Getting to know Koikatsu’s Chara Studio photo mode
Any self-respecting game these days has a Photo Mode, and in the case of games like Koikatsu, which pride themselves on how much detail is in their character creator, one might call it an essential part of the experience.

Which is why it’s kind of strange that this part of things was stripped out of the western Steam release of Koikatsu Party, with the base game focusing exclusively on the character creator and the sexual content. Never fear, though, because thanks to the sterling efforts of ManlyMarco and the HongFire community, it’s easy enough to patch all the missing content back in, with no piracy required.
Once you’ve got the essential HF Patch added in, chances are you took a look at the Chara Studio app and immediately found it a somewhat terrifying prospect. I’m with you — there’s still stuff in there I don’t 100% understand, either. But I do know enough to give you a basic practical overview of how it all works and how you can get a basic scene up and running. So follow along and you’ll be playing virtual dollhouse before you know it!
Here’s the finished scene we’ll be creating today:
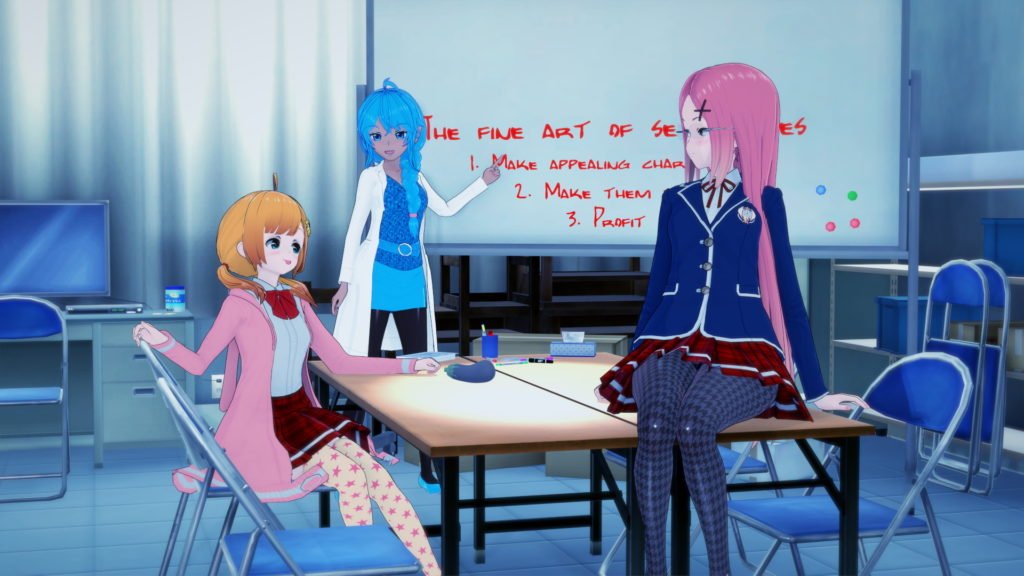
A pretty simple scene, but one which uses some of the advanced features of both the base Chara Studio application, and some of the helpful mods that are included as part of the HF Patch. We’re using both the character we created the last time we looked at Koikatsu, and two of the default characters included with the game.
Note that you can’t use the default characters in Koikatsu’s Chara Studio by default for some reason; in order to do so, you’ll need to copy their .png files from the Koikatsu Party\DefaultData\1\chara folder to the Koikatsu Party\UserData\chara folder.
Right! Let’s begin.
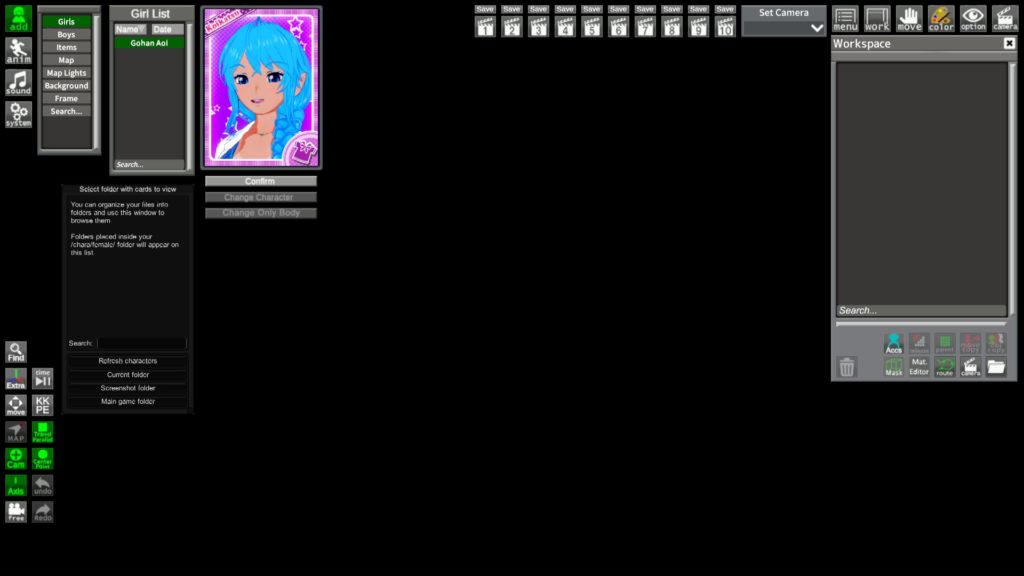
The first thing you’ll be presented with is a black screen and a scary-looking interface. Don’t fret! Just head on over to the “Add” button at the top left, choose “Girls” and pick a character you want to put into the scene. Here we’re choosing our creation, Aoi Gohan.
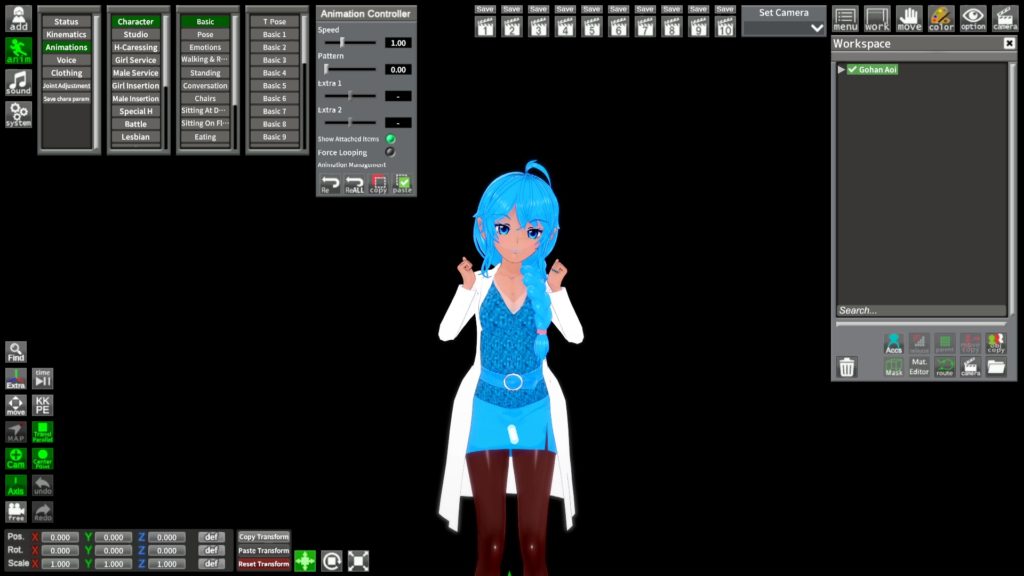
Your character will spawn in a T-pose, so you’ll probably want to get them standing in a more natural way first of all. To do this, first select them from the “Workspace” menu over on the right — this lists all the elements of your scene — and then click the “Anim” button in the top left. Choose “Animations”, then browse through the various categories until you find a pose you like.
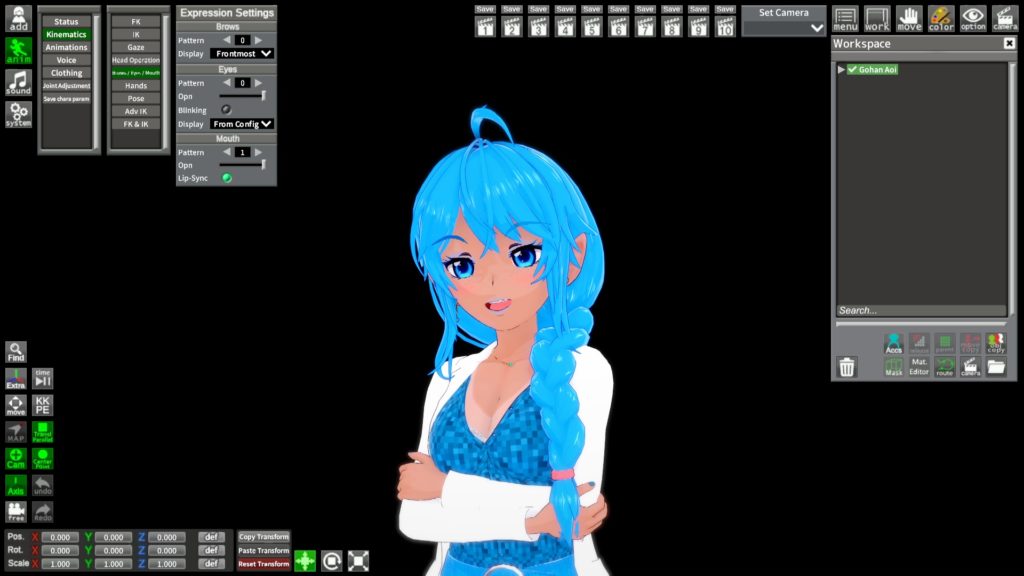
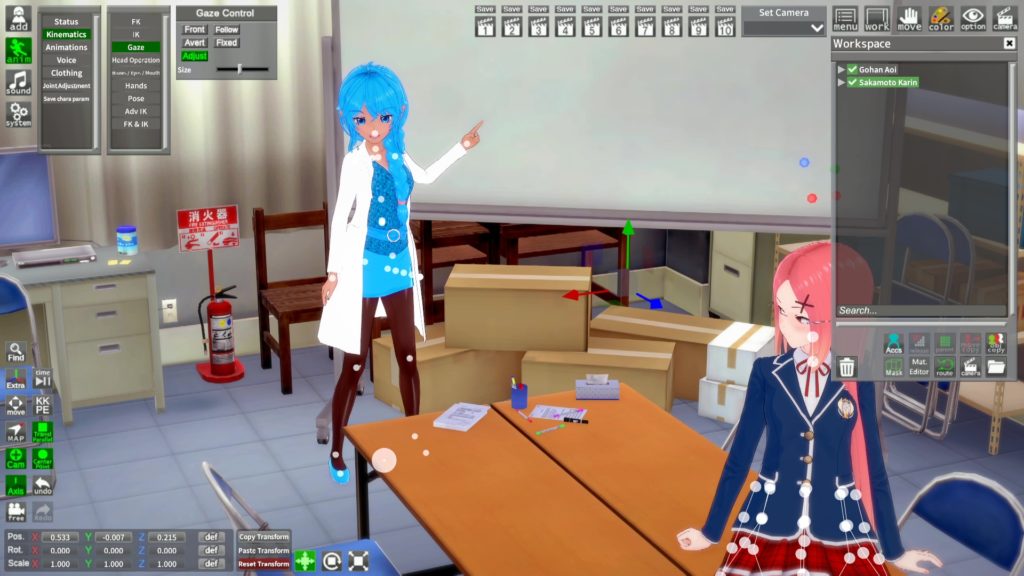
As part of this initial fiddling around with characters, you may wish to tinker with their facial expression, too. To do this, go to Anim > Kinematics > Brows/Eyes/Mouth and experiment with the settings. If you want to move the camera around to get a closer look at your character, hold the left button to rotate the camera around its focal point, hold the right button and move left and right to zoom in and out, and hold both buttons to move the focal point.
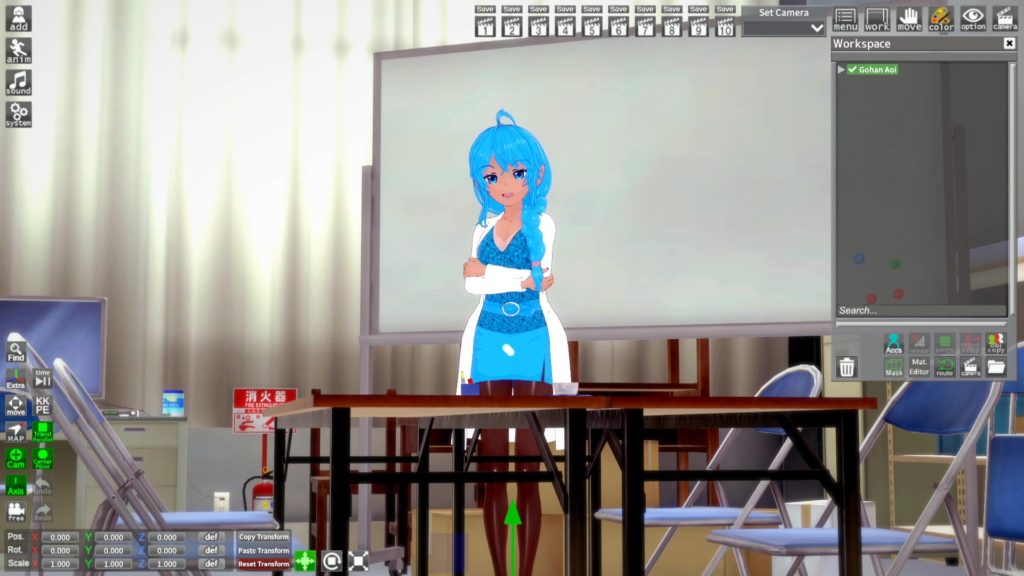
To see how your character looks in context in a scene, go to Add > Map and simply choose a setting you’d like to load in. There are a bunch included with Koikatsu, plus some additional ones from the HF Patch’s included mods. Here we’ve gone for the Manga Club room.

You can move your character around the scene by dragging the red, blue and green arrows. Red and blue move them on a flat plane, while green determines their height in the scene. If you can’t see the arrows, click the box with the four arrows next to the “Copy Transform”, “Paste Transform” and “Reset Transform” buttons, highlighted in the image above.
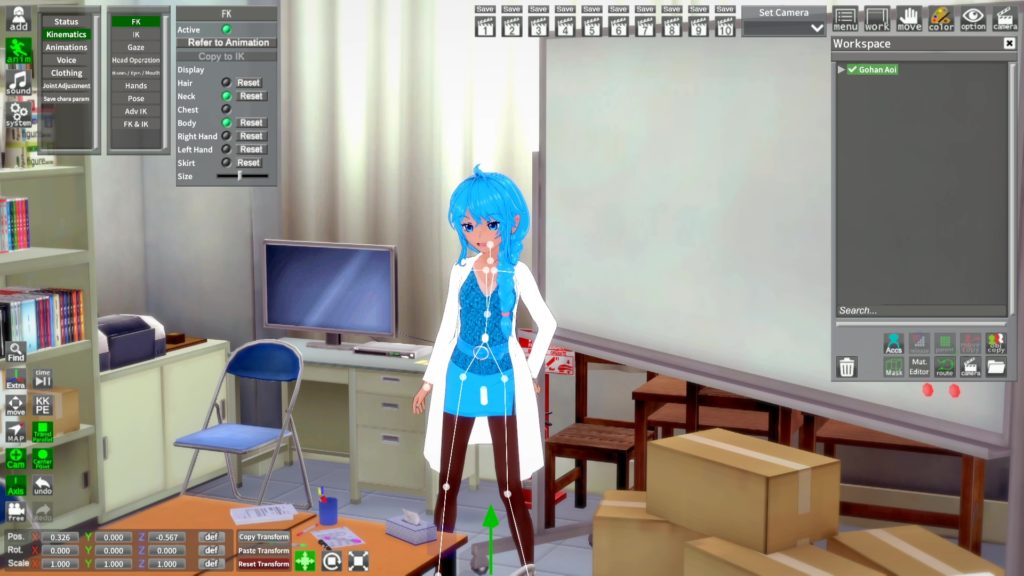
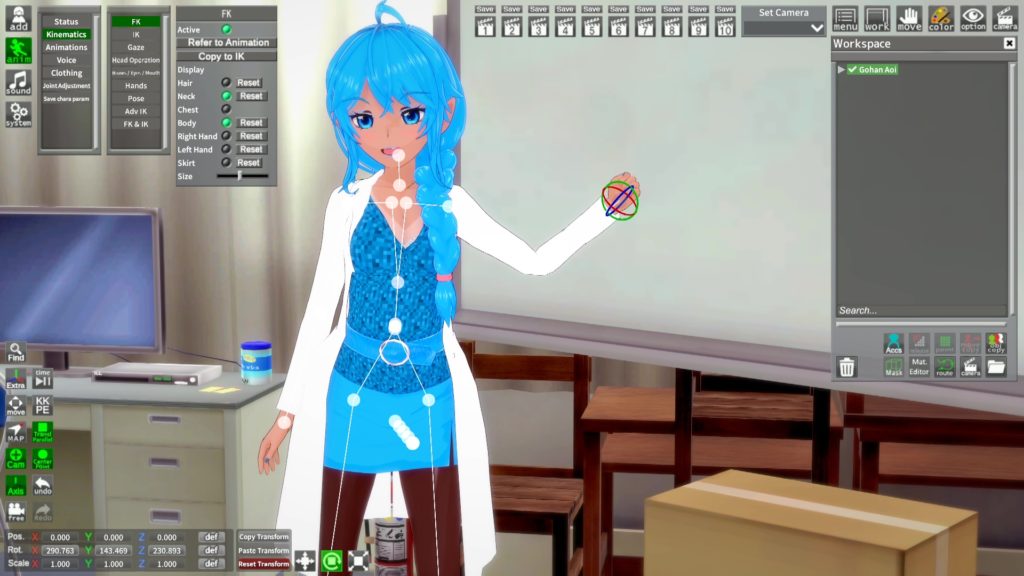
You may find that as you build a concept for your scene in your head, you find a pose that is almost but not quite right for what you want. For example, I thought this pose looked good for Aoi giving a sort of “lecture” at the whiteboard, but I wanted her to be pointing at the board rather than just standing there. That’s where the FK and IK posing features come in — we’ll talk about what those mean in a moment. Make sure Aoi is selected, then go to Anim > Kinematics > FK.
Click “Refer to animation” and we can use the current pose as the basis for a custom one, then go ahead and hit the “Active” button so it highlights. (If you don’t choose “Refer to Animation”, Aoi will switch to a default pose as soon as you activate FK.)
FK stands for “Forward Kinematics”, and it’s a model for posing and animation based on a “skeleton” of sorts — you can see Aoi’s skeleton when you activate FK. In order to pose her, you click one of the joints (the white balls) and drag the circles to rotate it in various directions. Here, for example, we’ve raised her arm a bit by rotating her shoulder.
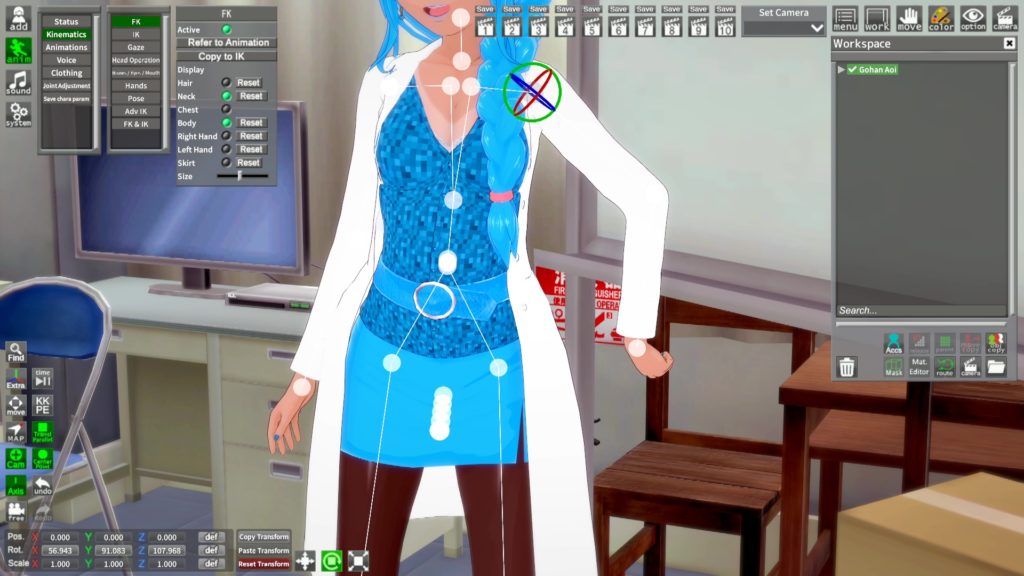
Your alternative is IK or “Inverse Kinematics”, which works by you moving the endpoints of a model around — for example, you could also pose Aoi’s arm by dragging her hand, and the rest of the arm position would update according to where the hand is. To a certain extent it’s a matter of preference which one you use, but we’ll stick with FK for the moment.
A little rotation of the shoulder, elbow and wrist joints and we have her hand roughly where we want it. She’s not pointing yet, though, so we’ll fix that next.
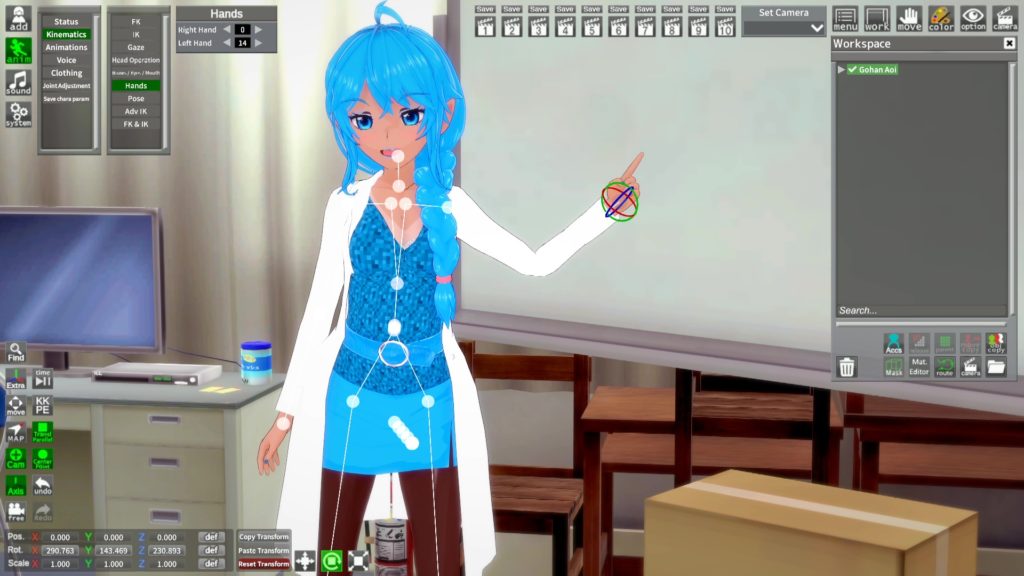
As it happens, this is dead easy. Go to Anim > Kinematics > Hands and simply pick an appropriate hand pose from the many available.
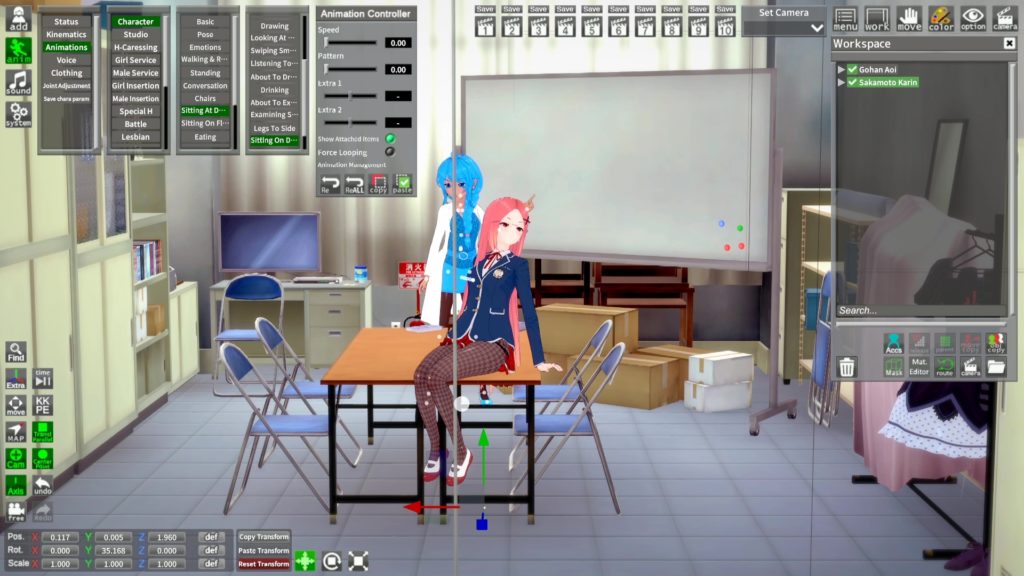
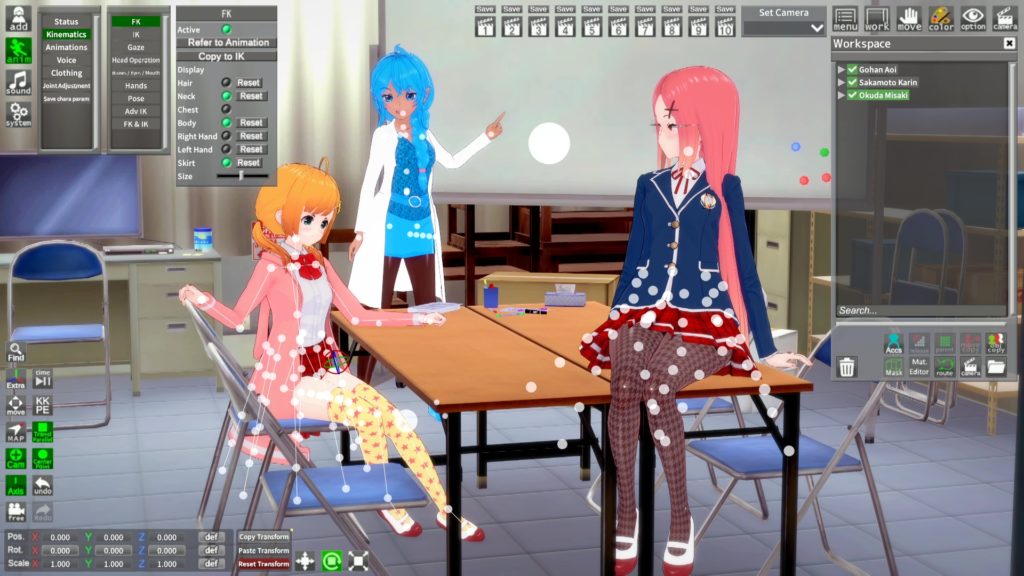
All right, with Aoi in place, let’s add in another character. Here’s Karin from the default Koikatsu lineup; we’ve put her in a “sitting on table” pose and moved her so that she’s, well, sitting on the table. But you’ll notice a few things we might want to fix: she’s gazing off into space, and her skirt is clipping through her legs and the table.
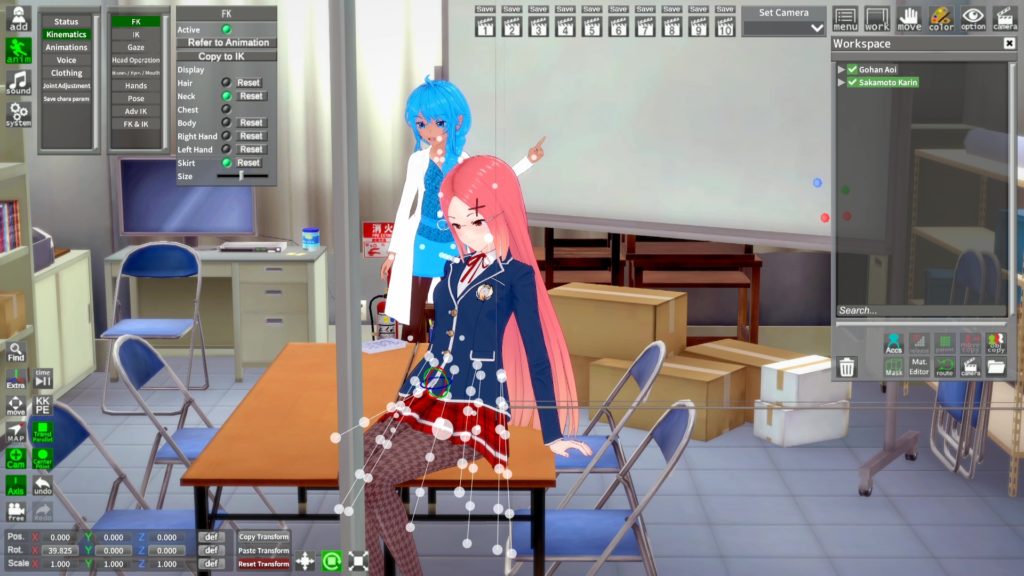
To fix the skirt problem, we can use FK, too. The skirt is actually made up of a series of “joints” that determine how it moves along with the model. So all we need to do is manipulate a few of those joints so that the skirt is sitting over her legs rather than inside them.
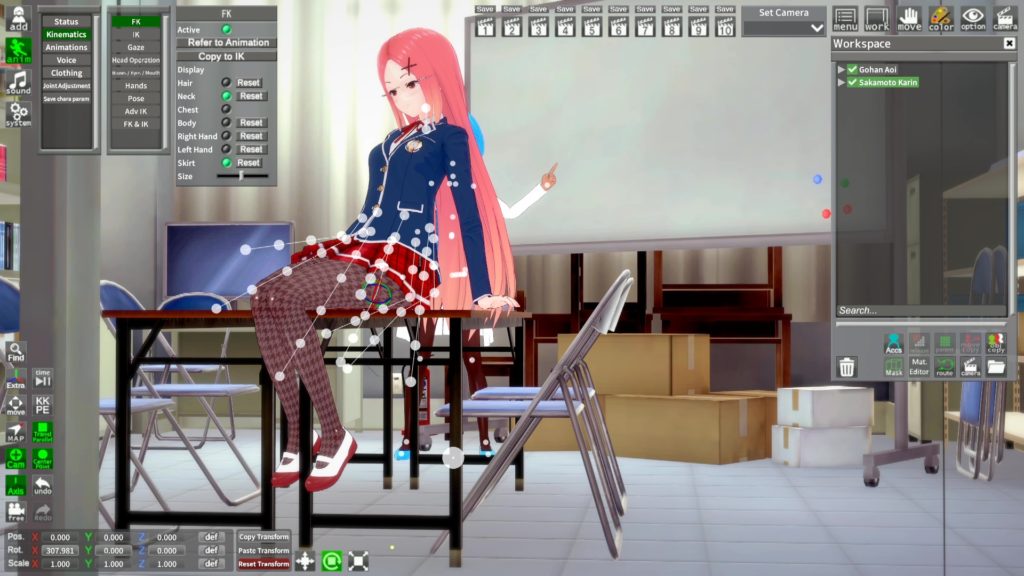
If you really want to polish things up, tinker with the joints underneath so that the skirt isn’t clipping through the table, either. Little bits of attention to detail like this make the difference between a scene that looks hastily thrown together and one which has had some love and care devoted to it.
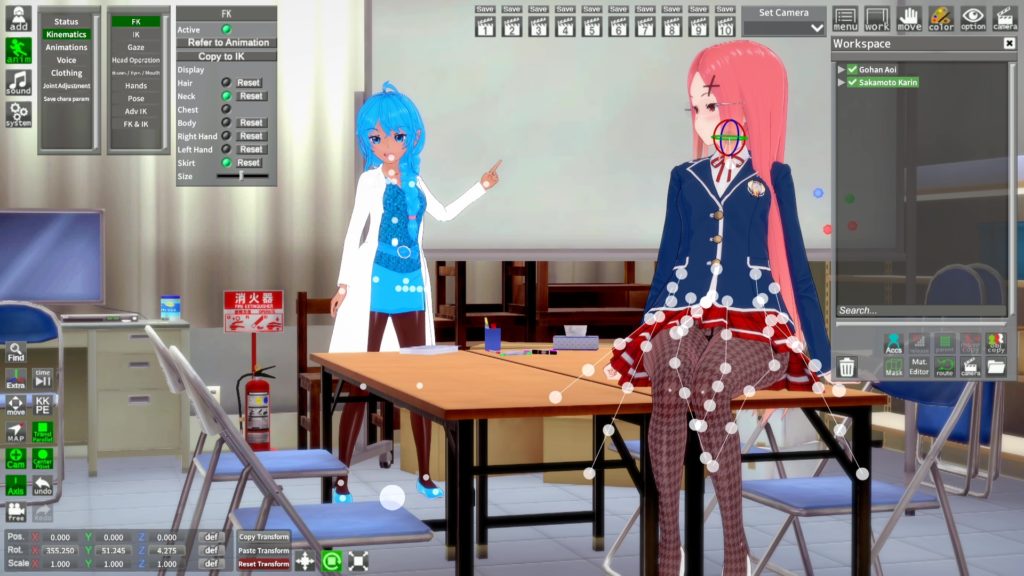
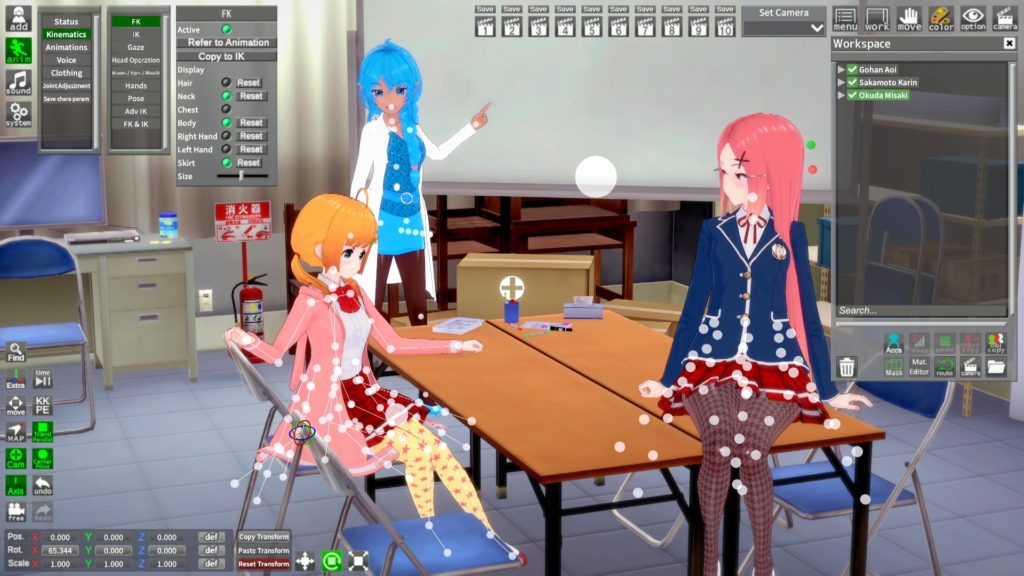
To fix Karin staring into space, simply rotate her neck with FK, but bear in mind what looks “natural” for a human being and don’t twist things too far — unless you’re deliberately trying to create something that looks unnatural, of course!
You can further enhance the way a character is “looking” with the Anim > Kinematics > Gaze option. If you chose the “Adjust” setting, you can drag a ball around in the scene to determine the exact point in the scene that the characters eyes will be looking towards. Here we’ve got Karin looking over her shoulder roughly in the direction of Aoi.

As your scene starts to come together, doubtless you’ll find a composition that you like. Rather than having to recreate it manually every time, you can use the ten “clapperboard” icons at the top right to save up to ten preset camera angles. Click the “Save” button above the clapperboard to save an angle, then click the clapperboard itself to recall it, regardless of what you’ve done with the camera in the meantime. This means that you can easily zoom in and do some fine detail work if you need to, then recall your overall scene composition with a single click.
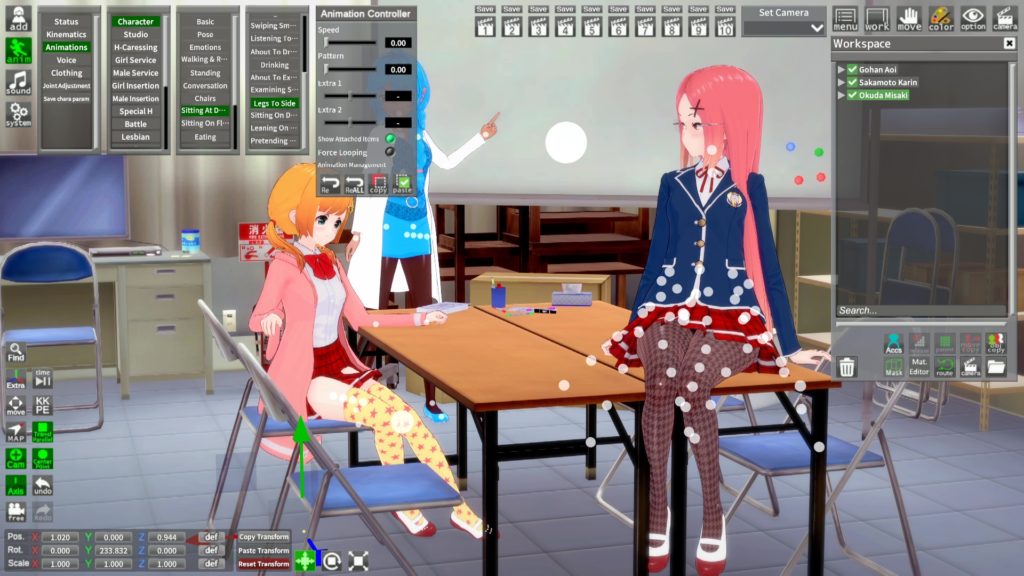
All right, this is coming together nicely. Time to add another character. Misaki here is another default Koikatsu character, so she’ll fit right in. I like this “Legs to Side” pose, it has a nice “conversational” feel to it. Those arm positions could maybe do with a tweak, though, so it’s time to get to work with FK again.
Okay, looking good, but activating FK turned her skirt into hotpants. That will never do!
Much better. Misaki presented an additional challenge in the form of her long cardigan, but since its hem is considered to be part of the skirt so far as FK is concerned, it was easy enough to stop it clipping through the chair.
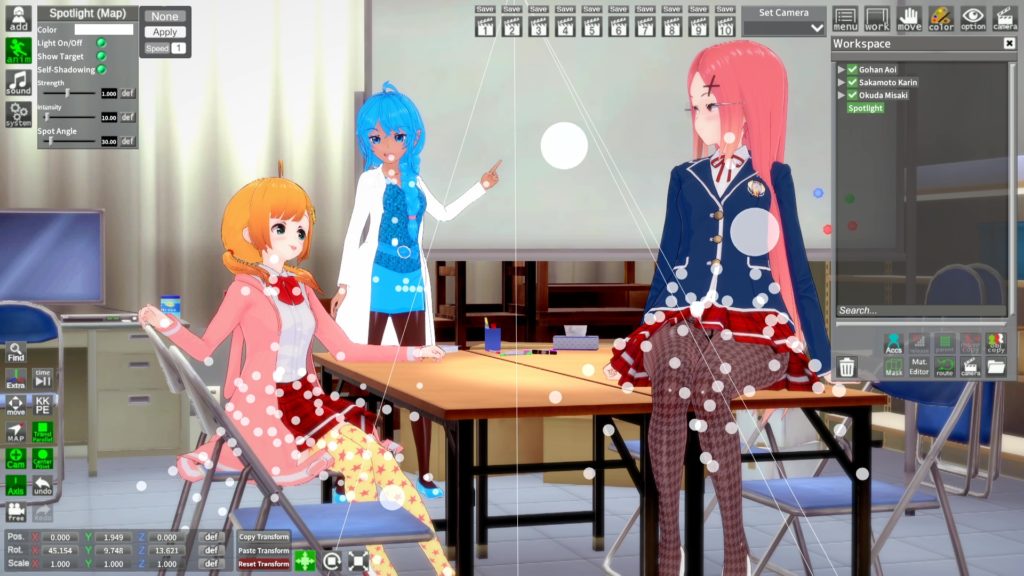
All right. Time for some finishing touches. Here I’ve added a spotlight above the table in the middle; these are invisible objects that cast light in the direction of the “rays” displayed on the interface. Move and rotate them just like characters to position them accordingly.
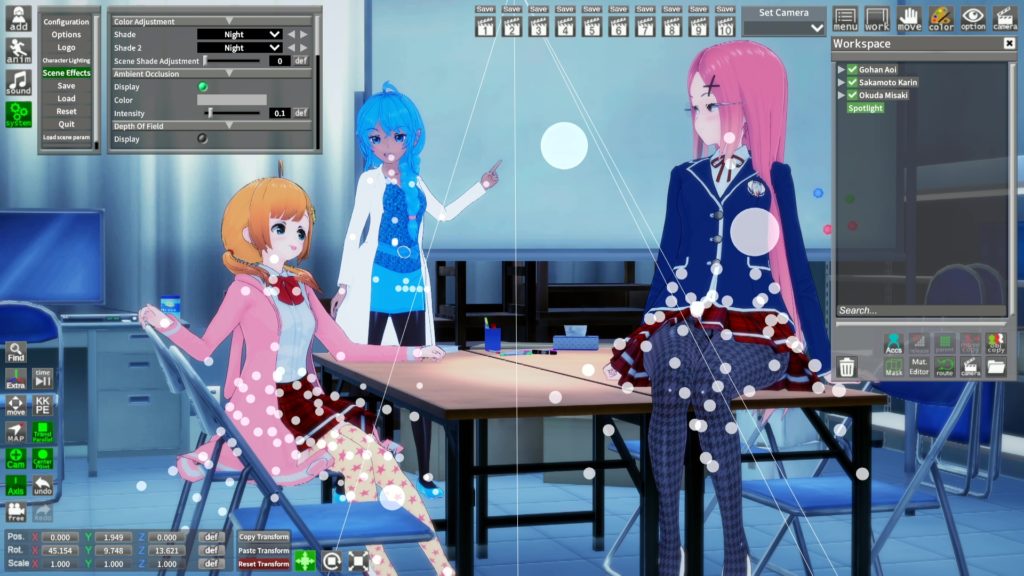
To make the spotlight effect a bit more obvious and dramatic, I’ve changed the overall lighting for the scene to “night” via the System > Scene Effects menu. You can actually use this to blend different overall colour schemes together, plus adjust various visual effects such as bloom, depth of field and shadow types here, too.
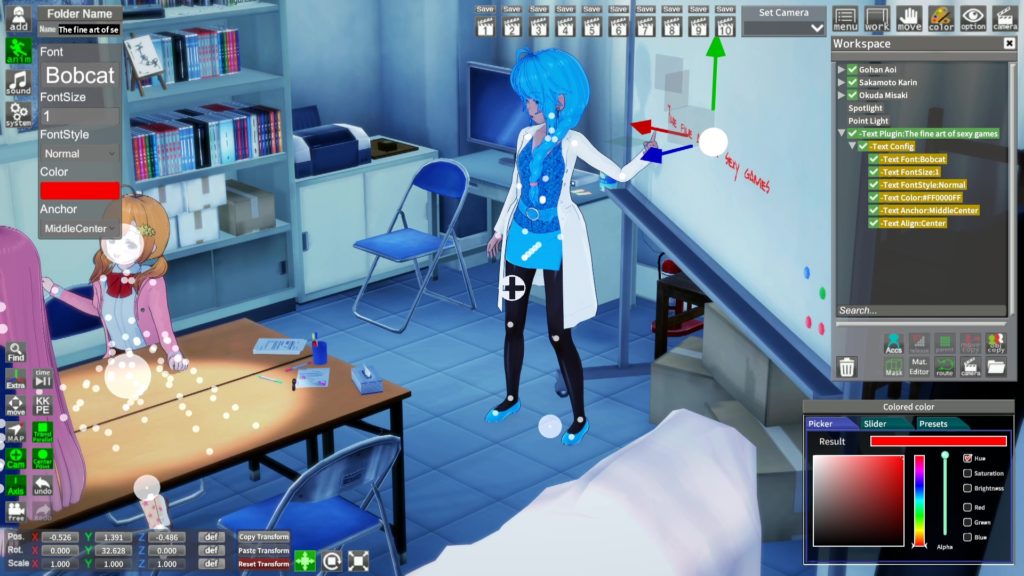
Now how about just a few extra details to finish off our scene? Here we’ve used the Text tool plugin included as part of the HF Patch. This allows you to create floating 3D text objects that can then be positioned in the scene just like characters. Here we’ve manoeuvred it so it looks like it’s written on the whiteboard. To change the text, font and colour, we use the “Anim” button, which brings up the plugin’s settings rather than the usual animation options.
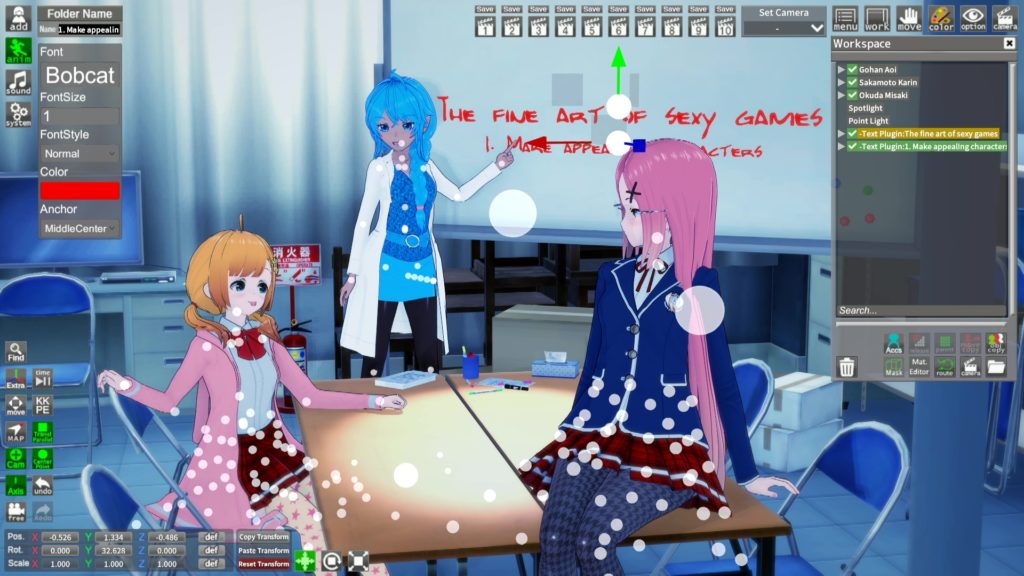
To add additional text on the board, we can just duplicate that existing text object and tweak its settings. Click it in the Workspace, then click the “Obj Copy” button in the lower right of the window to make an exact duplicate. You can then move and change the settings for that duplicate while leaving the original right where it is.
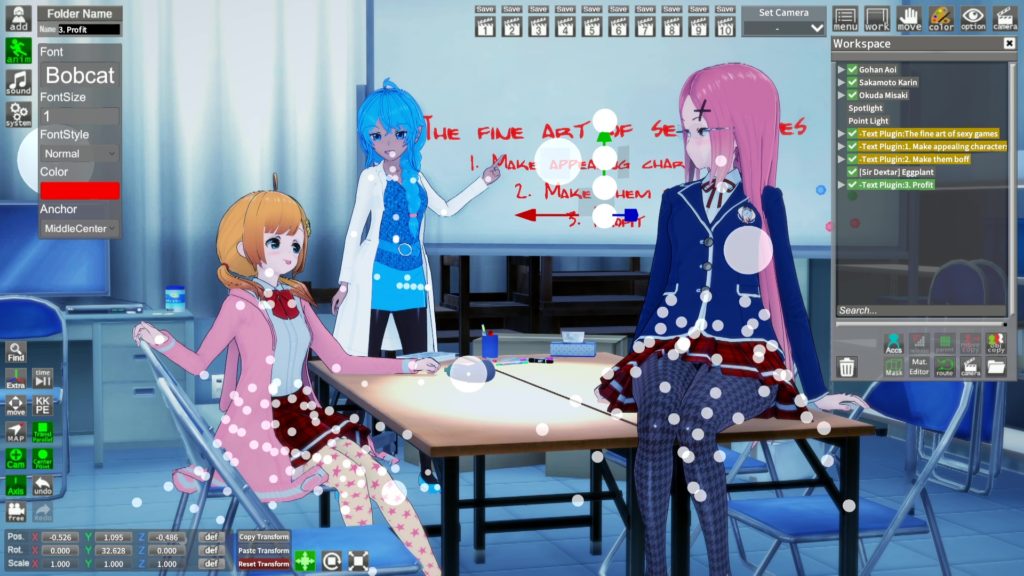
Popping an aubergine on the desk for some subtle environmental storytelling and finishing off the text… and we’re pretty much done! When you’re happy with your scene, hit the F11 key to take a high-quality screenshot, which will be saved in your Koikatsu Party > UserData > cap folder in .png format.
And that’s how you develop a crippling addiction to playing virtual dollhouse with anime girls. Enjoy!
Join The Discussion
Rice Digital Discord
Rice Digital Twitter
Rice Digital Facebook
Or write us a letter for the Rice Digital Friday Letters Page by clicking here!
Disclosure: Some links in this article may be affiliate links, which means we may earn a small commission if you make a purchase after clicking on them. This is at no additional cost to you and helps support Rice Digital!

- Letter from the Editor: passing the torch - June 30, 2023
- Super Woden GP 2 is looking promising - June 30, 2023
- Inti Creates is making a 32 bit-style Love Live action platformer - June 26, 2023