Making a new mascot in Steam’s best sex game Koikatsu Party
Now there’s a headline for ya. But yes — those of you who know, you know. Koikatsu Party is pretty much the best sex game on Steam, largely because it allows you to create pretty much any kind of character your imagination can come up with, and then do filthy, dirty things with them. Assuming you want to. If you just want to use it as one of the best character creators in the known Universe, then you can do that too.

And, if you download the strictly unofficial but well-maintained and rather wonderful HF Patch for Koikatsu Party from the hard-working ManlyMarco, you can restore pretty much all of the stuff that was trimmed out of the western Steam release too — including, most significantly, the excellent Chara Studio photo mode, which is arguably more fun than the actual porn side of things.
Anyway, today we’re going to focus strictly on the character creation side of things that is available in the base game. This is something that anyone who downloads Koikatsu Party from Steam is able to play with — no modding required. The HF Patch isn’t difficult to apply, but I appreciate there are some people out there who can’t be arsed faffing around with this sort of thing — so today we’re looking strictly at the “vanilla” experience, albeit with the “After Party” expansion installed.
Our mission for today: design a Rice Digital mascot! Let us begin!
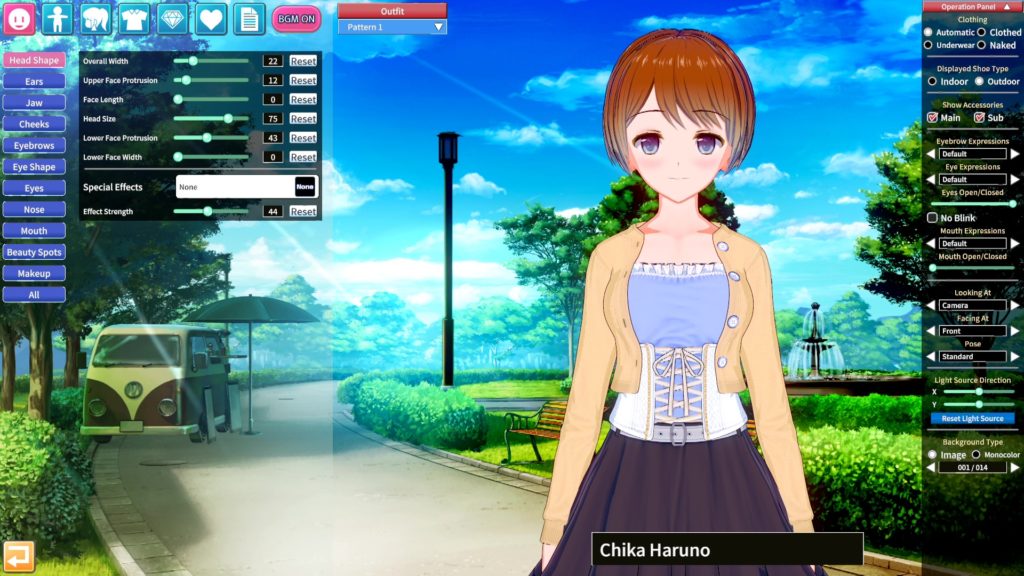
This is where it all begins: the default settings, and the default Koikatsu custom character, Chika Haruno. That simply won’t do, so let’s get started right away by establishing the basics of our new mascot’s identity!
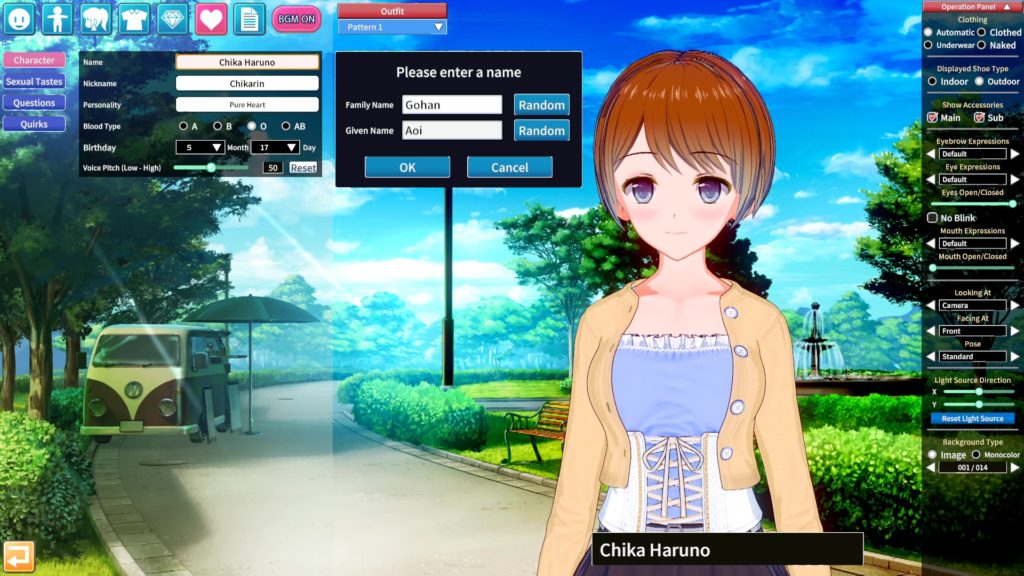
We’ll give her a new name first. Aoi Gohan (悟飯蒼) will do for now, since “Aoi” means “blue” and “gohan” means “cooked rice” (or “food”) — though here we’re using the slight variation of the kanji spelling as Gohan from Dragon Ball, which is normally used as a boy’s first name. We’ll say she’s a tomboy. From a family of tomboys.
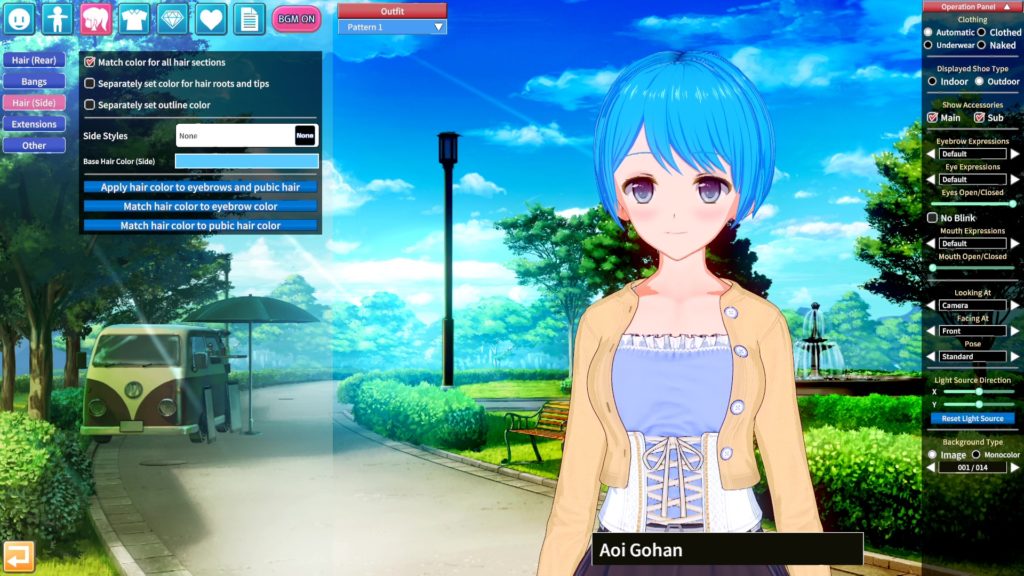
The other thing I thought we’d do first before anything else is establish Rice’s signature colour in our Koikatsu character design to get us in the right mood. With that in mind, I set Aoi’s hair colour to our favourite colour here at Rice: #5ACAFF in hex, R90 G202 B255 or H199 S64 V100 if you prefer to do things that way. In Koikatsu, you can save custom colours, so if you want to reuse them, you can.
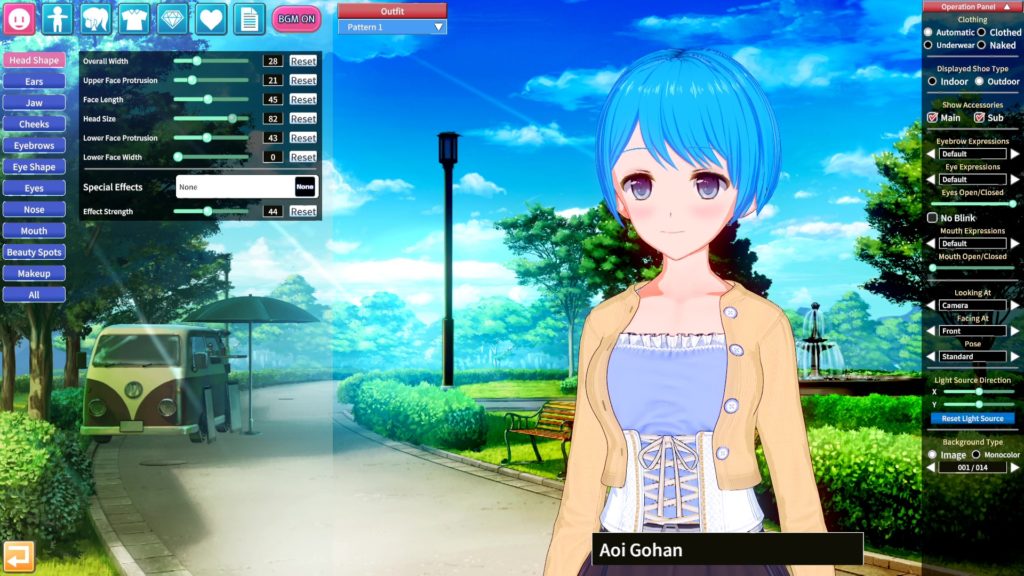
Now our Koikatsu character creation begins in earnest, starting with Aoi’s head shape. With all these settings there’s no real “best” way to do them — simply experiment with them to see what they do, and be sure to always check the results of your fiddling from all angles. What looks good from the front might look ridiculous from the side, and vice-versa!
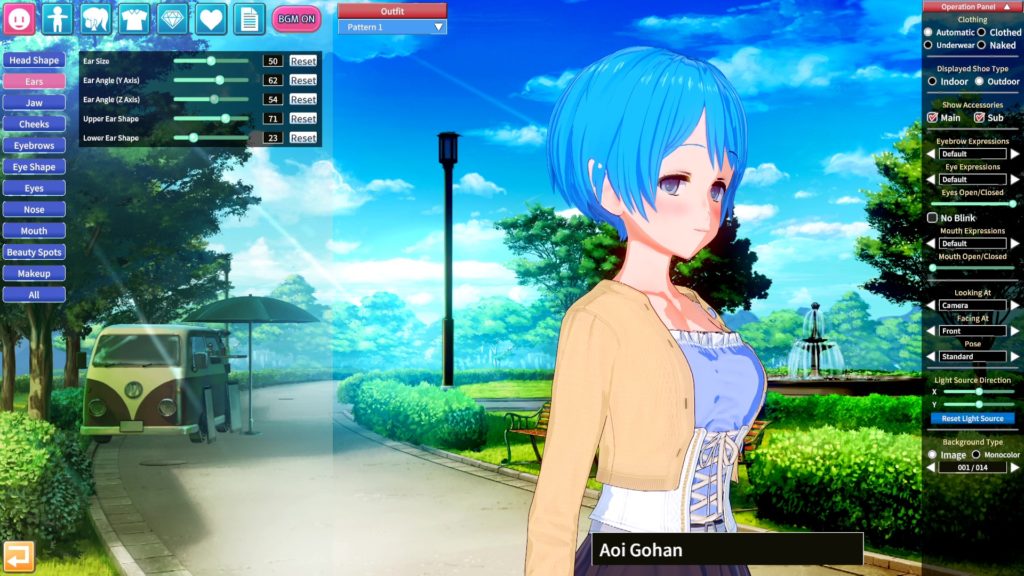
I determined early on that Aoi should probably have pointy elf ears. I like them, and we can also consider it a reflection of the fact that much of the Rice audience enjoys fantasy fiction of various descriptions — be it anime, manga or video games. Pointy elf ears are accomplished by sliding the “Upper Ear Shape” setting further to the right. You can also extend the lobes with the “Lower Ear Shape” slider, and fiddling with the angles can produce some interesting effects.
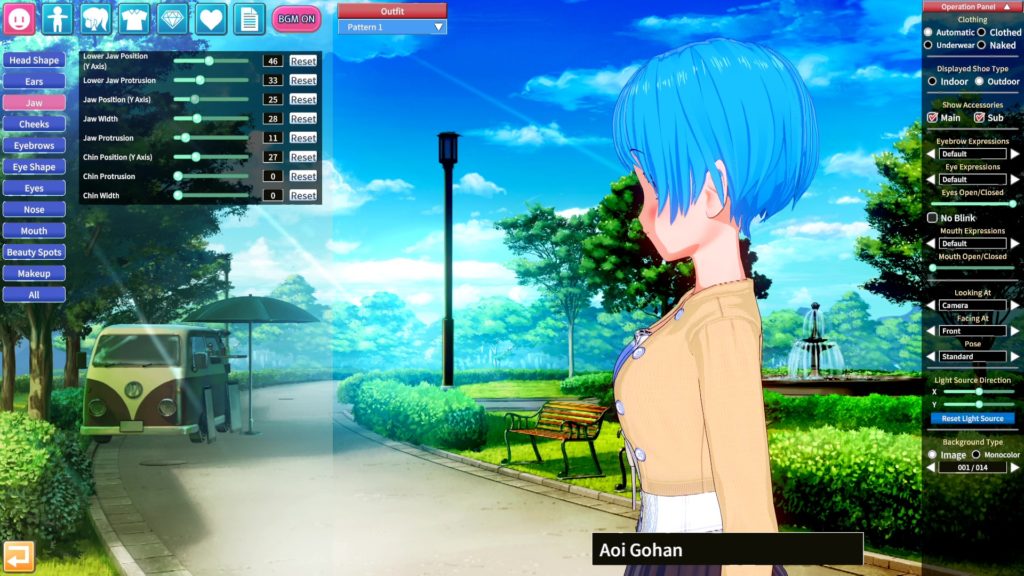
Next up, time to use Koikatsu’s jaw and chin settings to establish Aoi’s face shape. This is one area of the character creator you’ll want to move the camera around for, since many of these settings (particularly the “protrusion” options) do not have an obvious effect from the front, but viewed from the side their purpose becomes clear. I decided that we’d make Aoi slightly chubby around the face, since I just finished playing Atelier Firis and Firis is both adorable to the max and slightly chubby around the face.
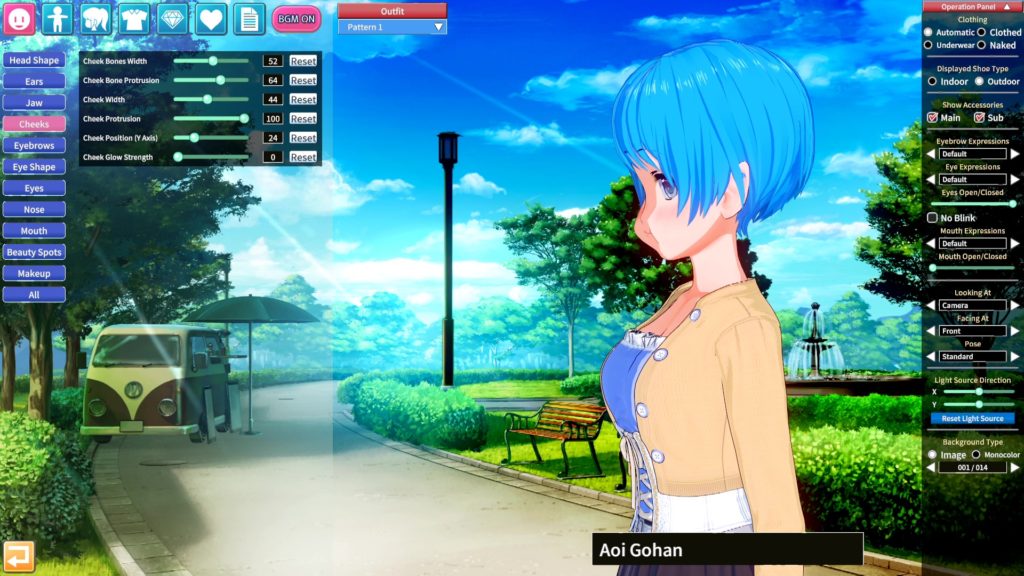
Koikatsu’s cheek settings demonstrate why manipulating the camera is important. This ridiculous puffy-cheeked scenario looked just fine from the front, but looks like the poutiest of tsunderes from the side. And while that can be appealing at times, you don’t want to look like that all the while. As your mother said, you’ll stick like it.
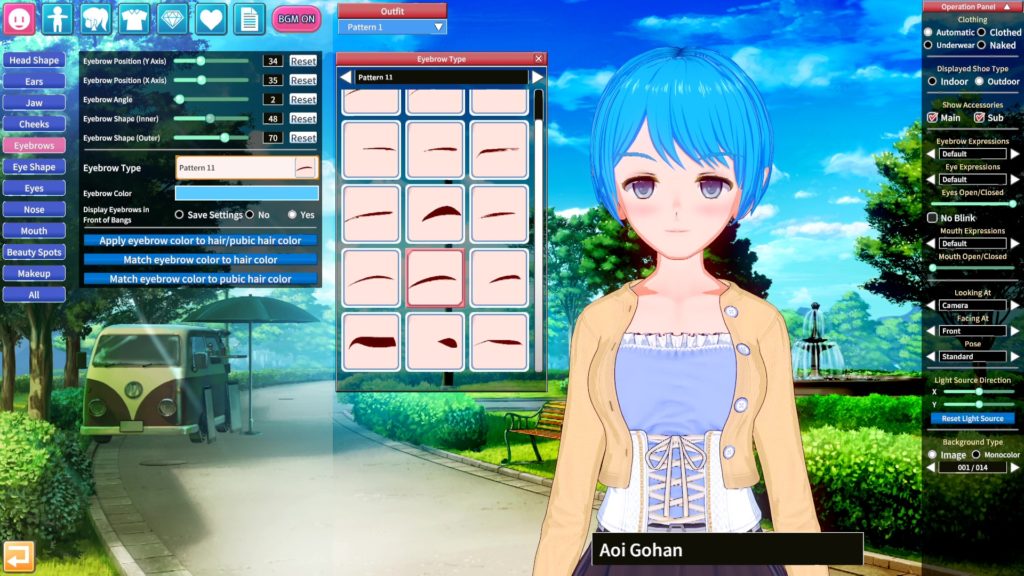
It’s eyebrow time! Koikatsu allows you to choose whether or not eyebrows appear in front of hair, anime-style, so you can choose your display preferences as you see fit. You can also fiddle with the sliders to define your character’s optimal default expression — though be sure to play with the “Eyebrow Expressions” setting on the Operation Panel on the right to make sure they don’t look daft when your character is emoting.
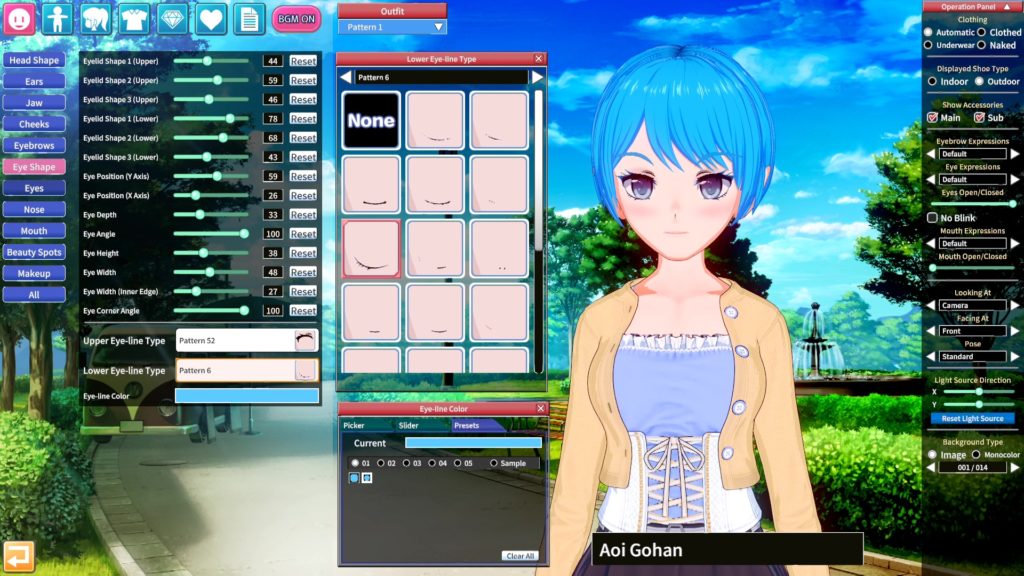
Eyes are a huge part of what gives an anime character their sense of identity, so it’s important to get them right. The default eyes in Koikatsu are a little too “soft” for the character concept I had in mind for Aoi, so a bit of careful shaping and experimenting with the upper and lower eye-line types (applying the Rice trademark colour, of course) produced the more determined look we have here.
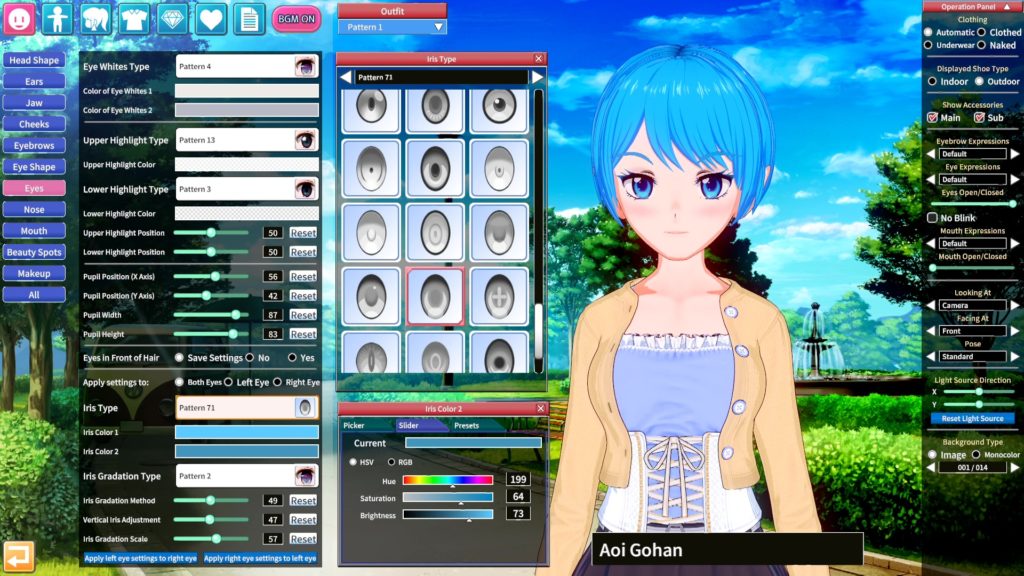
Eye colour is just as important as shape! Here, by picking a nice combination of iris style, applying the Rice Digital trademark colour and fiddling with the anime-style highlights, we go from “determined” to “somewhat piercing”. I like it.
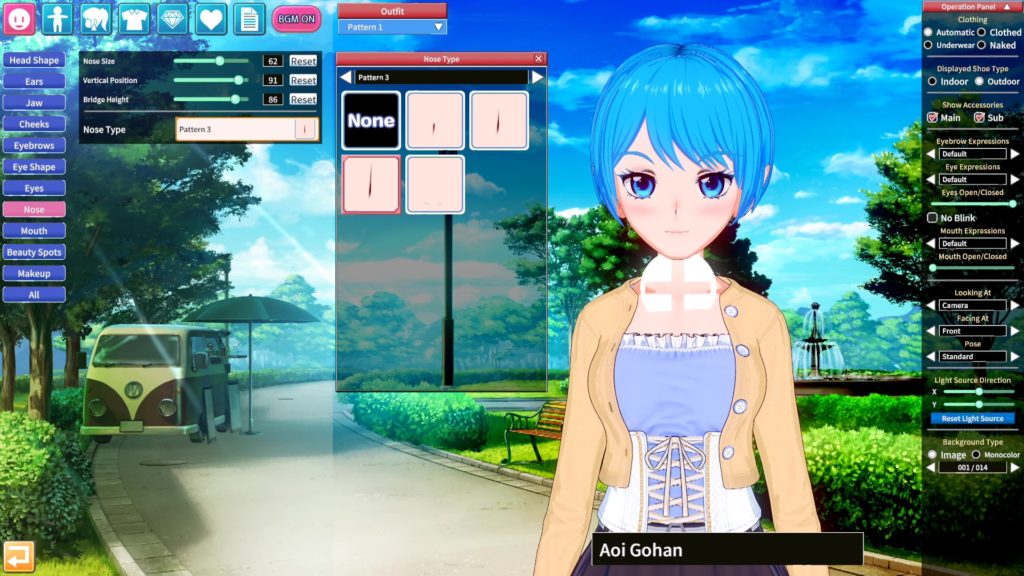
Since no-one working in anime-style art really seems to care all that much about character noses, Koikatsu’s nose settings are predictably fairly barren. Just find something that works for you (and, again, check it doesn’t look ridiculous from the side!) and move on.
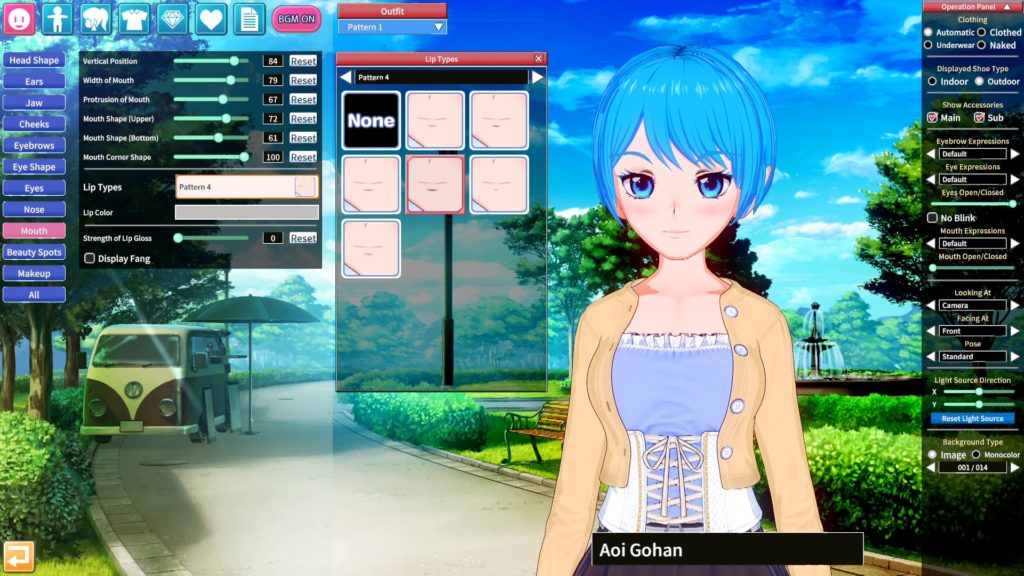
Mouth shape and size, on the other hand, can make a big difference to the overall sense of personality that we get from a character’s appearance. Here we’ve widened Koikatsu’s default mouth a bit and made the lower lip a bit more visible and prominent. Those simple changes make for a slightly more mature vibe.
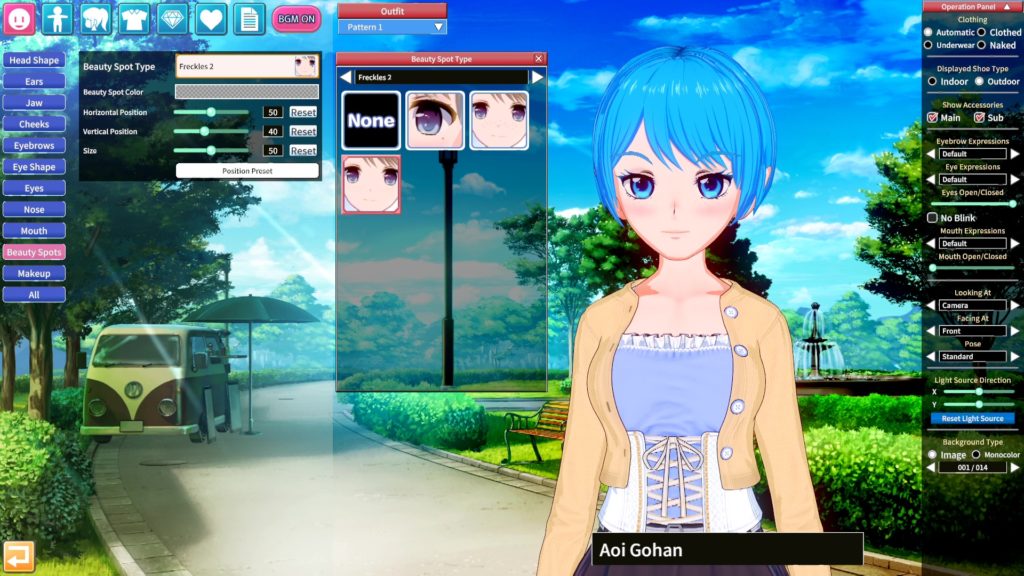
Freckles are cute. I will hear no opinions to the contrary, and if Koikatsu is happy to provide me with freckles, I am happy to make use of them.
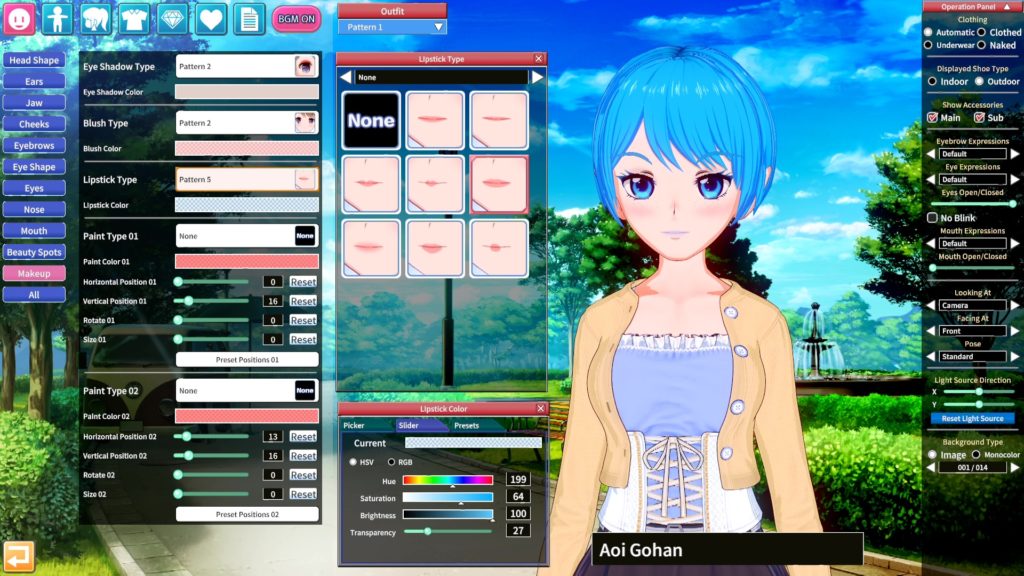
Next we move on to makeup, which allows some further colour customisation of facial elements. I thought to go with the mature vibe, Aoi should wear some lipstick — but at the default settings it looked just a little too in-your-face, even when using Rice’s signature colour. No fear, though; I simply turned down the transparency (or I guess it should really be “opacity” factor in Koikatsu’s colour settings, and the result was much more subtle. I did the same for eye shadow.
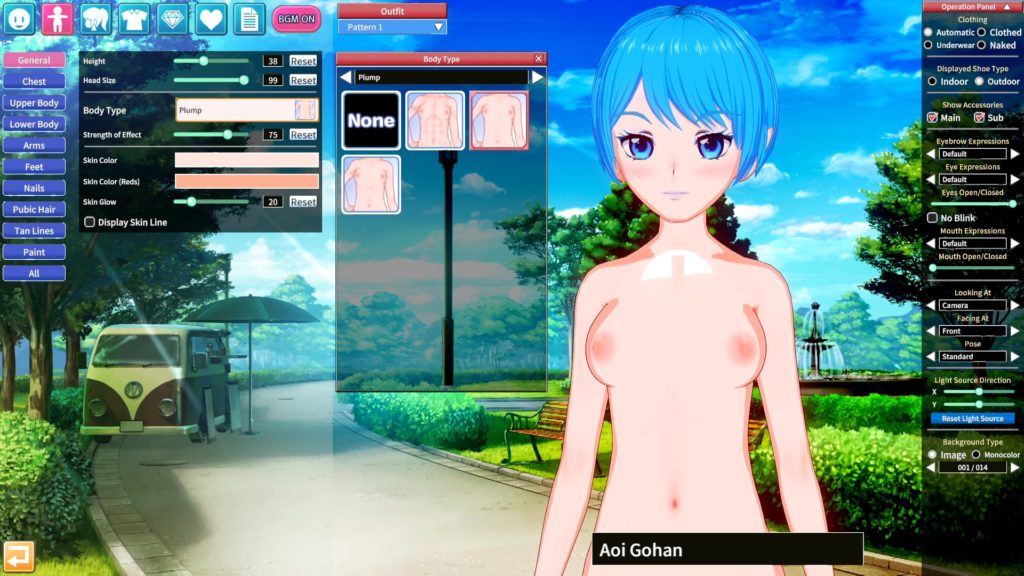
Now we move on to the body shape. Face, hair and eyes are probably the most immediately striking parts of an anime character, but their overall figure can make quite an impression, too — so make sure you spend a little time experimenting with these settings. Height and head size in particular are two simple settings that can make for a very different feel to the character — as can the few “body type” textures Koikatsu provides. We went for a simple, smooth “plump” type for Aoi here.
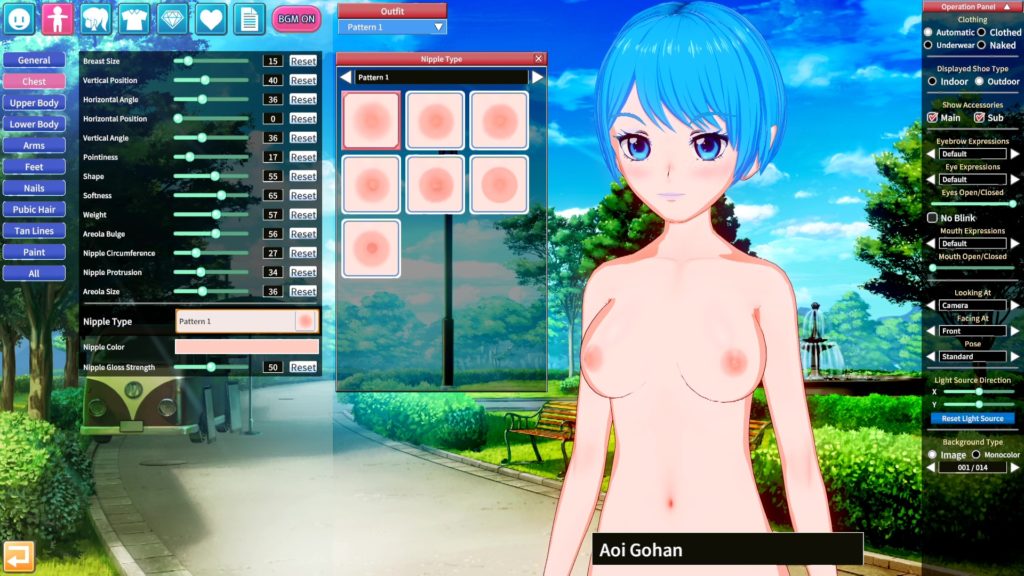
On to the all-important titties. Even if you only have innocent things in mind for your Koikatsu creation, the overall shape of her body will help define her overall look, so again it’s worth spending some time looking at the impact all of these settings have. If you’re just planning on using her for wholesome purposes (such as being a mascot, say) then you might not feel the need to bother with things like nipple type and areola size — but ah, what’s the harm in having a little fiddle?
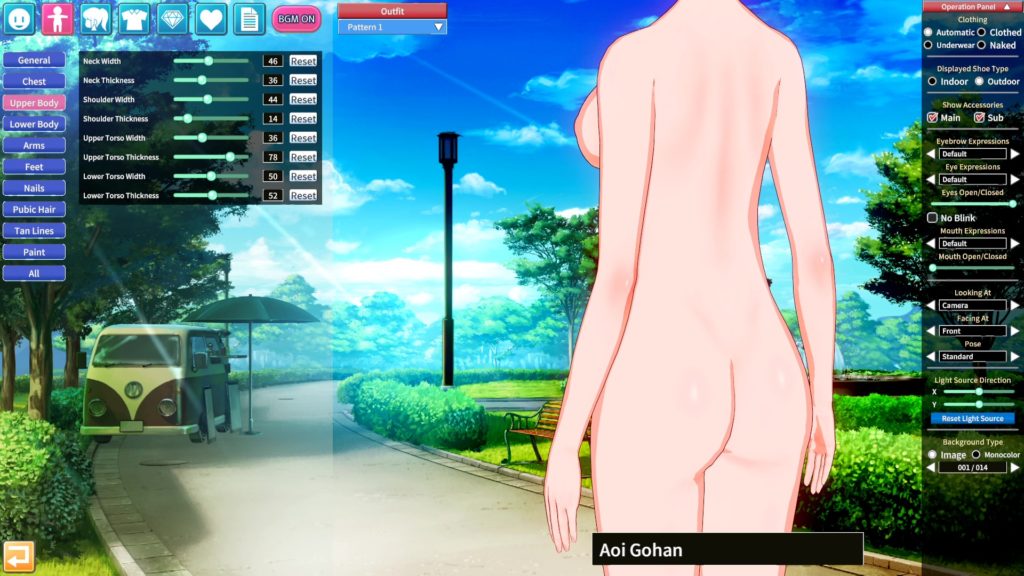
Then we move on to the settings that really start to sculpt the overall body shape. These are split into “upper” and “lower” body — note in this case that the “upper body” stops around the waist/bellybutton area or so, and “lower body” is from there downwards. So if you want a finely sculpted butt, you’ll probably want to experiment with both sets of settings.
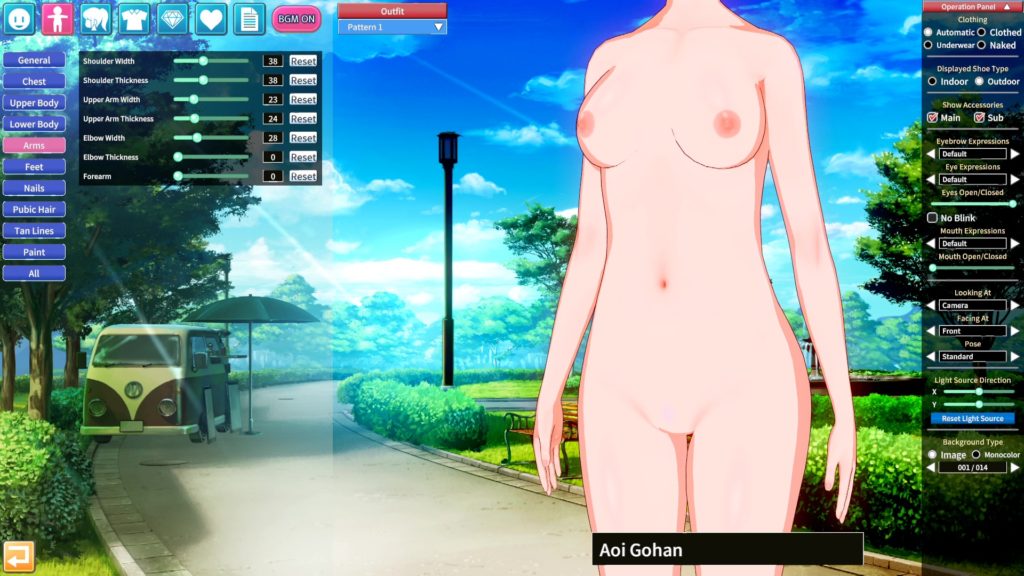
Arms are an area it’s easy to not bother with, but their overall shape can have quite an impact on how physically imposing your creation is, as well as their overall posture. Pay attention to how Koikatsu’s arm settings affect your creation’s shoulder shape, for example.
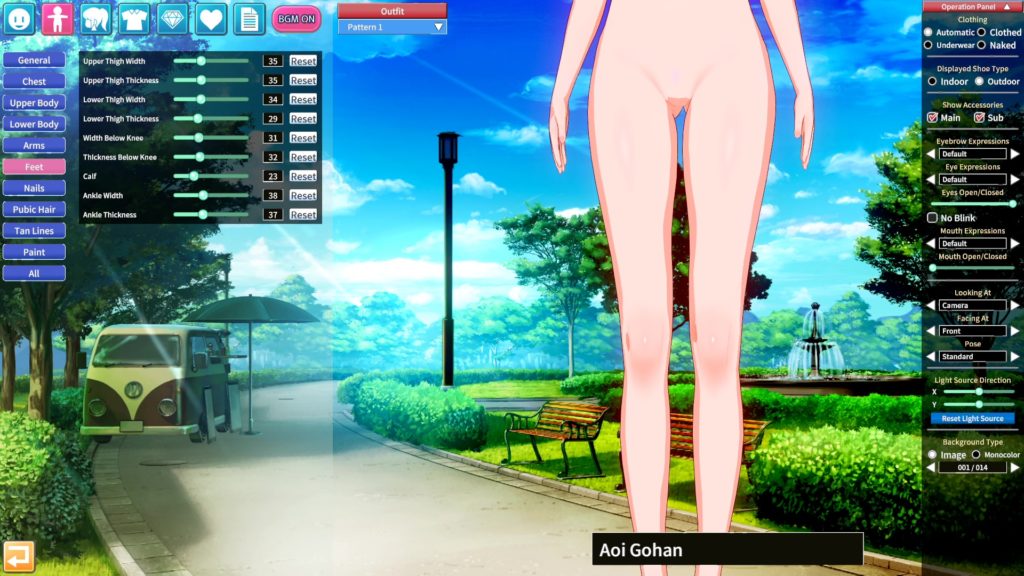
The “feet” setting in Koikatsu actually covers all the legs, so if you want thicc thighs, this is where you come — likewise if you want that thing where you can see her buttocks through the gap in her legs. There’s probably a name for that, but I don’t know what it is. My wife thinks it’s weird, but I’m all for it.
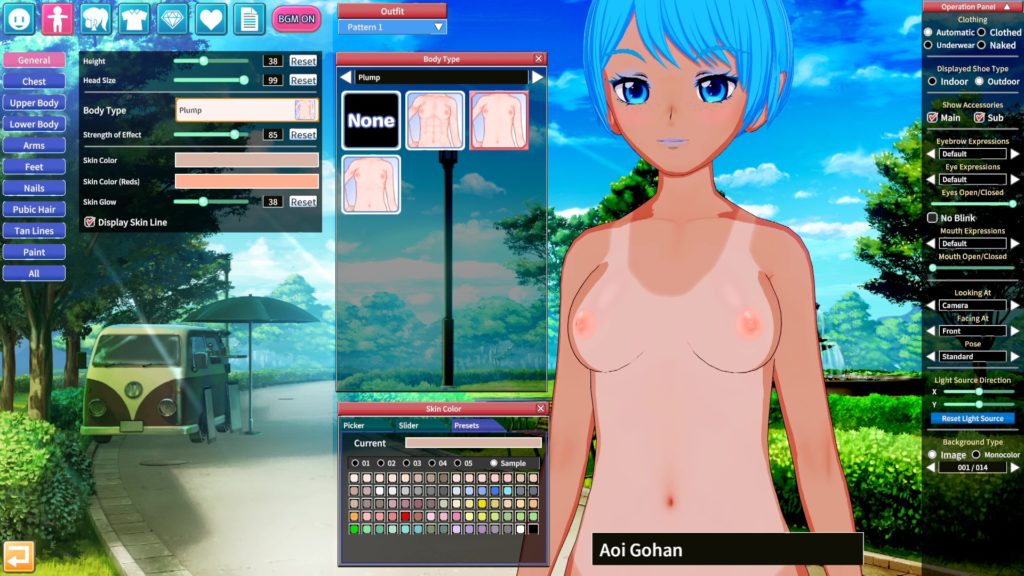
While playing with Koikatsu’s tan line settings, I thought that Aoi might actually look pretty good with a tan (and some tan lines). So I zipped back to the “General” settings to experiment with skin colour a bit. I eventually settled on this, which allows both the tanlines and the brighter colours of her makeup to “pop” somewhat. Plus tanned elves, am I right? Shiranui Flare fans represent.
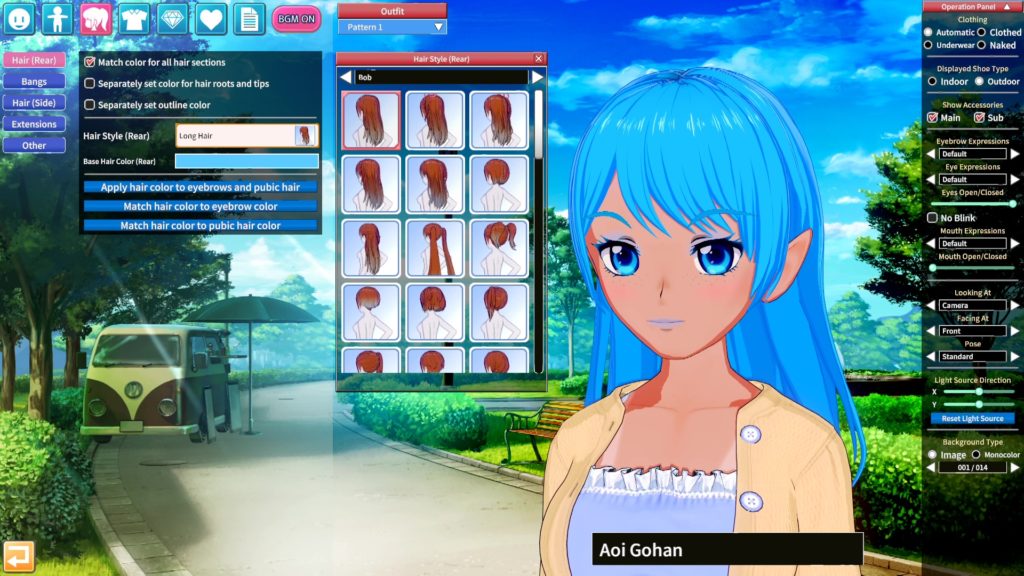
After settling on Aoi’s body shape, it was time to turn our attention to Koikatsu’s many wonderful hair options. They’re split into several distinct areas, so you can sort of “mix and match” elements of different hairstyles together — you can independently colour them if you want, too, but by default all parts of the hair are set to make use of the same colour — in this case, Rice blue.
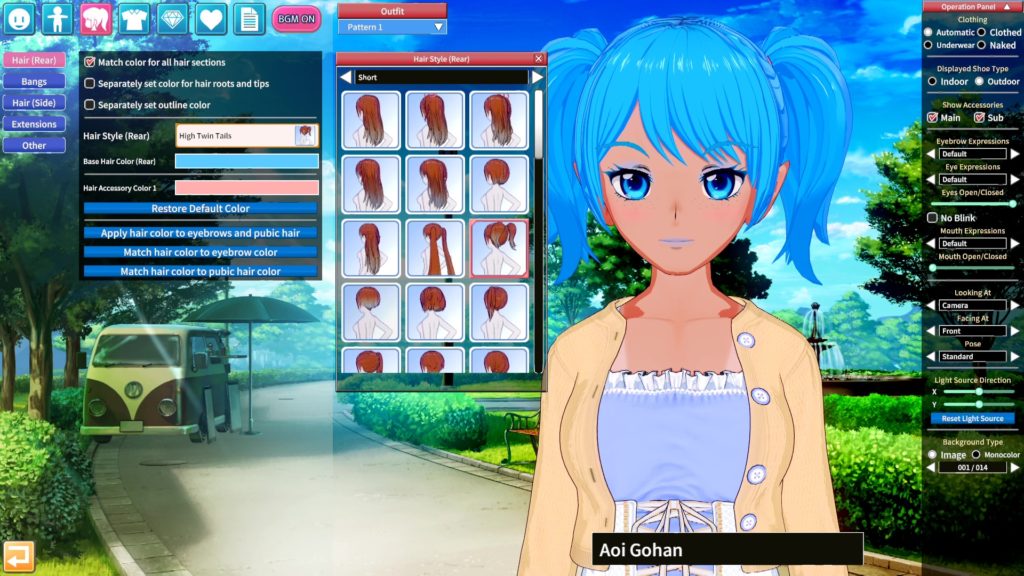
Twintails of various descriptions are always a tempting choice — and Koikatsu has a selection of ’em — but I didn’t feel they quite fit the concept I had for Aoi in my head. They’re often associated with either characters who act in quite a “young” manner, or tsundere types, and I didn’t feel like Aoi was really going to fit into either of those categories.
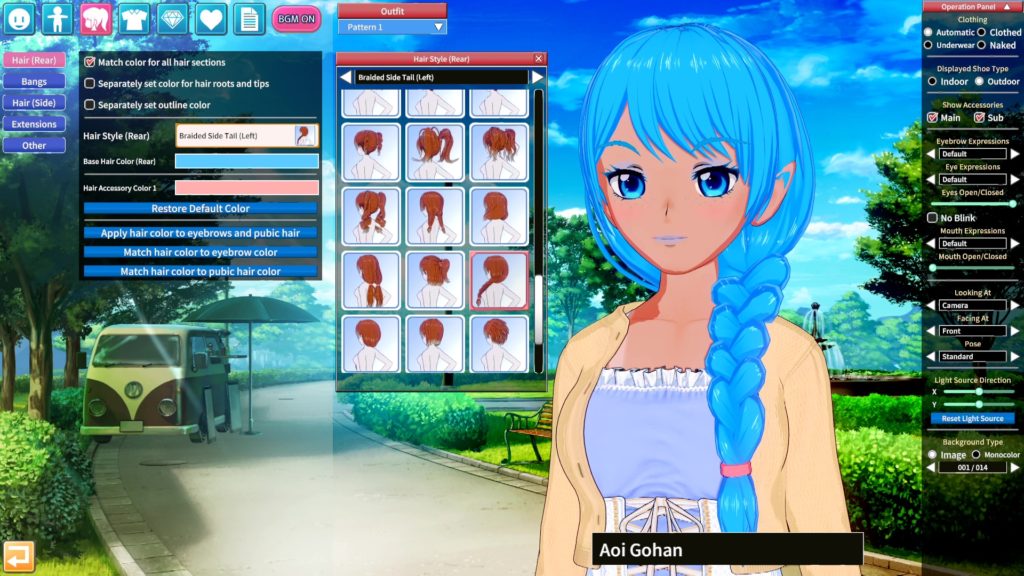
Now we’re talking. The over-the-shoulder braid goes nicely with the mature vibe we have going on, though those ears are going to need some attention — you don’t have to do things like correct clipping issues if you can’t be bothered, but you’ll almost certainly feel more satisfied with your creation if you do!
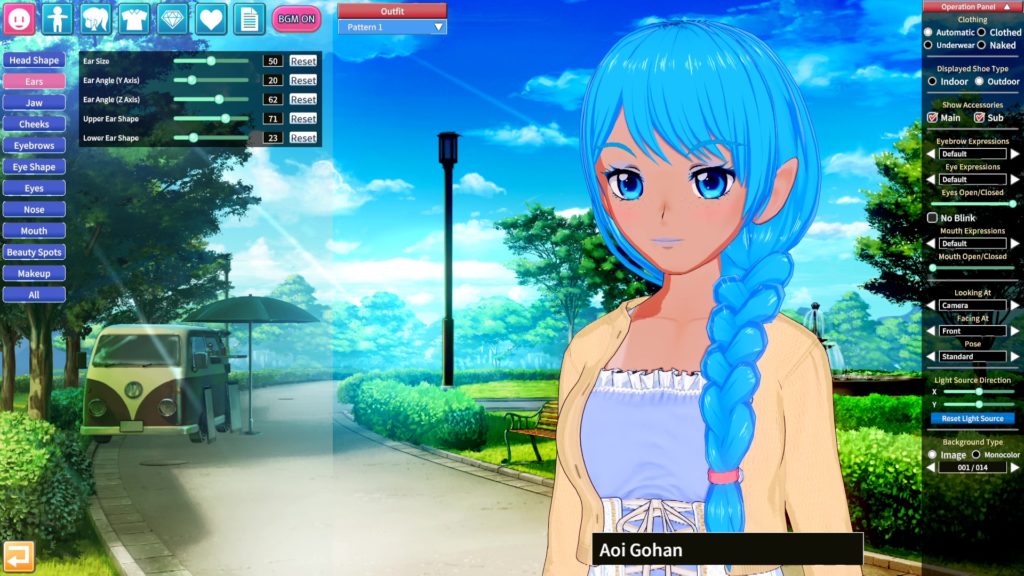
And so it was back to Koikatsu’s Ear settings menu — all it took was a very slight twist to bring them outwards a little bit, and no more hair clipping issues. Marvellous.
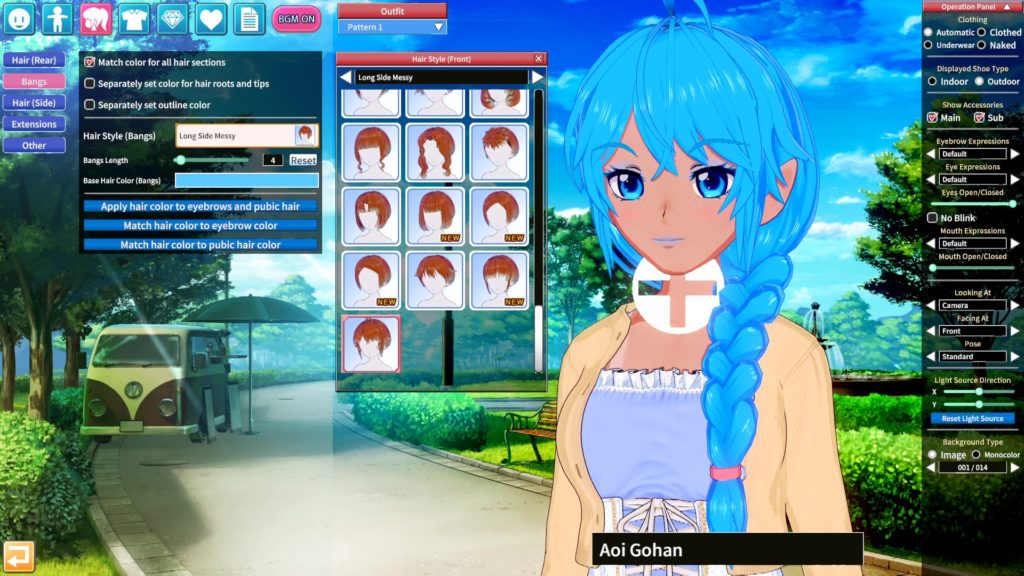
I wanted the maturity of the main hairstyle to contrast with a front piece that reflected a somewhat fun-loving personality — so I made use of this cute messed-up front hairstyle from the After Party expansion pack. That achieved pretty much the effect I was after — all business at the back, party at the front. The anti-mullet.
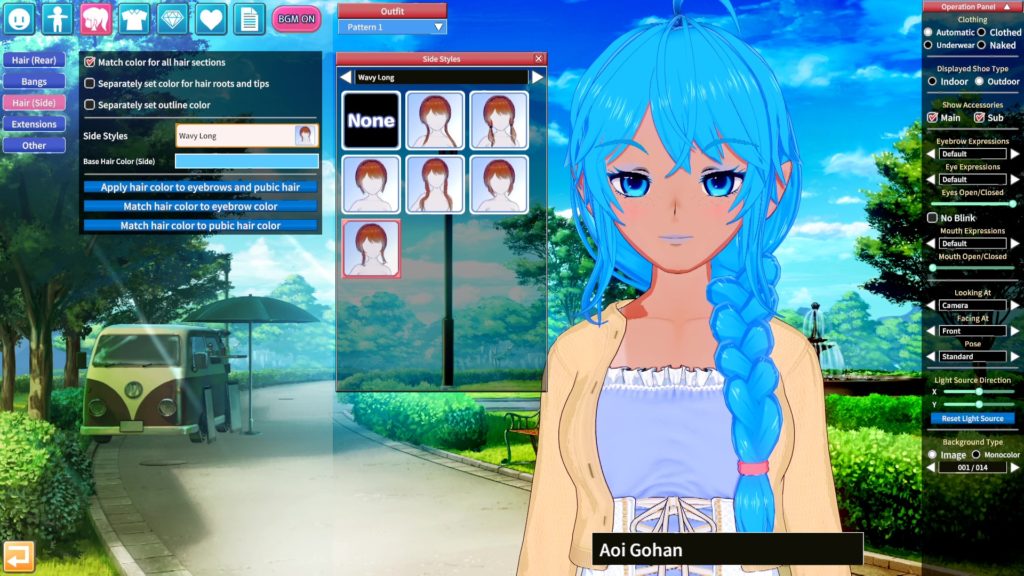
It’s easy to go a bit overboard with Koikatsu’s hair settings, particularly when you already have quite a “busy” design like the messy front I went for here. So for side hair I just went for a couple of simple, long strands that fit in nicely with the messed-up front. Aoi doesn’t look too impressed in this image, but she told me afterwards that she was very happy.
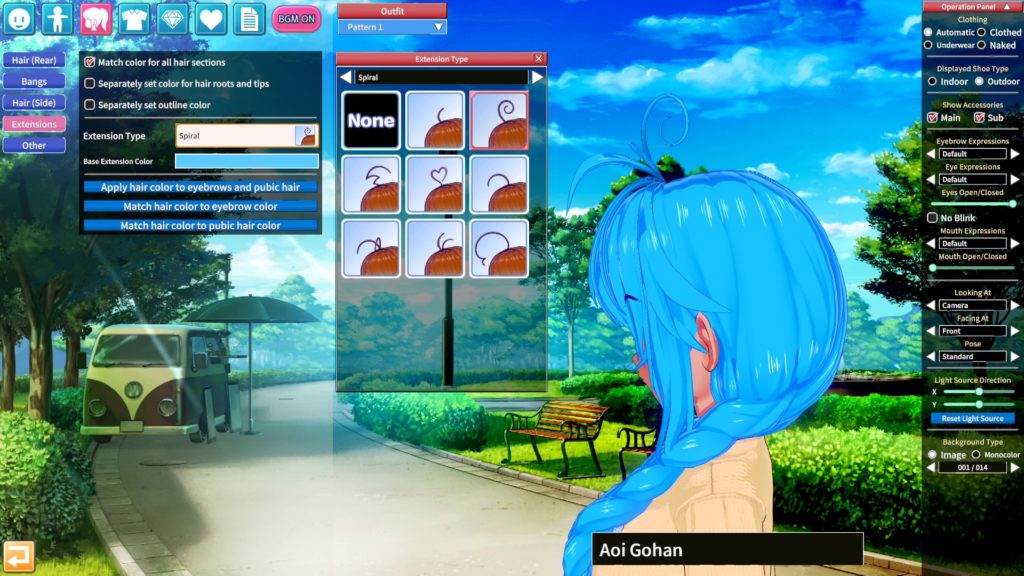
Likewise for the hair extensions — otherwise known as ahoge. Since the hairstyle I’d picked already had a bit of an ahoge going on, adding another one would just be kind of overkill. So after checking that really was the case, I elected to just stick with what we had.
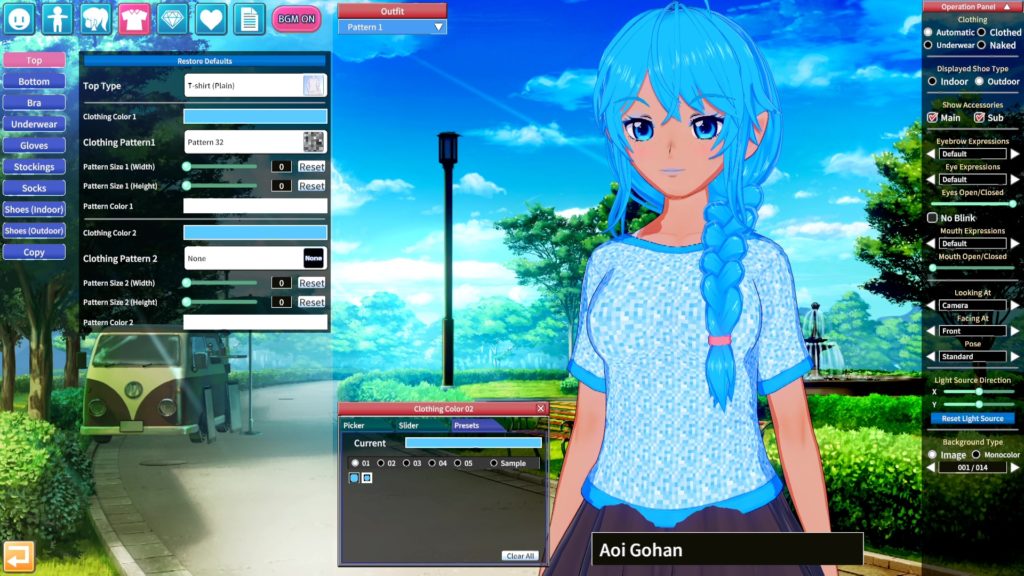
Now we come to clothes. Koikatsu comes with a selection of outfits, most of which can be customised in various ways. Here we’ve taken a simple T-shirt, applied Rice’s signature colour and also added a pixelated mosaic pattern. Because “digital”, you know? It’s a bit simple, though; I felt like Aoi could do with a little more sex appeal.
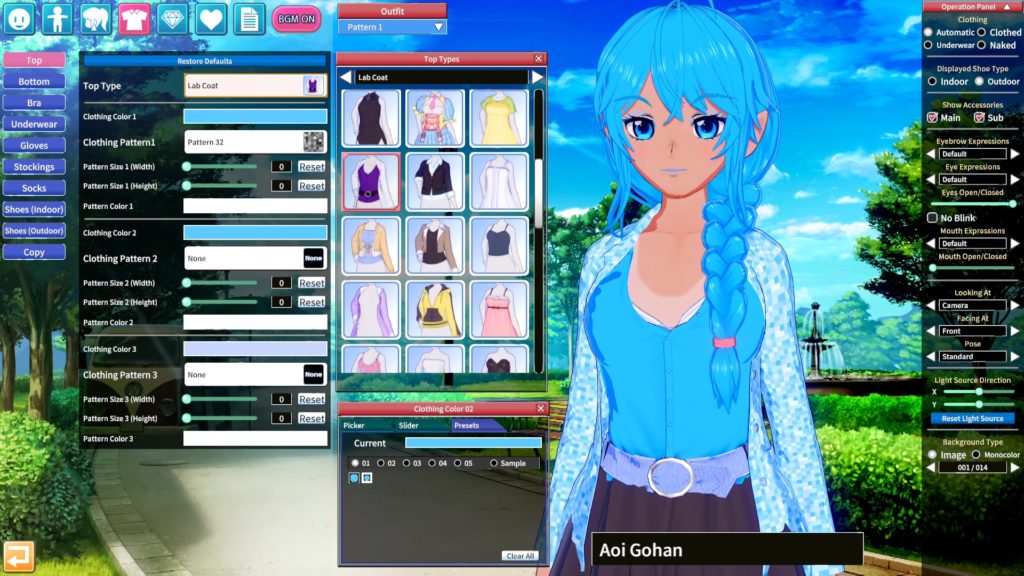
I eventually plumped for this lab coat and low-cut top combo. You get just a glimpse of the bra top and tan lines — subtly sexy without being overbearing. I wasn’t quite happy with how that pixelated pattern looked on the coat, though — and it was also clipping through the skirt.
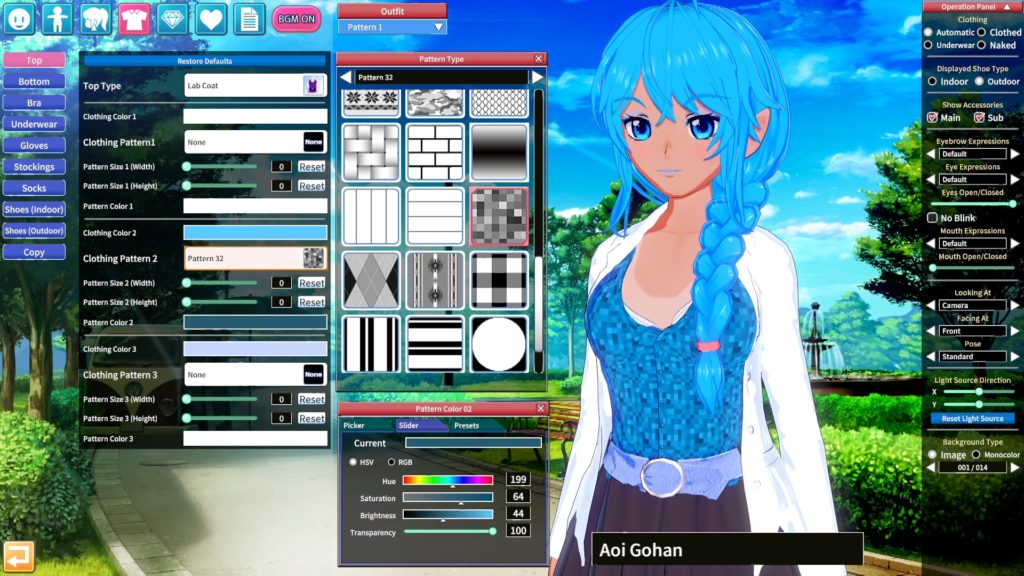
Switching the lab coat back to a nice clean white and moving the pixelated pattern to the shirt — as well as darkening it somewhat — made for a nice contrast. We’re getting a nice look going on here. Still need to do something about that skirt clipping, though.
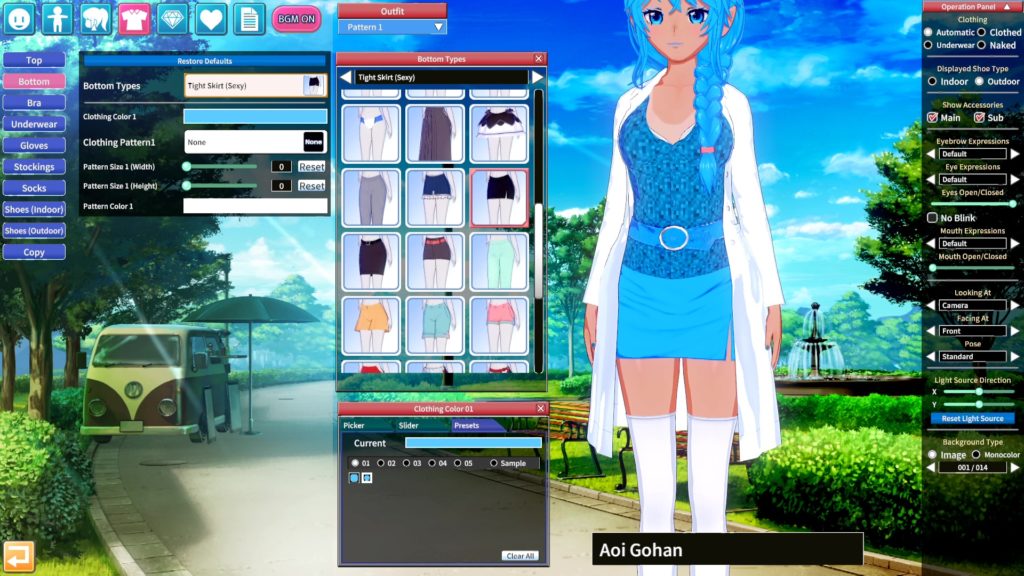
The problem was simple enough to solve — wear something that didn’t puff out as much on the lower body. I went for this skirt, because I wanted Aoi to have her legs on display. I considered shorts for a full on Makise Kurisu vibe, but eventually settled for the skirt instead.
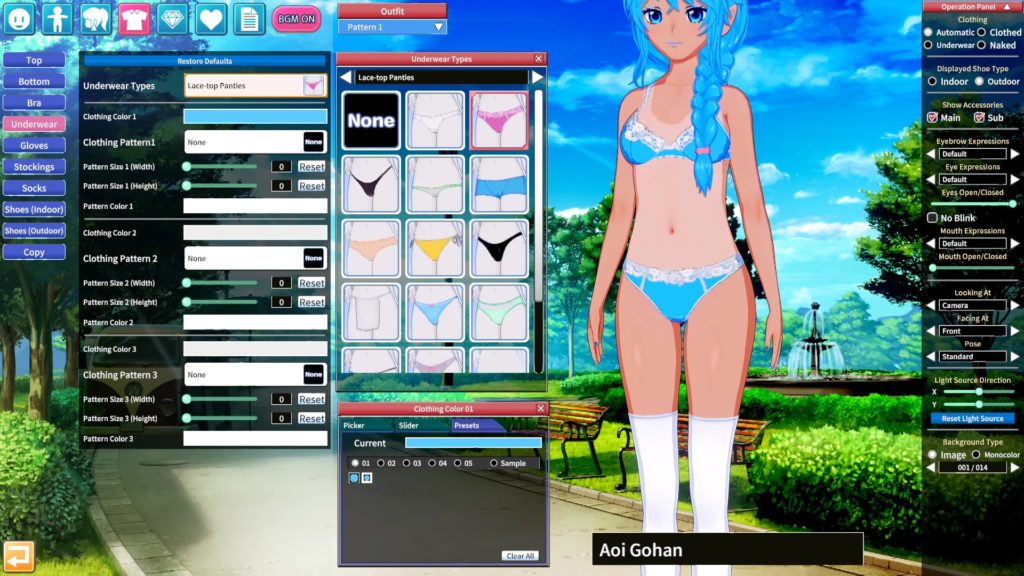
A brief stop to ensure that Aoi was fully colour-coordinated even in the areas one wouldn’t see under most circumstances…
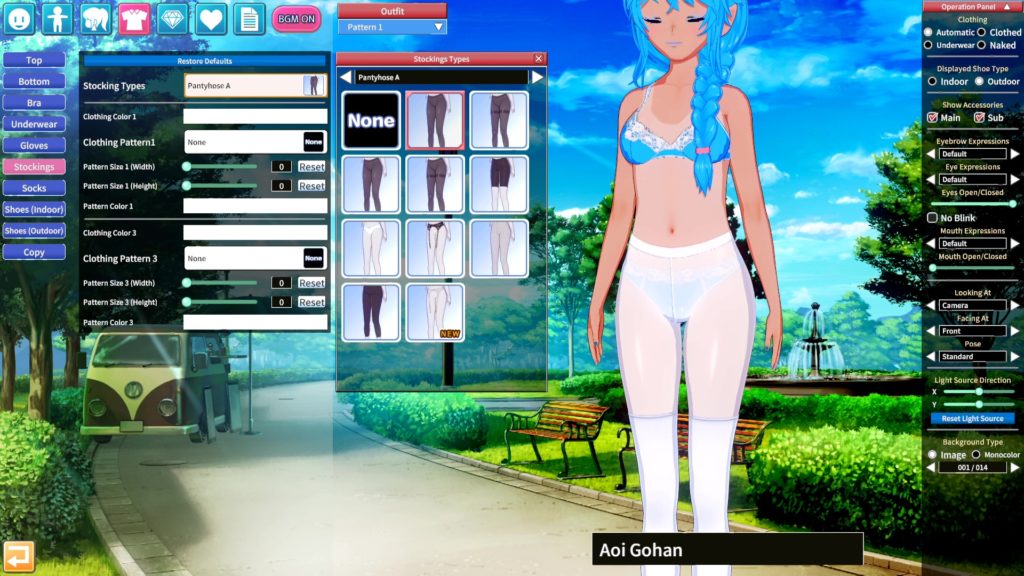
And some tights, because tights are great, and once again Koikatsu is happy to provide.
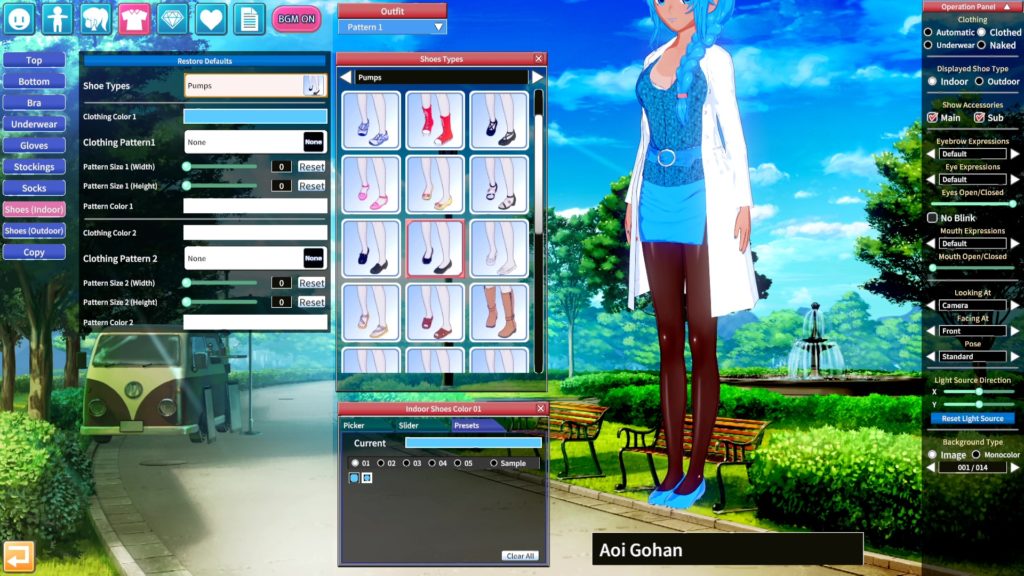
Dark tights, though, because classy. And I wasn’t willing to completely let go of the Makise Kurisu homage. Contrast those with some nice Rice blue pumps when hanging out indoors…
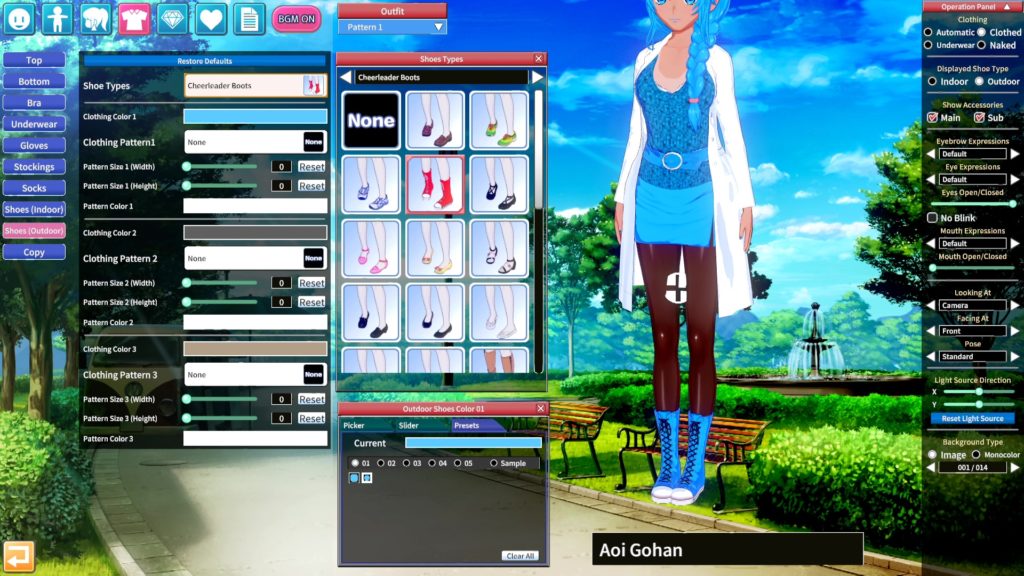
And some pretty frickin’ cool boots for going out and about, and we’re nearly done.
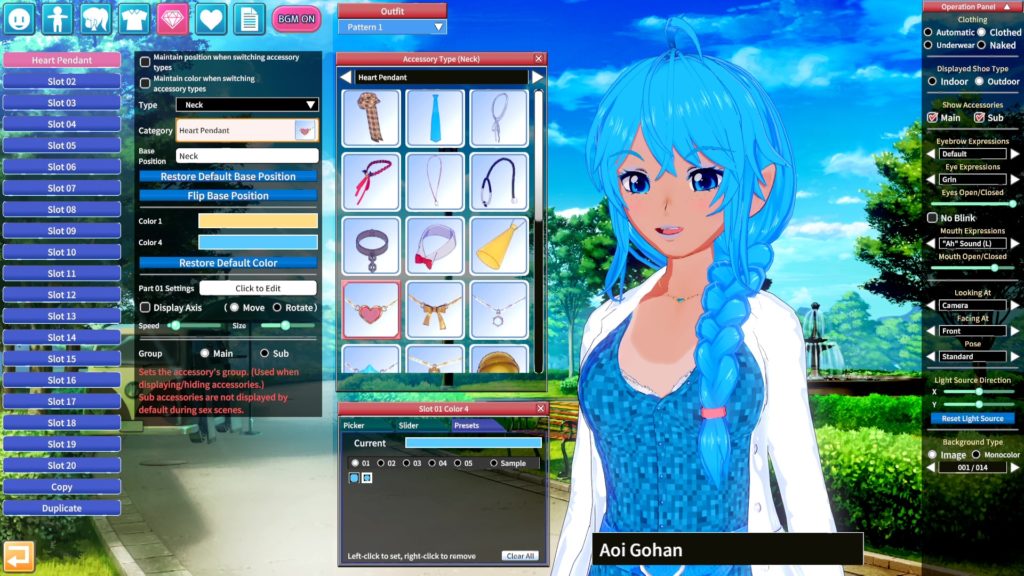
Last stop on our journey of character design is accessorising. Koikatsu provides 20 slots you can add accessories to, and each accessory can be attached pretty much anywhere on the body. There’s a default location for everything, but you can also fine-tune or get creative as you see fit. Here we’ve gone for a nice heart pendant, with a crystal in, of course, Rice blue.
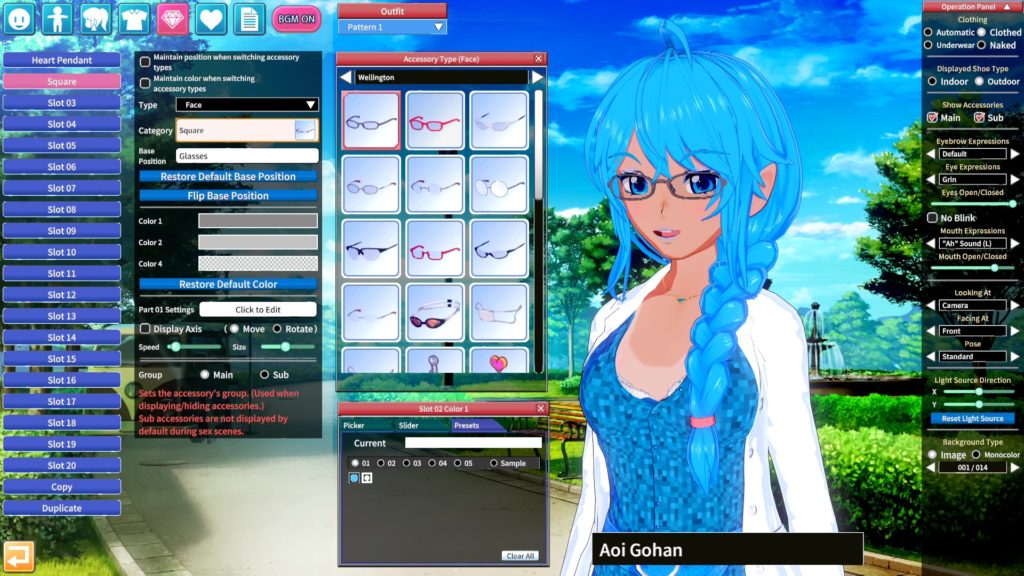
I considered adding glasses, but after a while it’s easy to feel like you’re adding things just for the sake of it. I liked the way Aoi looked without glasses, so she remains without them for now.
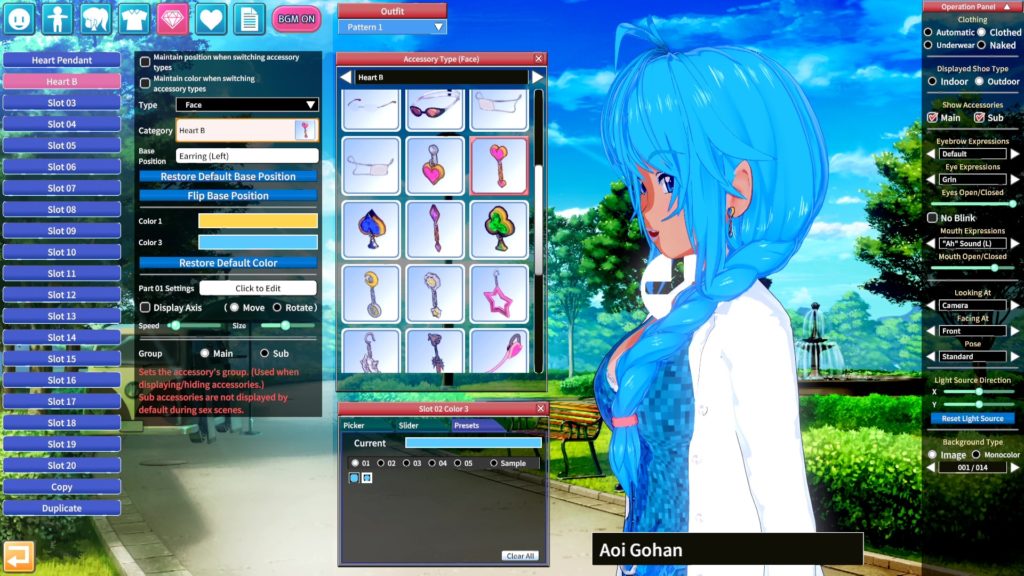
Also adding some more subtle touches with accessories will make you feel good. These heart-shaped earrings will be covered up by her hair most of the time, but I know they’re there.
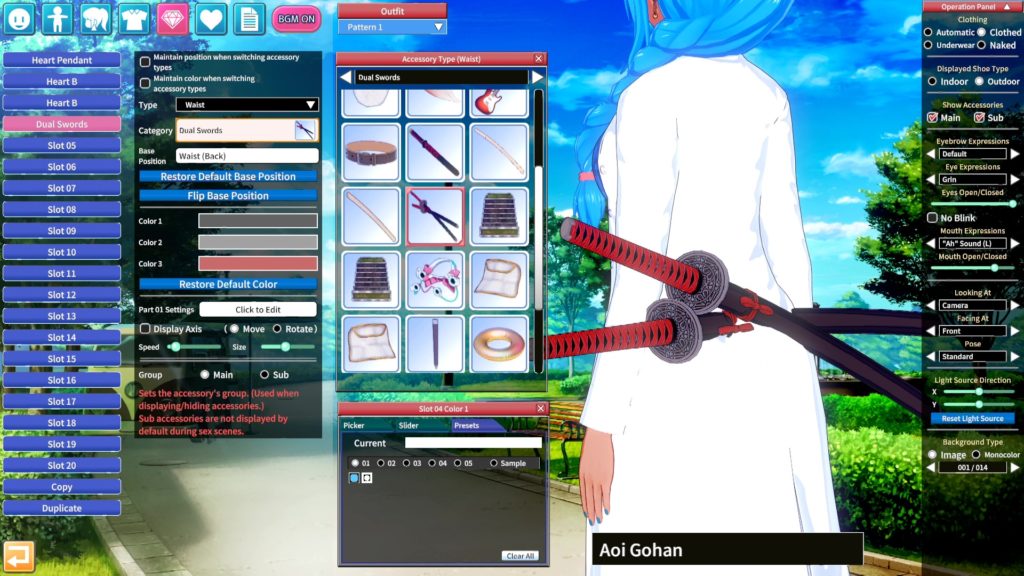
Again, if you want to get super-weeb “I spent years studying the blade” about things, you absolutely can do that in Koikatsu — but I felt like Aoi had enough appeal already without needing gimmicks like swords strapped to her back.
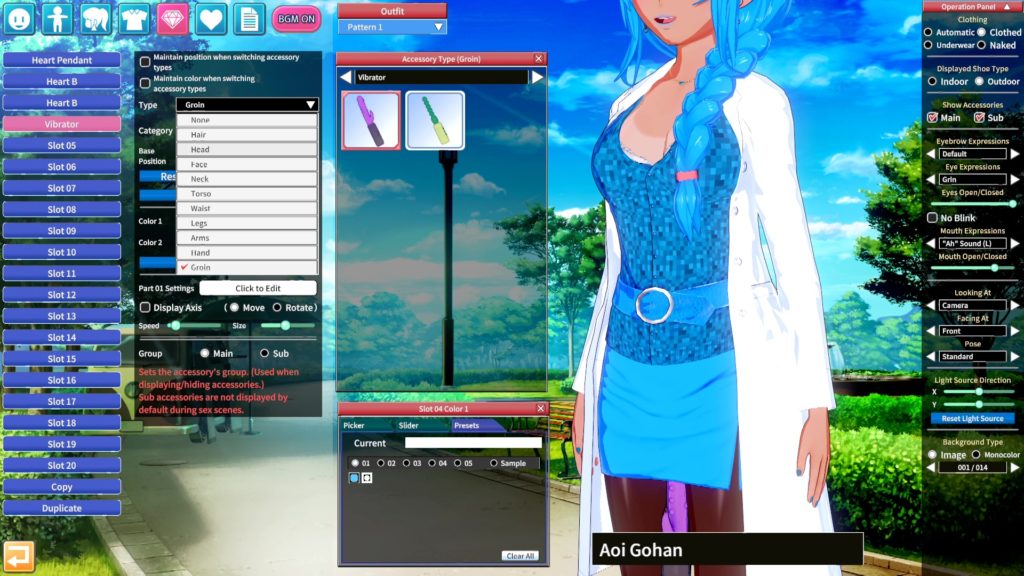
I… no. Save it for private time.
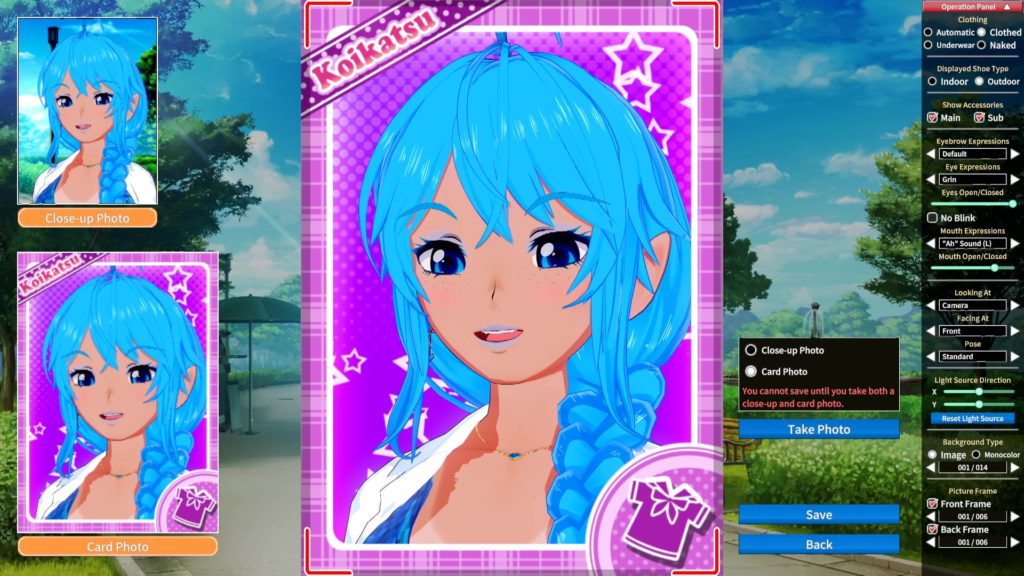
Finally, snap a photo or two and you’re all done! And that, ladies and gentlemen, is how you make a mascot with Koikatsu. We’ll return to this subject very soon and take a look at how you can use the Chara Studio application to set up your own scenes. Be warned, though — that side of things can get very addictive!
Join The Discussion
Rice Digital Discord
Rice Digital Twitter
Rice Digital Facebook
Or write us a letter for the Rice Digital Friday Letters Page by clicking here!
Disclosure: Some links in this article may be affiliate links, which means we may earn a small commission if you make a purchase after clicking on them. This is at no additional cost to you and helps support Rice Digital!

- Letter from the Editor: passing the torch - June 30, 2023
- Super Woden GP 2 is looking promising - June 30, 2023
- Inti Creates is making a 32 bit-style Love Live action platformer - June 26, 2023