Gal Guardians: Demon Purge boss guide
For veterans of Castlevania-style games and Inti Creates’ other work such as the Gunvolt series, Gal Guardians: Demon Purge errs on the slightly easier side of things, but it still puts up a fairly stiff challenge in a few places. And for newbies, you might find yourself surprised quite how brutal some of the bosses can be!

With that in mind, we’ve put together a boss guide for you that will help you to defeat all the bosses on the standard path through the game. Note that you’ll fight all of these bosses at least twice as you progress, and second time around they’ll be slightly tougher; they generally don’t completely reinvent their mechanics, but there are often a few twists here and there that we’ll note where appropriate.
Note: This game was originally known as “Grim Guardians: Demon Purge”, but its name was changed to “Gal Guardians: Demon Purge” following a trademark dispute in some territories.
Let’s get right on with it, then! Note that enemy and move names are our own creation, because the game doesn’t tell you what they’re called and it’s fun to make things up.
Bat Demon (Stage 1)
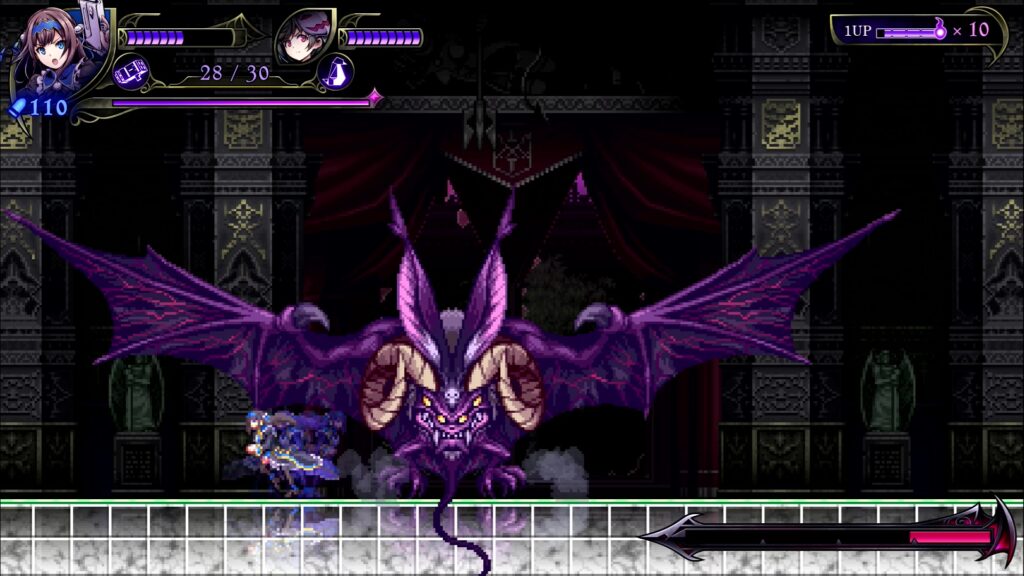
The Bat Demon cycles around a series of attacks fairly predictably, with each attack having a clear cue to watch out for. Most bosses in Gal Guardians: Demon Purge work this way, so this is a good opportunity to familiarise yourself with the conventions of these encounters.

Bat Swarm: The Bat Demon will split into bats and fly off the screen. A string of bats moving in a sine-wave motion will then come in from one of the sides of the screen, either high or low — usually high at the start of the fight, then low thereafter. As Shinobu, shoot the high arrangement from underneath for some free, easy damage.
If a low arrangement is coming in, switch to Maya and position yourself where a “peak” in the sine wave will appear. Activate her Shikigami subweapon and hack and slash at the passing bats as they raise up and over your head, correcting your position slightly if necessary. This should deal a decent amount of damage.
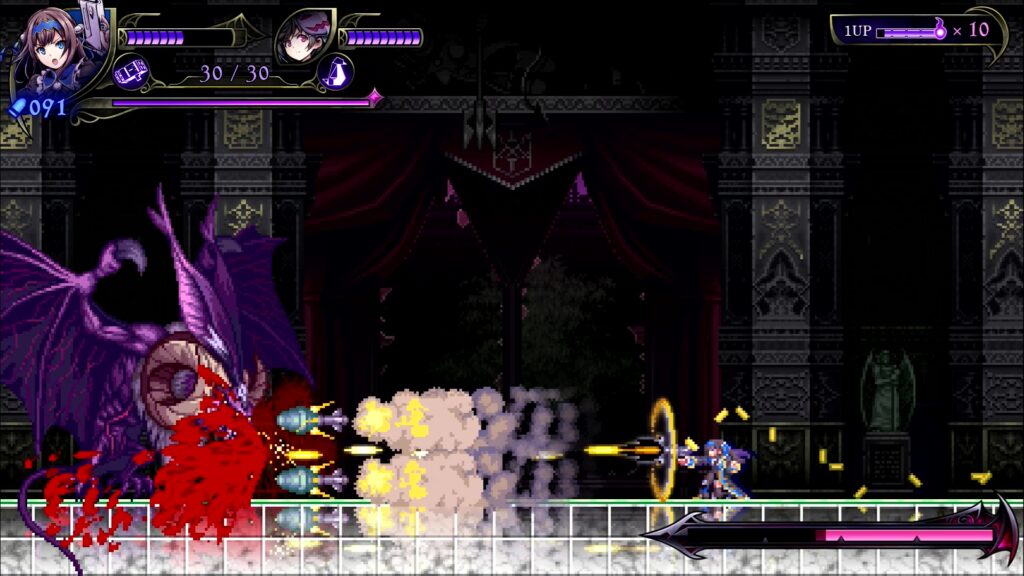
Bat Shot: The Bat Demon will coalesce into its full form, usually after a Bat Swarm, and move to one side of the screen. While there, it’s wide open to damage, but it will also fire bats at you, particularly during the “hard mode” encounters from second time around and beyond. Stand back as Shinobu and fire repeatedly; if you have her upgraded shot, crouch down while firing and the missiles will take care of the bats before they get anywhere near you. Stay ducked as he’ll charge for you at the end of this move.
Swoop: The Bat Demon will coalesce at the top-middle of the screen, then disappear off the top. It will then swoop several times across the screen. This is easily avoided simply by starting to walk in one direction before it appears. Don’t be tempted to try and get some attacks in, just let it finish.
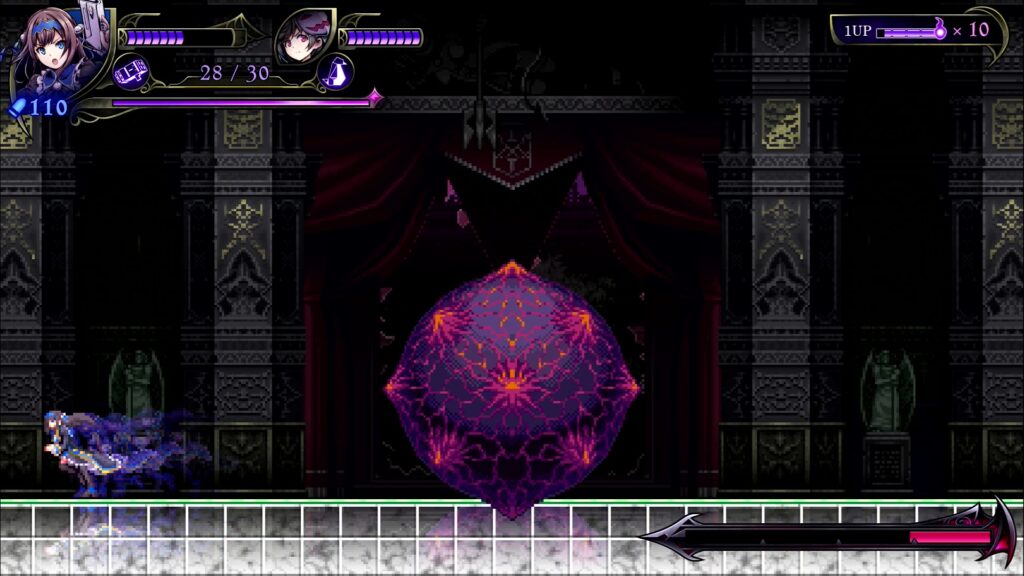
Big Glowy Ball Thing: Usually after a Swoop, the Bat Demon will reappear at the top middle of the screen, fold its wings and turn into a big glowy ball thing and crash down to the ground, shooting out bats to the left and right. Position yourself to either the left or right before the ball crashes down and simply jump over the bats.
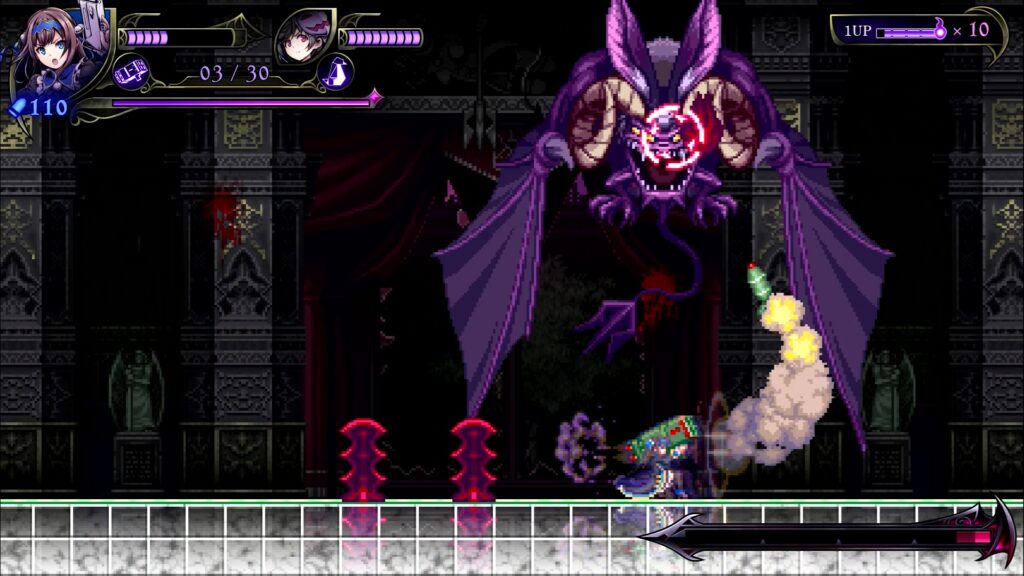
Sword Drop: Only seen in the “hard mode” encounters, the Bat Demon will coalesce in a top corner and move across the top of the screen, dropping red gooey things on the floor that form into spiky blades. Simply destroy these blades as Maya to get them out of the way. If you have time, use Shinobu’s rocket launcher to deal a bit of cheap damage in the process, too.
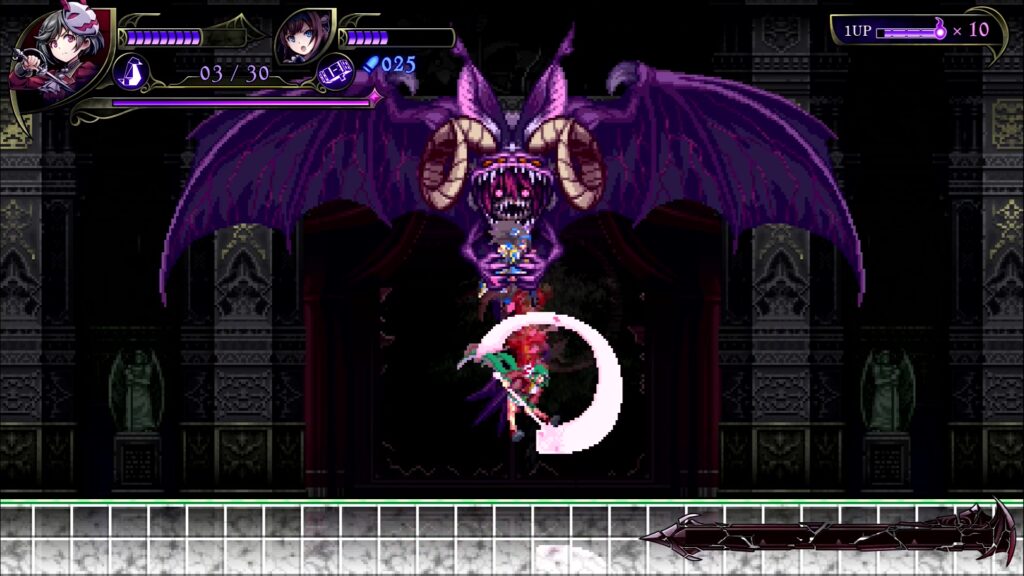
Desperation Move – Kidnap: Most of the bosses in Gal Guardians: Demon Purge have a “desperation move” that they use when you deplete their life bar completely. These are generally a last-ditch attempt to finish you off, so be prepared for them! In the case of the Bat Demon, it will move to the top of the screen and a demonic mouth will appear from inside its bigger mouth. It will then grab whichever character you are playing as, either Shinobu or Maya, and the game will automatically switch to the other character while the Bat Demon attempts to squeeze the life out of your partner. Simply hit it a couple of times to free your pal and clear the stage.
Rabbit Demon (Stage 2)
After entering the boss room, you’ll drop down from some chandeliers onto the stage of the Ceremony Hall and be faced with the Rabbit Demon, who is well and truly ready to rock. This is probably one of the more straightforward fights in Gal Guardians: Demon Purge, but you need to be paying attention.
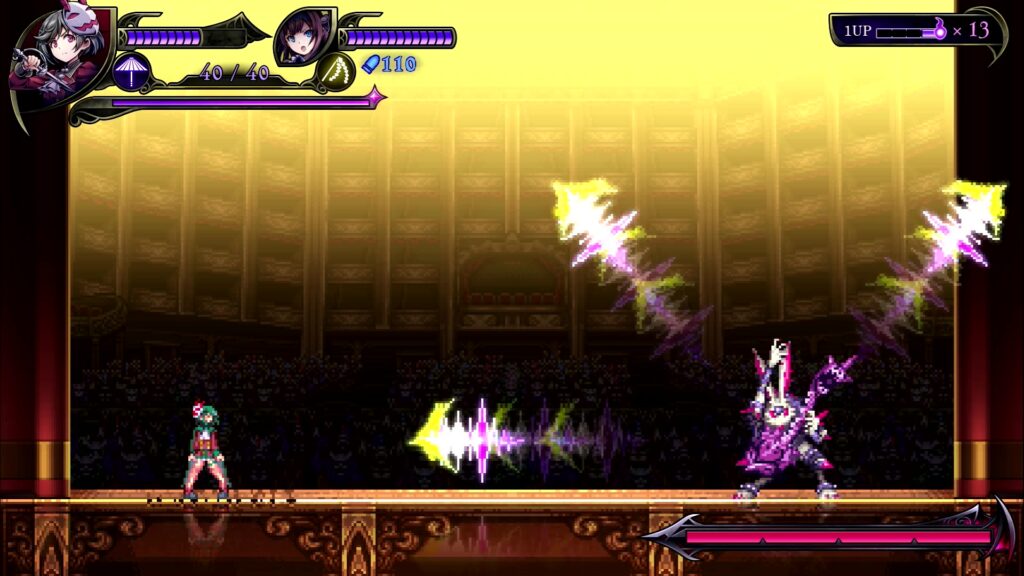
Shred: The Rabbit Demon will open the fight by blasting three power chords at you, which you’ll need to jump over while ensuring you don’t bang your head on the diagonally-firing waves. This is easily avoided, but pay attention for this move returning periodically throughout the fight, usually while you’re dealing with additional enemies. After the three chords, the Rabbit Demon is left wide open for a second or two, so charge in with Maya and give it a good slashing.
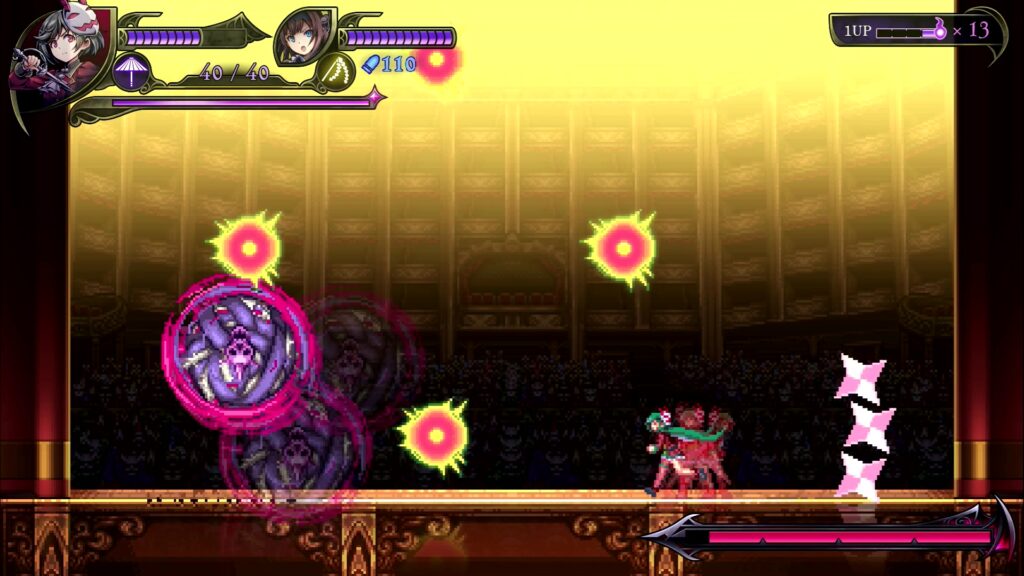
Bunny Bounce: The Rabbit Demon will begin cartwheeling and will bounce around the screen, firing sets of four large shots while it does so. These alternate between firing in a “+” and an “X” pattern, so position yourself accordingly to easily avoid these. There’s another brief opening to deal some damage after the Rabbit Demon lands.

Hop, Skip and Jump: The Rabbit Demon will jump several times, heading for a wall. When it jumps off the wall and into the air, it will crash down onto the stage from on high, throwing floorboards up that will deal damage if you’re too close. This will also coincide with several additional enemies being summoned. The easiest way to deal with this is to switch to Shinobu, get well out of the way of the Rabbit Demon crashing down, and keep firing to quickly take out the new enemies, which are all very weak.
After jumping in the air, the Rabbit Demon will use Shred again, regardless of whether you’ve cleared out the enemies, and the cycle will simply repeat until you’ve emptied its HP bar.
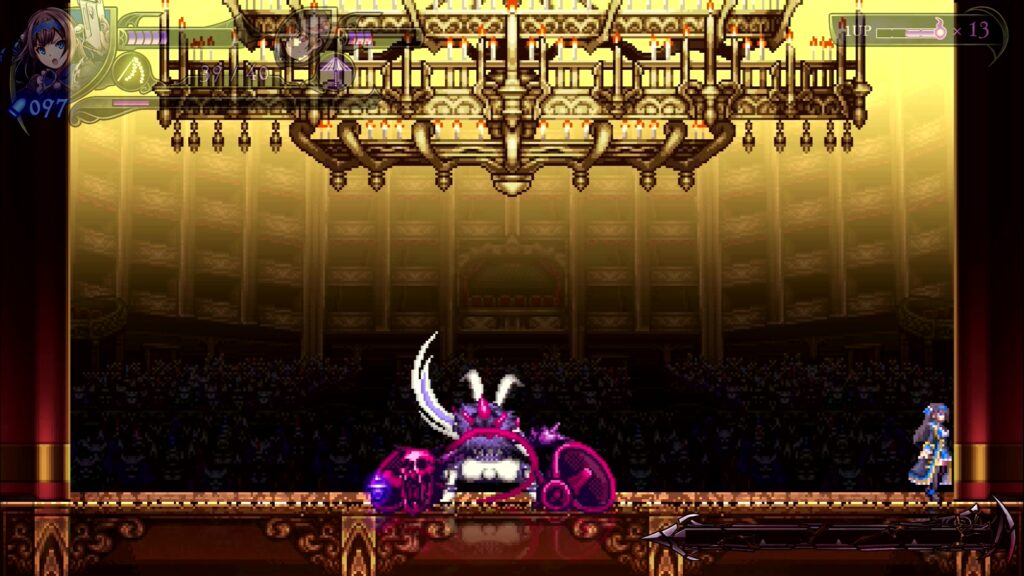
Desperation Move – Chandelier Crash: When you’ve beaten down the Rabbit Demon sufficiently, it will summon a series of chandeliers to crash down on you from above. Do your best to avoid as many of these as possible by simply moving left and right, and when the large one appears, move to either far edge of the stage for it to miss you altogether. When it comes down and makes a sticky mess, you’re done.
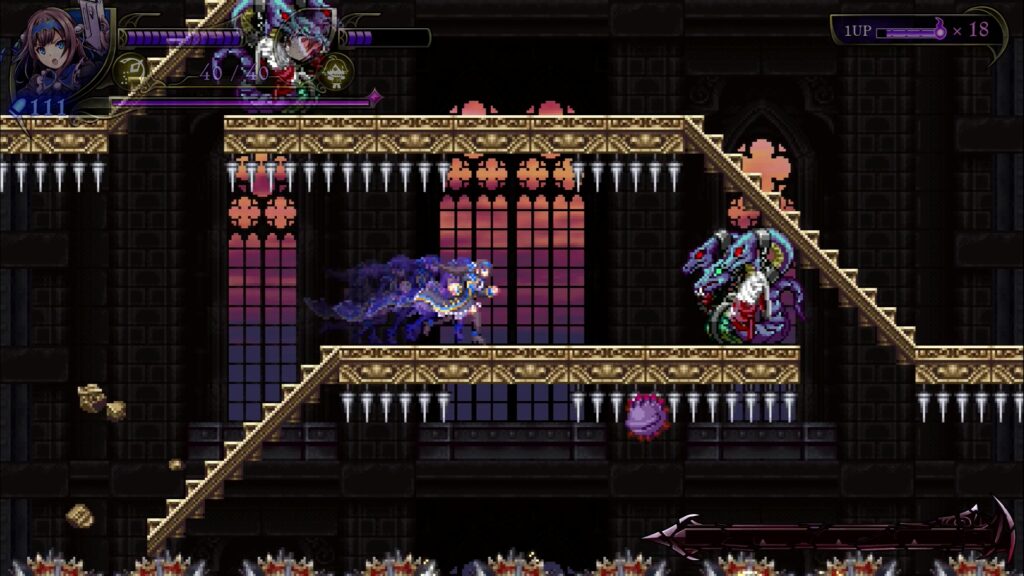
Pirate Demon (Stage 3)
This can be a challenging fight, so stay on your toes, and be prepared for the fact that this boss has two health bars to deplete before you’re done. To make up for this, he doesn’t have a desperation move in the same way as the prior bosses; his “reincarnation” is his desperation move.
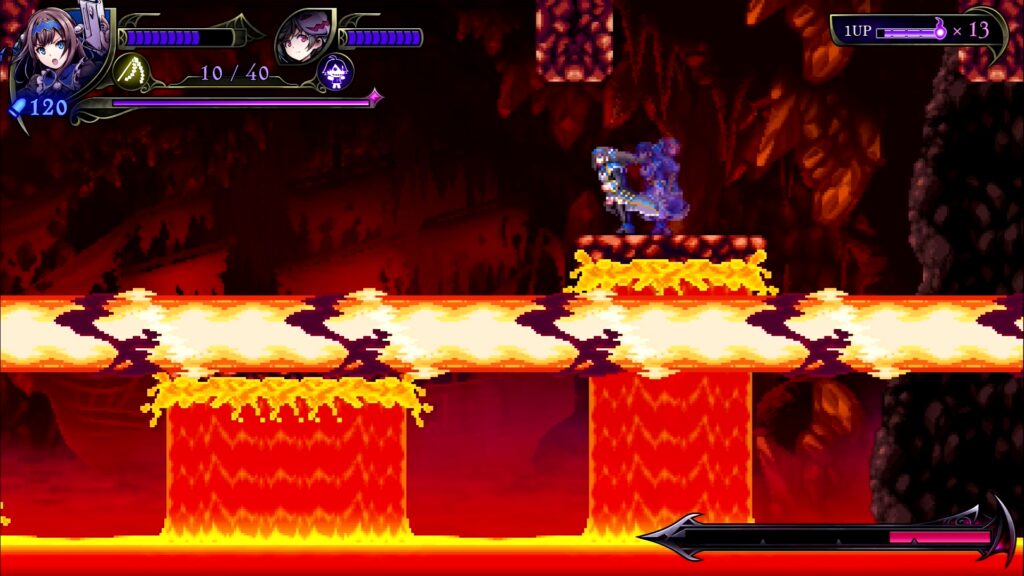
The first encounter with this boss unfolds in an icy cavern, but the second takes place in a lava cavern where you’ll have to change up your tactics a little to avoid taking unnecessary damage, since the floor between platforms is no longer safe.

Split and Charge: The boss will slam his sword into the ground, raising some platforms to different heights, then split in half. Stand on the middle-height one and duck so that his split body passes safely over you, then immediately after he passes drop to the lowest level and duck to avoid his spinning sword. There’ll be a good opening to deal some damage after this move; just take care not to attack his shield, as this will deal no damage.

Cannon Fire: The boss will raise his sword in the air and roar, causing the pirate ship in the background to begin firing cannonballs at you. These are telegraphed well before they land, so get well out of the way. Take care on the “hard mode” version of this boss, as cannonballs that land in the lava will send up some fireballs that you’ll also need to avoid. You can deal damage while all this is going on, but it’s best to concentrate on dodging.
Beam Shot: The boss will slam his sword into the ground again, raising platforms to different heights. He will then point his sword across the arena and it will vibrate, firing a wide beam shortly afterwards. This is usually best avoided by getting on the middle-height platform and ducking, though on the “hard mode” variant he sometimes fires the beam low or high. Look at where he’s pointing his sword if you have time, and get out of the way.
Note that in the second phase of the fight, after you’ve depleted his HP bar once, he will often fire a beam low and then move upwards. If this is the case, quickly move to the uppermost platform to stay safe, or jump with good timing to avoid the beam before it expires. Maya’s umbrella can be handy here to stay airborne for longer.
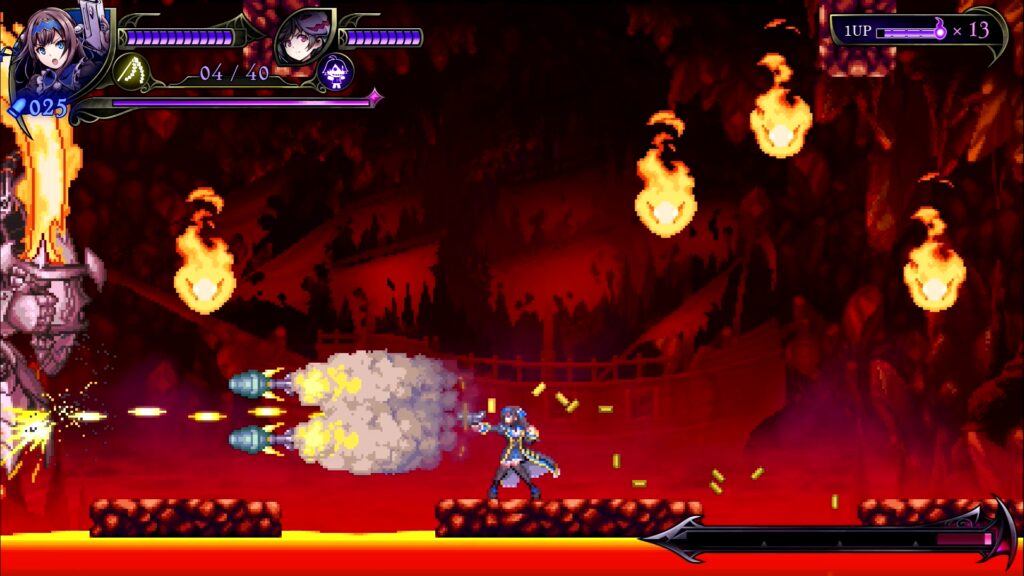
Incoming!: The boss will summon four projectiles (fireballs in the “hard mode” encounter, pictured) which, after a moment’s pause, will fire directly at you. Move to the side and jump over them to avoid them.
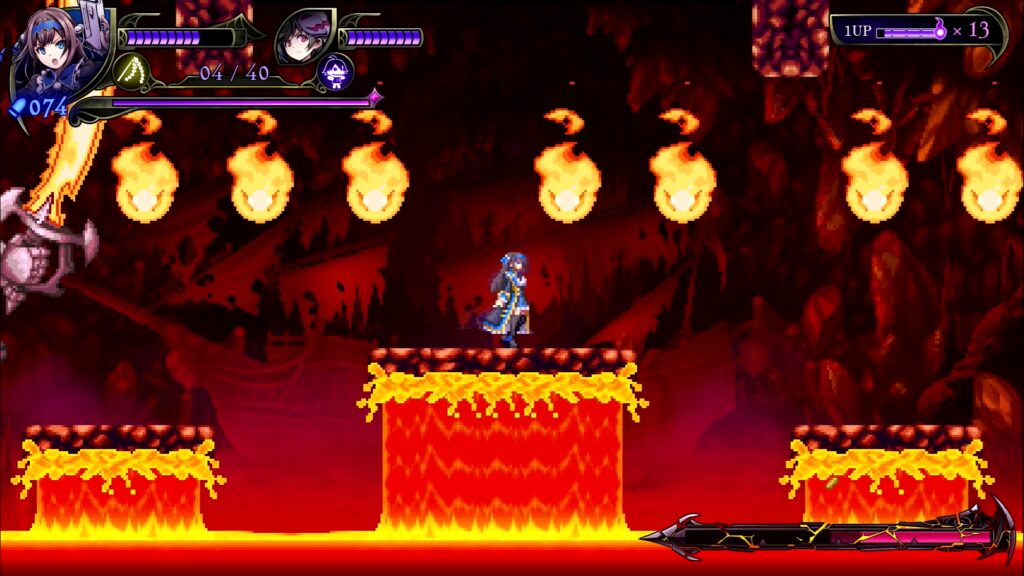
Fire Rain: The boss will summon a line of fiery spirits from above. There will be a clear gap in the arrangement, so position yourself under this, but be aware that the spirits will rain down diagonally rather than vertically, so move with them to stay safe.
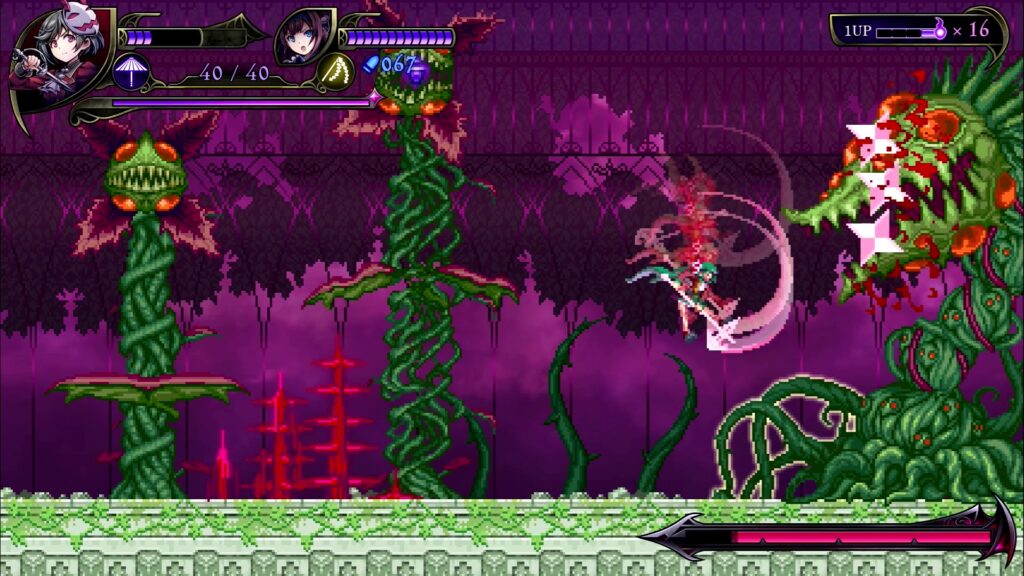
Plant Demon (Stage 4)
This vulgar, tights-collecting monster and enemy to all women is pretty straightforward to take out, but again pay attention to the clear audio-visual cues as to when some of its more dangerous attacks are incoming.
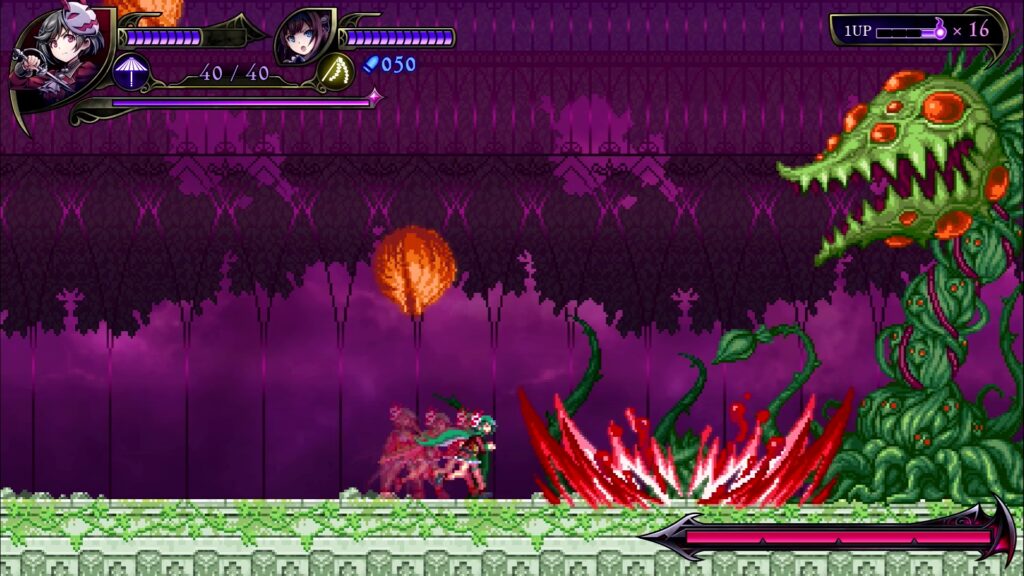
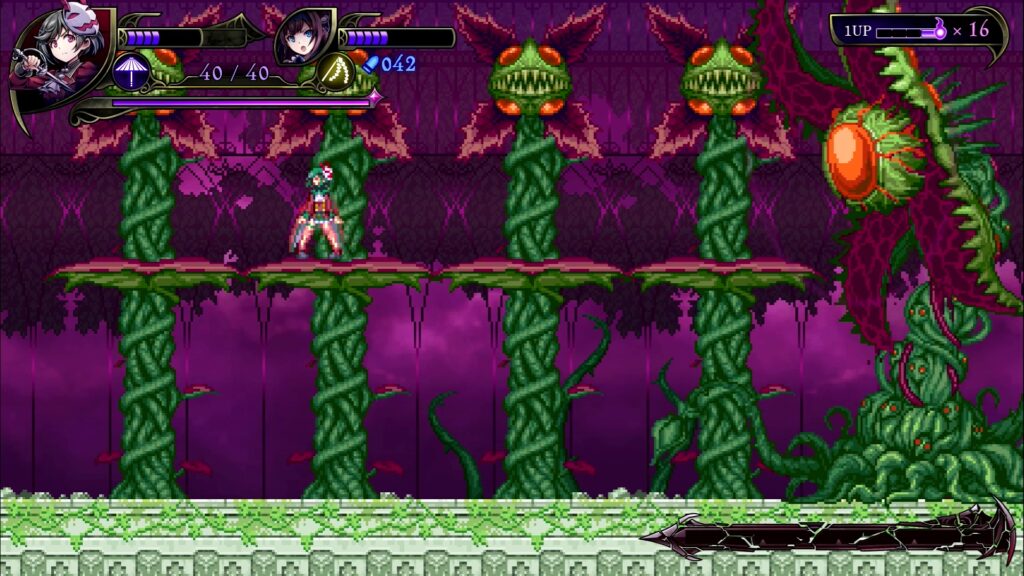
Seed Shot: The Plant Demon will spit three large seeds into the air. These will land in a predictable arrangement on your first encounter, but a randomised order on the “hard mode” second encounter and beyond. Avoid the falling seeds and the splatter they create, and each will create a large stem with a small head atop it, and a platform. You can destroy the heads and the stems, but make sure you leave at least the lowest platform and one of the high platforms to give you easy access to the boss; only its head is vulnerable, so hit it whenever an opportunity arises.
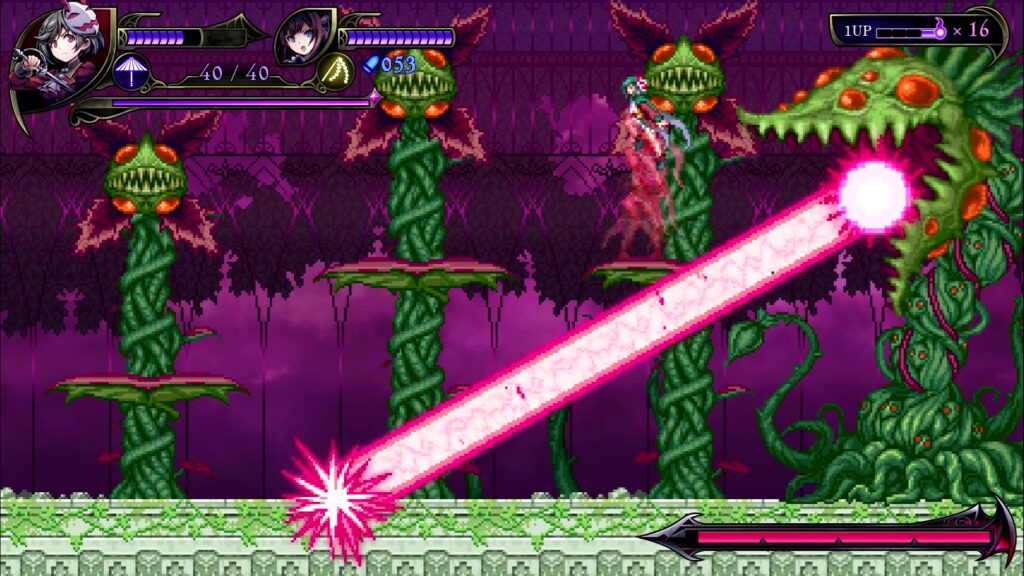
Low Laser: The Plant Demon will face its head straight down, then fire a laser beam from its mouth, starting facing straight down and rotating up to a diagonal angle. Position yourself on the middle platform (if it’s still there) and jump over the beam if necessary.
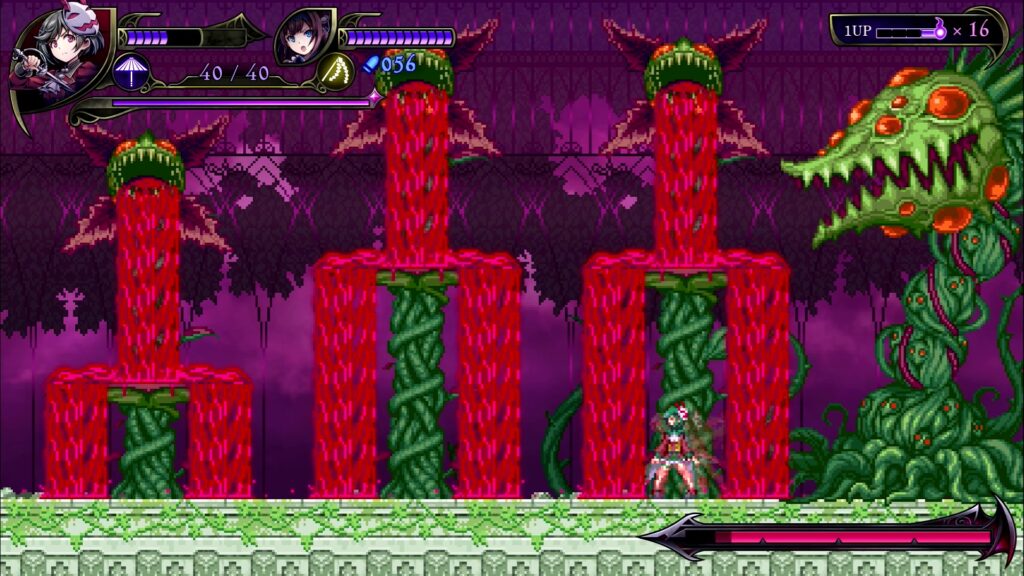
Blood Vomit: Periodically, the heads atop the stems will swill something around in their mouths, then vomit out blood. This will fall directly down from their mouths, then pour off either side of their respective platforms, leaving a safe spot directly in the middle underneath the platform. You can also use Maya’s umbrella to protect yourself.
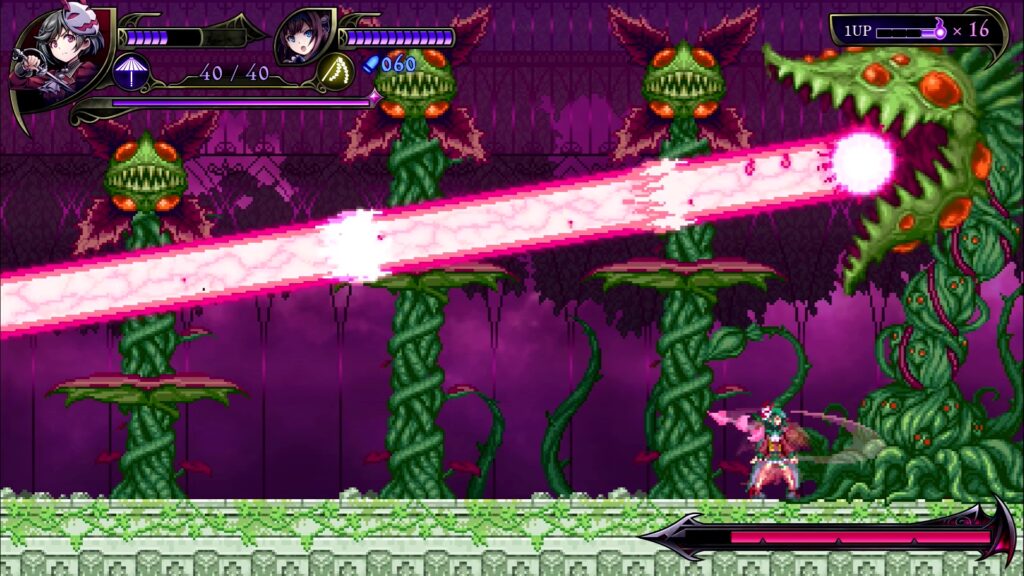
High Laser: The Plant Demon will face its head upwards, then fire a laser beam from its mouth, starting facing diagonally upwards and rotating to a diagonally downwards direction. To avoid this, drop to the floor and move as close as possible to the Plant Demon’s main body.
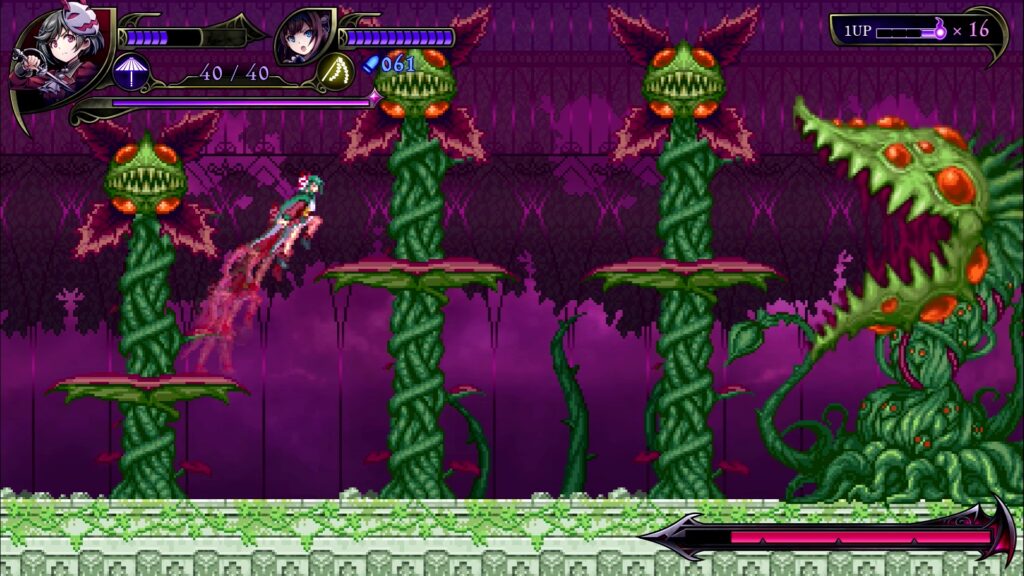
Bite: The Plant Demon will open its mouth wide then, after a short delay, charge across the arena in an attempt to bite you. Easiest way to deal with this is to stand just out of its maximum reach (about halfway across the leftmost platform) and attack it while it can’t quite get you.
The Root of the Problem: Periodically, the Plant Demon will send a wave of spiky roots across the arena, destroying the stems and marking the beginning of a new cycle around the moves. If you spend most of your time on the platforms rather than the floor, this move won’t even be a threat at all.
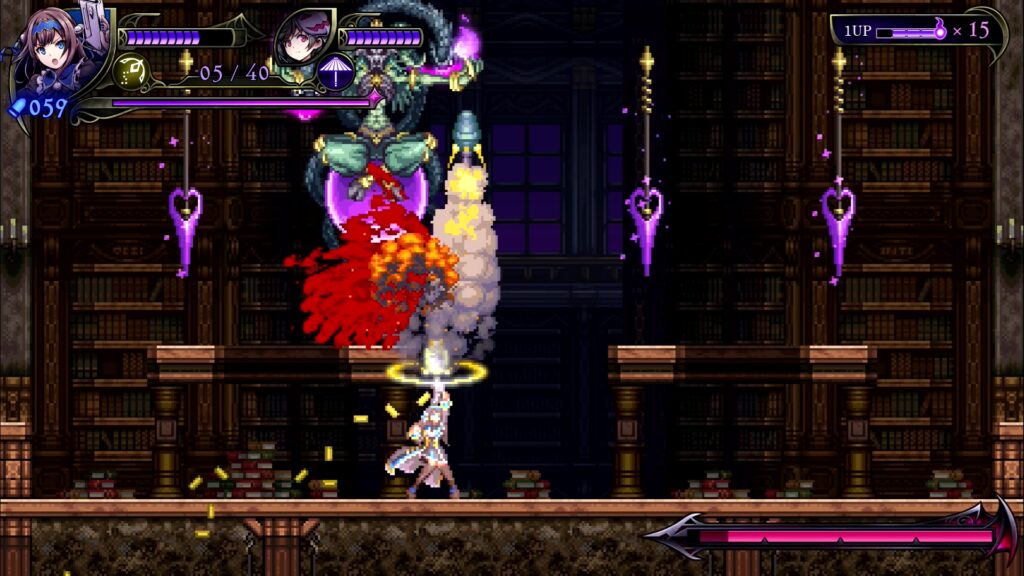
Desperation Move – Megablast: Deplete the Plant Demon’s HP and it will immediately destroy all the stems, cause blood to rain down from the sky in several places (easily avoided) and then summon several stems with high platforms. It will then open up fully and begin charging an enormous, very difficult to avoid blast attack. Stay as far right as possible and you might get lucky; a more reliable solution is to use Shinobu’s Oonusa while the attack is charging to summon Mr. Happiness and get a quick heal in, then take the hit like a real Demon Hunter!
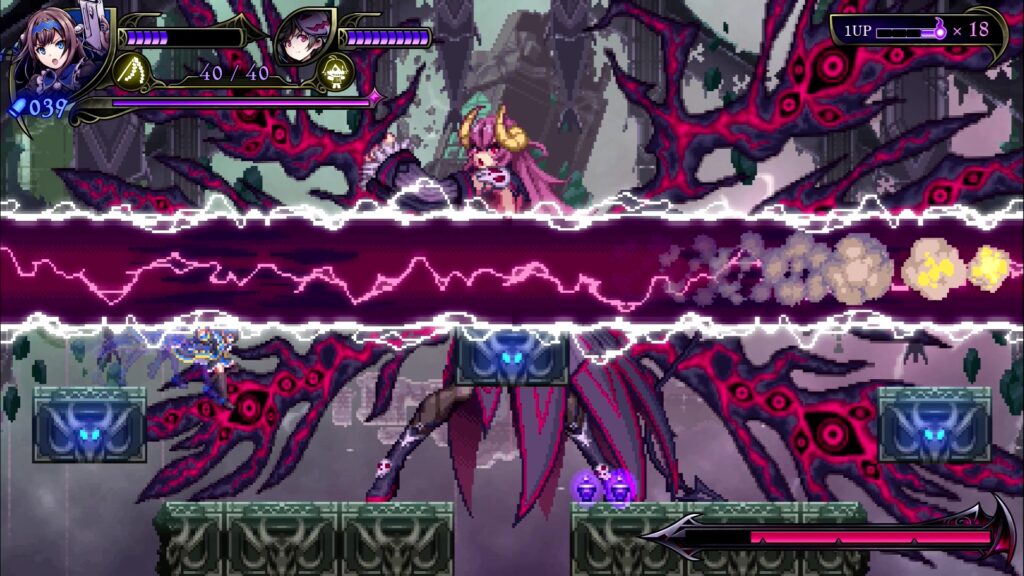
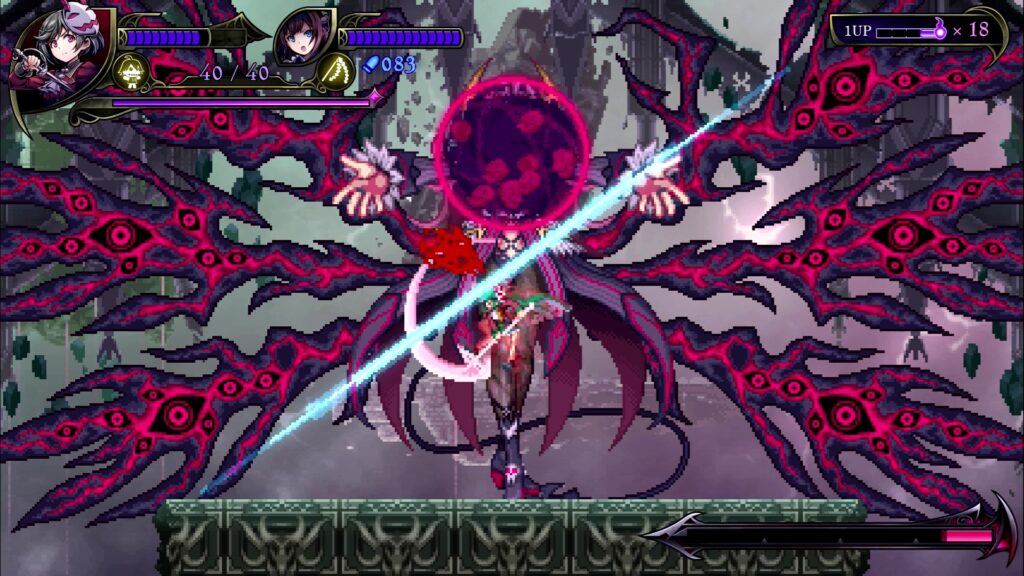
True Demon (Stage 5)
This is a difficult, fast-paced fight, so don’t be discouraged if you mess this up a few times. Just take your time and attack during openings. There’s no time limit to worry about, so just chip away at the boss and you’ll eventually get there.
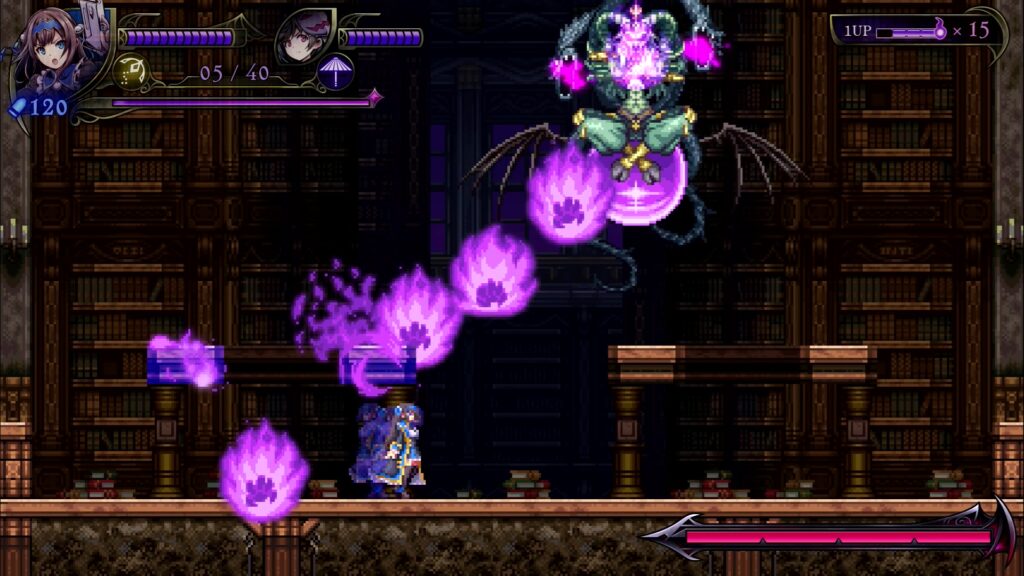
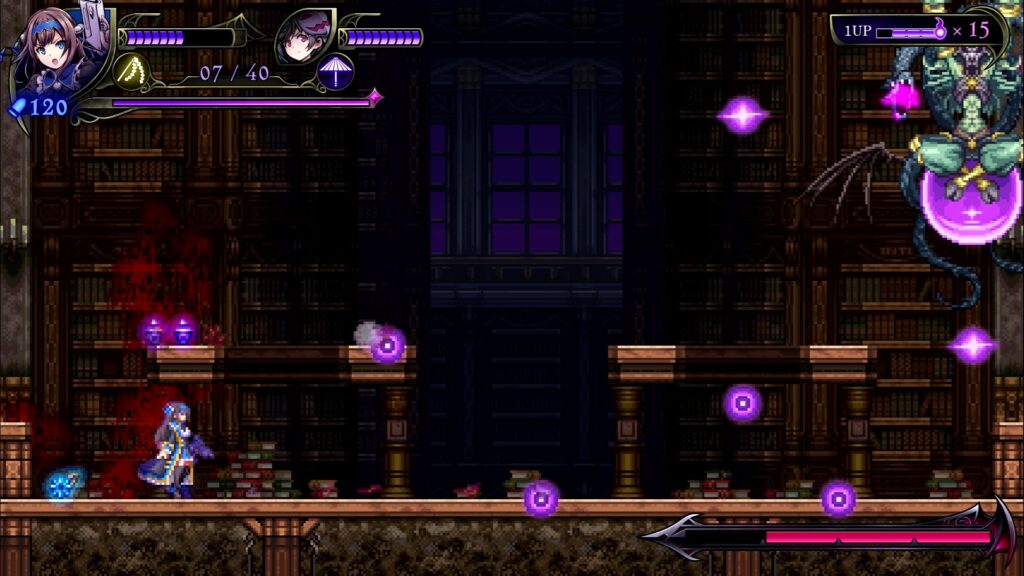
Demon Fire: The boss will disappear and reappear at one of the top corners. He will then proceed horizontally across the screen dropping purple fireballs. Stand beneath a platform to avoid being hit, but note that the fireballs cause the platforms to burn, making them unsafe. It is possible to destroy the fireballs before they land in order to create a safe spot, but this is tricky to do.
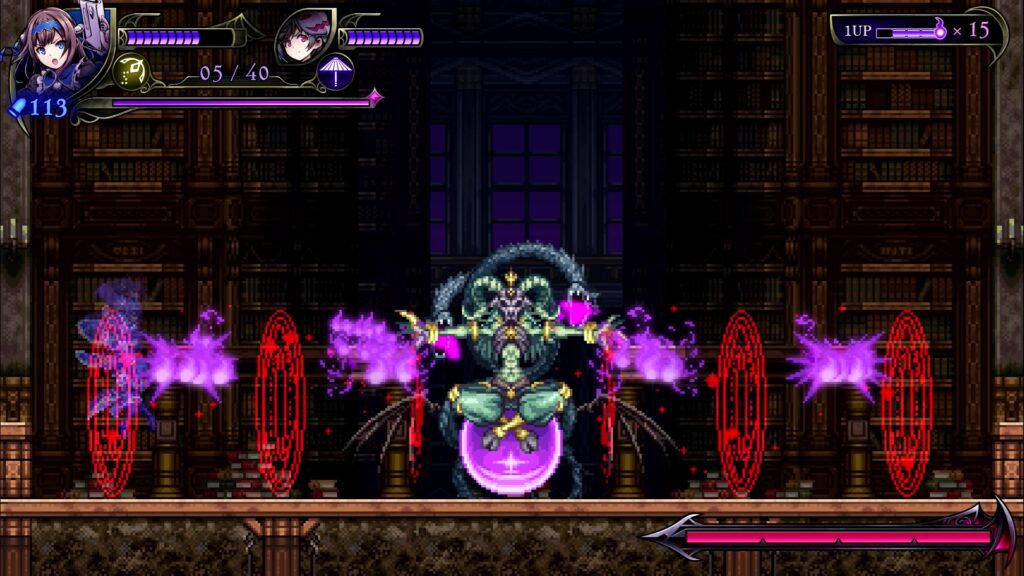
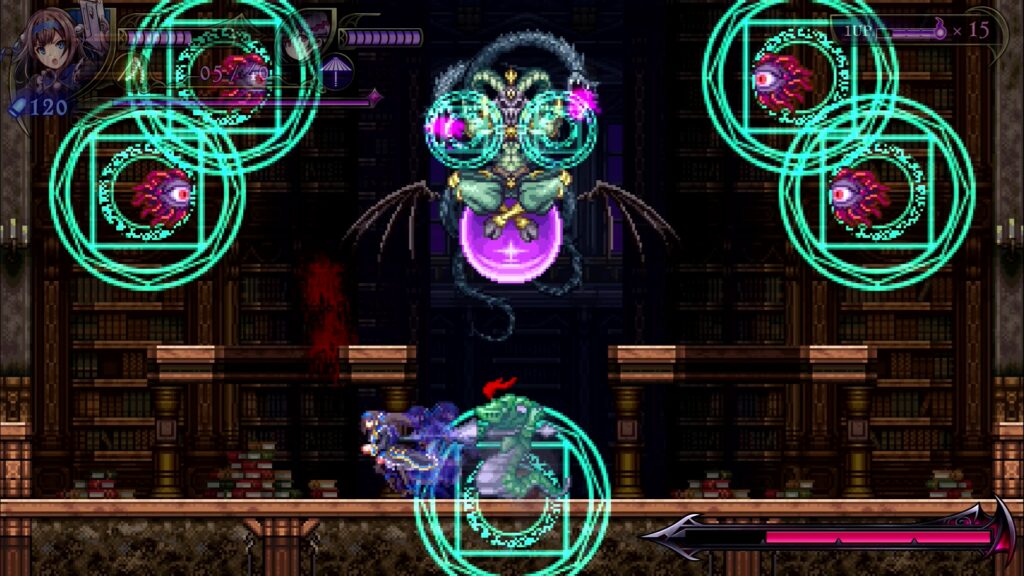
Magic Circles: The boss will disappear and reappear in the lower middle. After a moment’s casting time, he will shoot out large magic circles either side of himself which block your attacks and cause damage if they hit you. To avoid, jump into one of the little “alcoves” at the extreme right and left of the arena and use these to hop over the projectiles, landing on a platform if there’s a safe one. Note that on the “hard mode” encounter, the magic circles will come back again after being fired out, so be ready to avoid them again.
Spear Drop: The boss will disappear and reappear at the top, not in a corner. He will then summon three large spears to drop on you, which are easily avoided. The spears will subsequently explode in large vertical energy pillars, but if you avoided them already this won’t be an issue. This is the best opportunity you have for dealing damage, so take full advantage.
Summon: The boss will disappear and reappear in the top middle, then create several magic circles that weak enemies will pop out of. Dispatch them quickly before they get in the way.
Bullet Hell: The boss will disappear and reappear at one of the top corners, then fire a string of small fireballs that move in two distinct “lanes” across the floor and platforms. Pick a lane, move to the opposite side of the screen to the boss, stick to the lane you picked, and concentrate on dodging the bullets in that single lane by jumping over them.

Desperation Move – Hell Drop: After depleting the boss’ HP, he will jump off the top of the screen holding his cracked crystal. He will then summon a vertical string of magic circles down the centre of the screen. Hop up onto a platform while this is happening, as a moment later he will slam into the ground causing a wave of tall explosions. Simply hop over these to stay safe — or just tank the damage if you have enough HP remaining, since clearing the stage will fully heal you anyway.
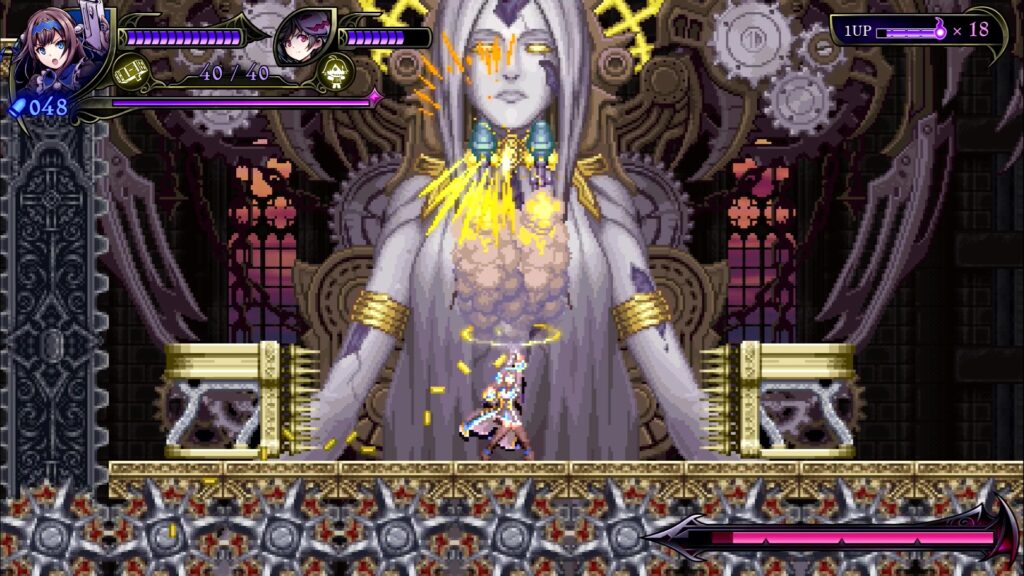
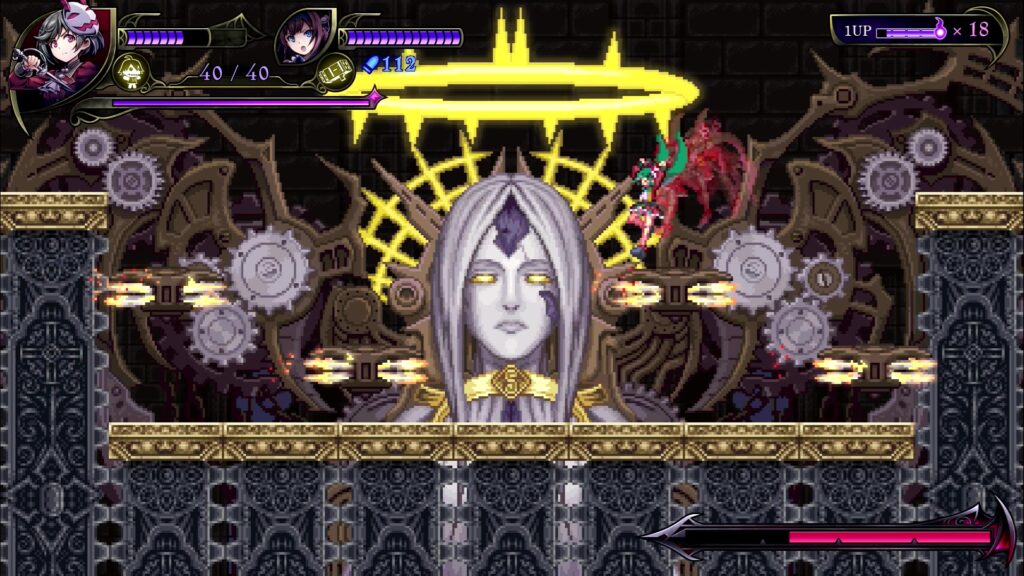
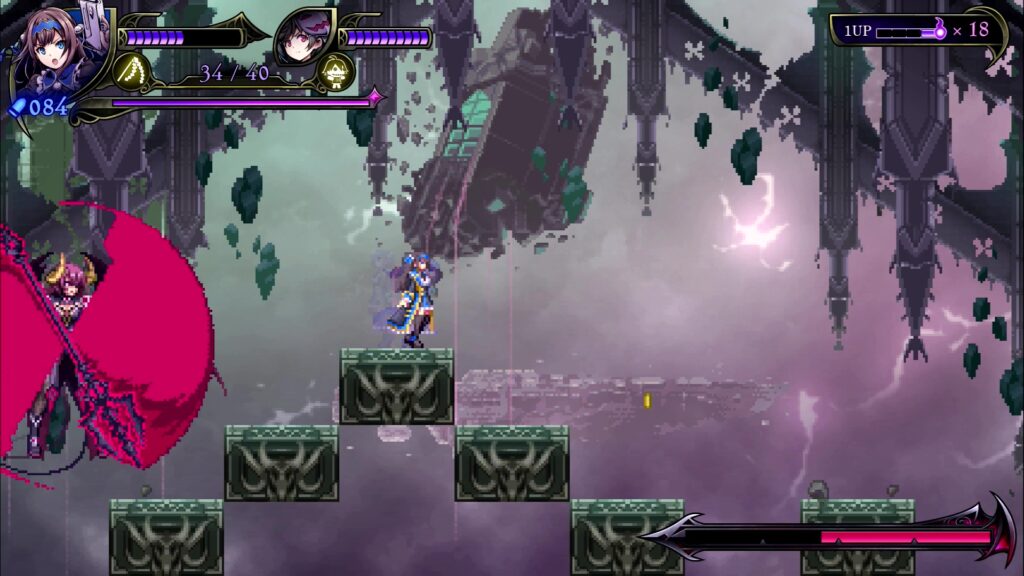
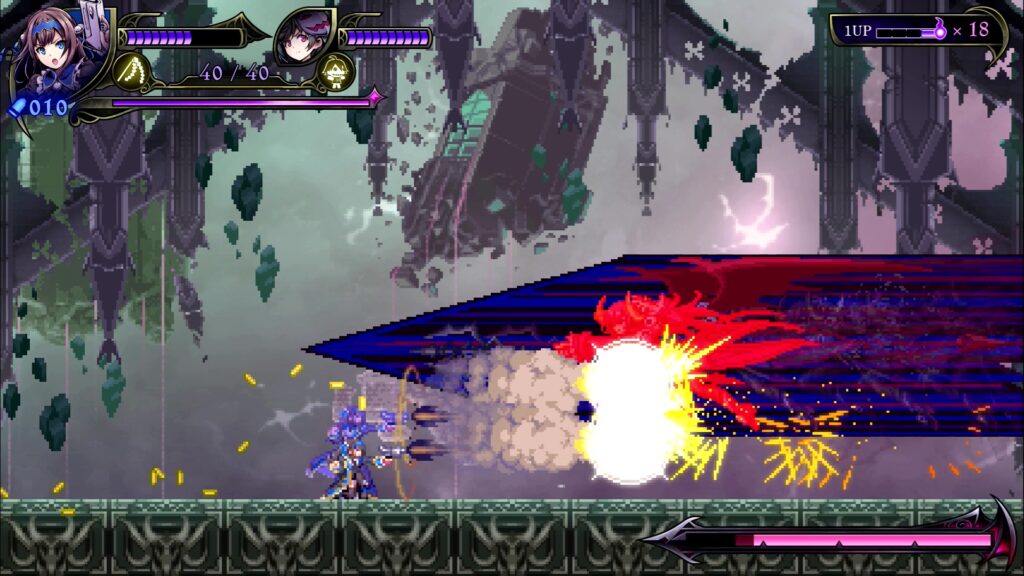
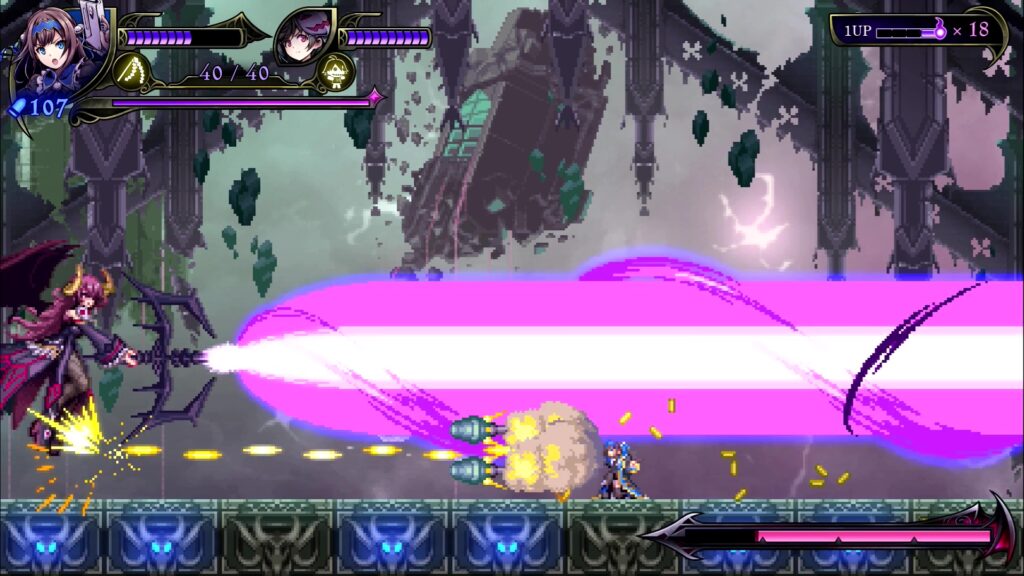
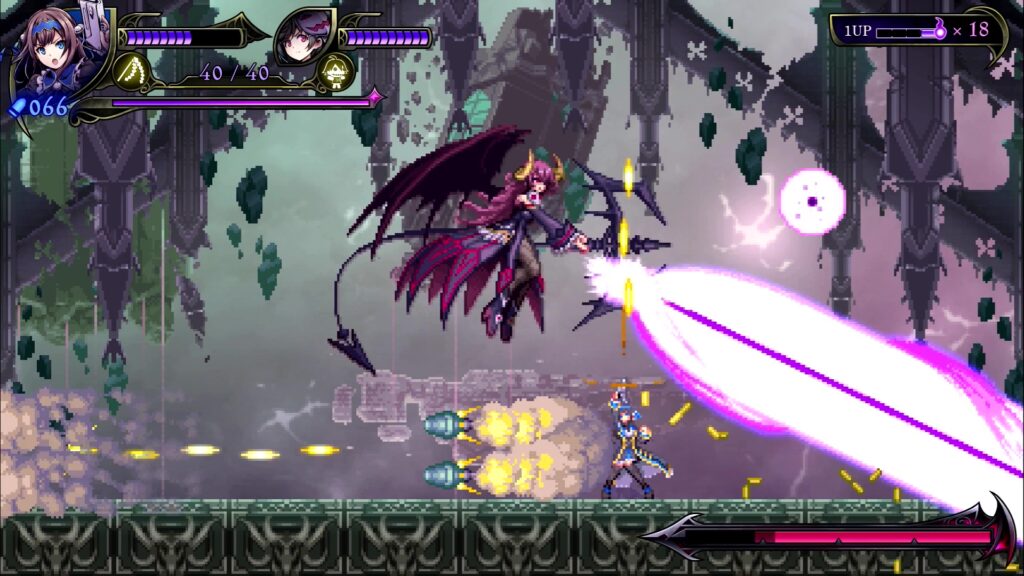
Fallen Angel (Stage 6)
This is actually a fairly straightforward boss as long as you are paying attention. Switch characters as required according to the situation — Maya when you have an opportunity to deal close-up damage, Shinobu when you need to either attack from range or use her grappling hook subweapon to stay safe.

Cog Throw: The Fallen Angel’s eyes will flash, and she will summon spiked cogs from alternating sides. You can either jump over these and attack her head during openings, or you can use Maya to easily destroy them with a single strike. If the Fallen Angel has raised up some floor sections, you can hang from the “ceiling” this creates with Shinobu’s grappling hook to easily avoid everything.
Fist Crush: The Fallen Angel will raise up one or more parts of the floor and summon a pair of spiked fists either side of you, which will follow your movement. Just before they slam together, they will pull apart slightly — this is your cue to jump. There are three sets of fists to avoid, and standing on the second pair while the third one is preparing puts you close enough to hit the Fallen Angel’s head with Maya’s melee attack several times.
Cog Wave: The Fallen Angel will adjust the floor platforms and summon a series of horizontally moving spiked cogs from the side of the screen. You can jump and stand on these as if they were platforms — just make sure you don’t get hit by their sides.
Desperation Move – Clock Tower Chase: When you deplete her HP, the Fallen Angel’s head will come off and fly further up the clock tower. You’ll then need to proceed up a short platforming stage, taking out enemies along the way (preferably with Maya for her additional damage), while the sawblades from underneath the boss arena gradually rise up. When you reach the top, just hit the Fallen Angel’s head a few times and you’re done.
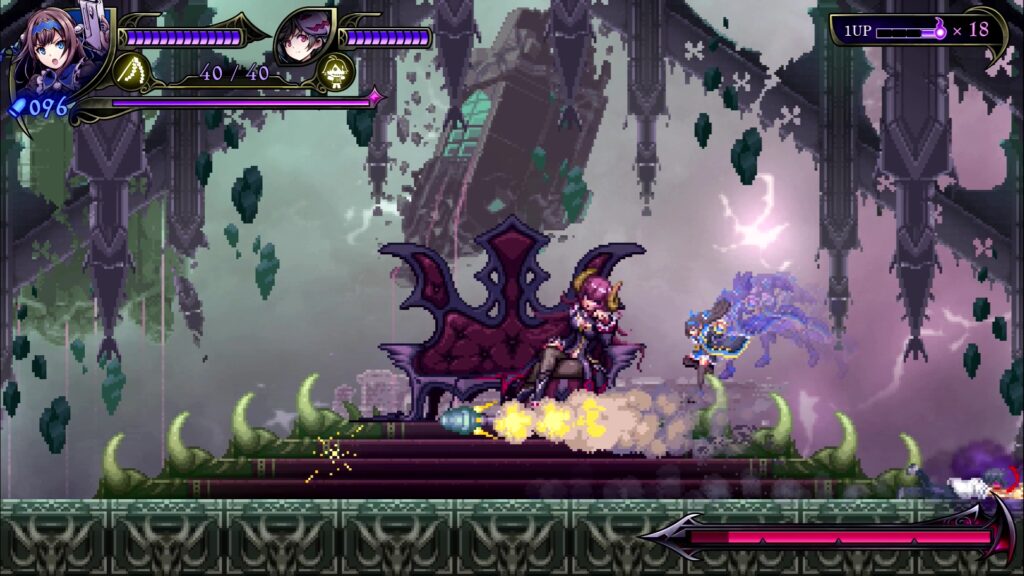
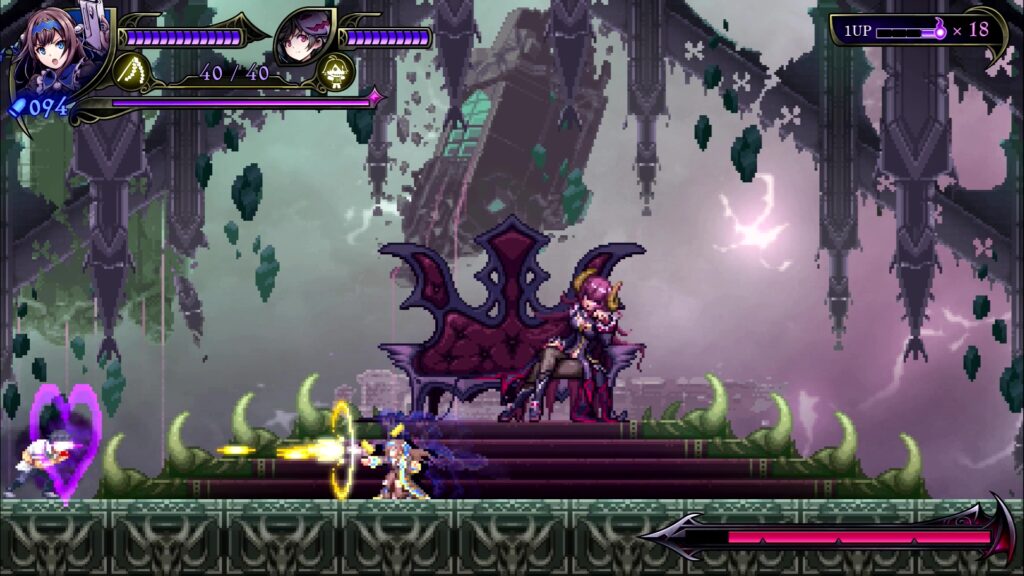
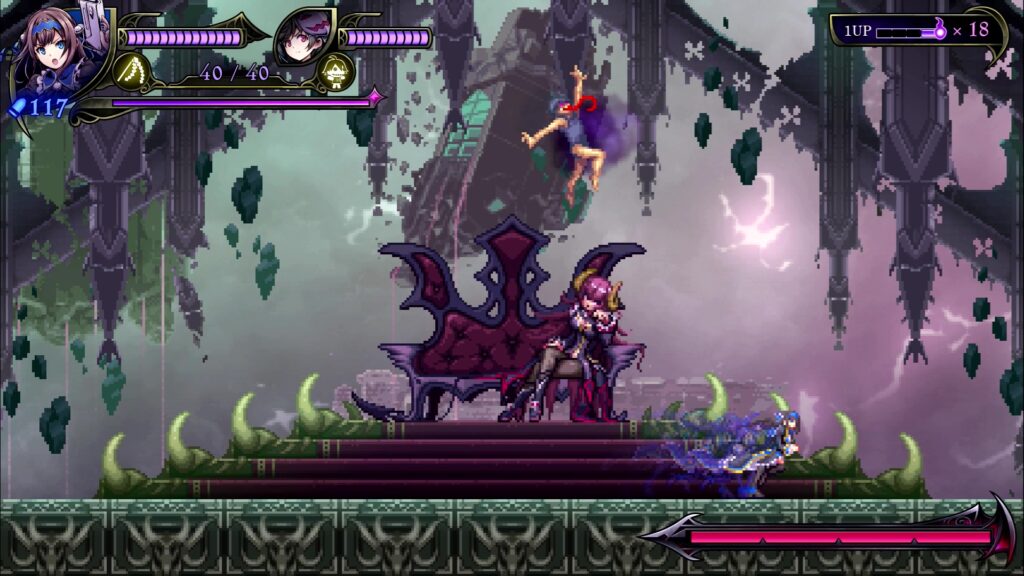
Kurona (Stage 7)
Kurona looks pretty daunting, but she’s a huge target and pretty easy to take out. Just watch out for the constant string of Mini-Demons she summons across the floor, and stick to the platforms at the sides for the most part to ensure a reasonably easy life.
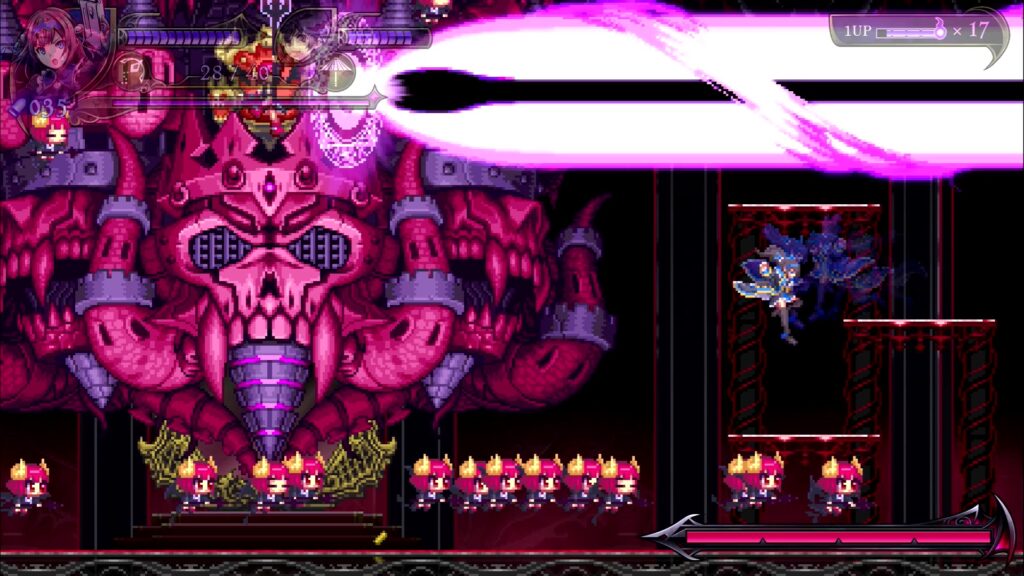
Kurona Beam: The only real attack Kurona uses while she’s in her “skull castle” form, every few seconds she will mumble “Kurona” and fire a beam directly at your location. On the “hard mode” variant second time around, this will be almost immediately followed by a second beam, so avoid both. Use the time between beams to destroy the several distinct pieces of the castle that surround her throne.

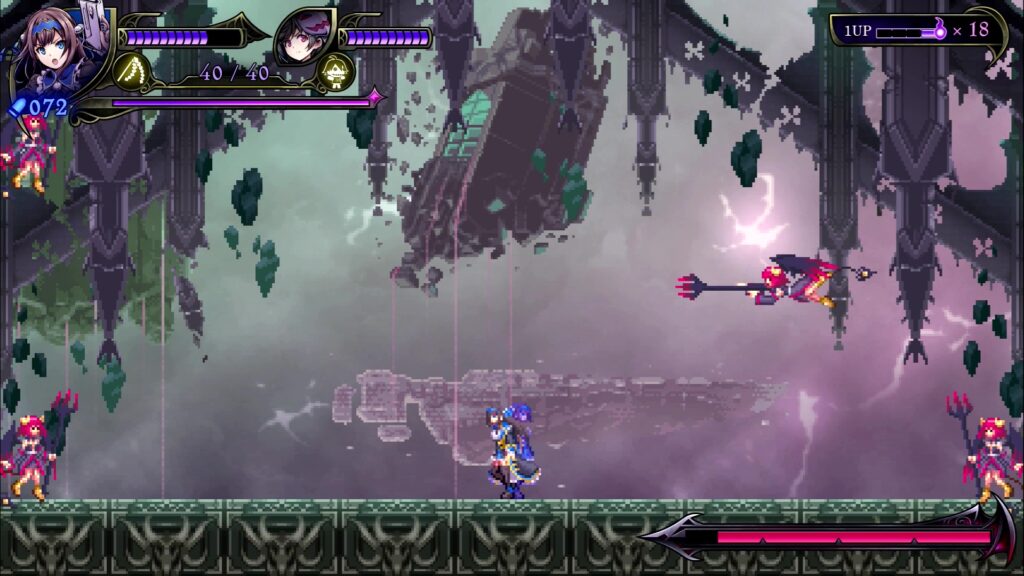
Kurona Shot: After you’ve destroyed her castle, you’ll be thrown into a void and the platforms will become invisible. Kurona will appear randomly and shoot out four bullets in cardinal directions, followed by four in diagonal directions that will pause before homing in on you. Hit her with Maya’s melee attack while this is going on. If you’ve powered it up, you can take her down in just one or two uses of this move.
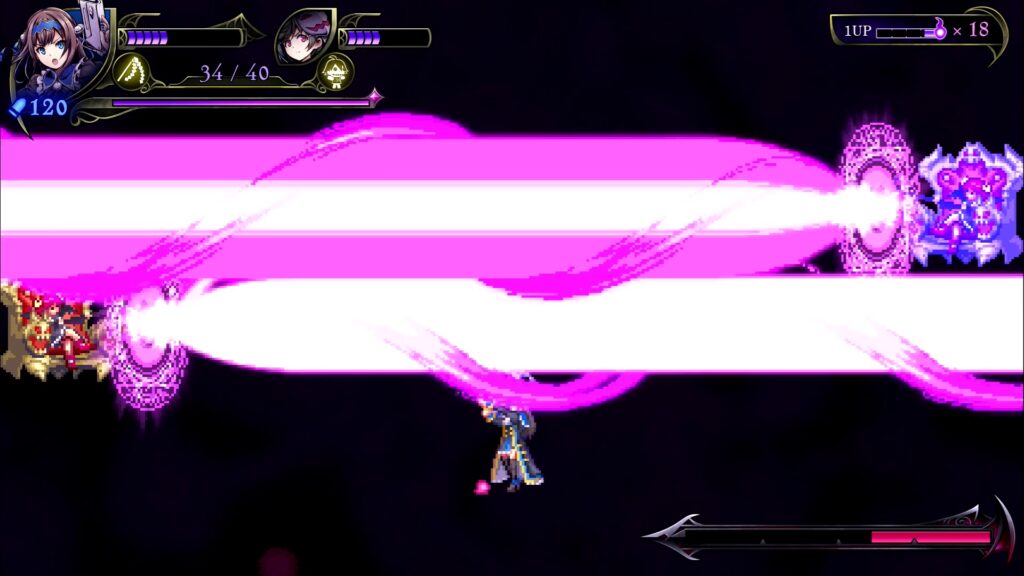
Kurona Double Beam: Kurona will appear in two different locations in the void at once, but only one of her will be real and vulnerable to damage — you can tell which by the colour. Both Kurona and her fake will fire a large beam horizontally across the arena after a moment.
Congratulations, you’ve beaten Kurona! Except you haven’t. If it’s the first time you encounter her, she’ll send you all the way back to the beginning and the second half of the game will begin. If it’s the second, you’d better prepare to go through the magic mirror via one of three means.
Choose “Believe in the bunny” (only available if you’ve received all of Risu’s gifts for defeating particular numbers of enemies) for a special CG; choose “Find another way” (only available if you’ve found all three hidden Parts items and given them to Chiru) to open up the True Ending; or choose “Force your way through” (always available) to enjoy Shinobu’s full tsuntsun fury and put you on the Normal Ending route.
Fake Houdai (Stage 8)
After the short Dimensional Rift stage, the final boss battle will begin. This comes in three distinct phases, and if you fail on any one of them you’ll have to start from the Houdai fight again. Houdai is pretty easy to defeat, so try and avoid taking any damage to give you some flexibility for the subsequent stages.
Slide Tackle: Houdai will leap and slide across the entire width of the arena up to four times. Simply jump over him to avoid this.
Charged Pheromone Shot: Houdai will follow a Slide Tackle by standing up at the edge of the arena and charging a Pheromone Shot with a heart in front of him. This is your best opportunity to attack. Crouching down and firing with Shinobu from a short distance away will deal damage to Houdai and destroy his projectiles.
Why Is He Wearing That?!: Houdai will throw off his uniform, revealing a school swimsuit, and dive into the platform with a splash. A moment later, he will splash twice following your location, leaping out after the second. Be somewhere else when that happens, and be ready for him to go straight into a Slide Tackle after he lands.
Adult Kurona (Stage 8)
After Houdai is defeated, Adult Kurona will take the stage. Her encounter is quite fast-paced, but heavily pattern-based and easily learnable.
DEATH-troy: Adult Kurona will start the fight and each cycle around her moveset by diving down to the platform (get some quick damage in here) then summoning four Young Kuronas to the corners of the arena. These will then launch themselves at you in the order top right, bottom right, top left, bottom left. Simply jump over them and don’t bother attacking them. Also don’t reload as Shinobu during this sequence as even with animation cancels it can be tricky to avoid the Kuronas.

Kurona Dive: Immediately after DEATH-troy is finished, Adult Kurona will dive-bomb the platform with her spear over your location. Simply run to one side to avoid it.
Spinning Staff: After landing from Kurona Dive, up to three platforms will turn blue and two will turn red. Avoid the red ones as they’ll fall into the abyss and stand on the central of the blue ones, which will raise into the air. This will put you high enough to jump over Adult Kurona’s staff, which she will fling at you after a moment.
Kurona Charge: Immediately after Spinning Staff is complete, Adult Kurona will charge across the arena. Duck to avoid this.
Kurona Beam: Several platforms will turn blue, but with no red ones this time. Avoid the blue platforms and duck to stay clear of Kurona’s beam attack.
At the end of the attack, Kurona will move into the centre of the screen and sweep the beam down diagonally towards herself. Simply move behind her to avoid this.
Kurona Lightning: Lightning will flash briefly, with two obvious safe spots where the bolts are further apart from one another. Move into one of these safe spots before the actual attack occurs, and take the opportunity to attack Kurona while she’s immobile. She will cast this three times before returning to the beginning of the sequence.
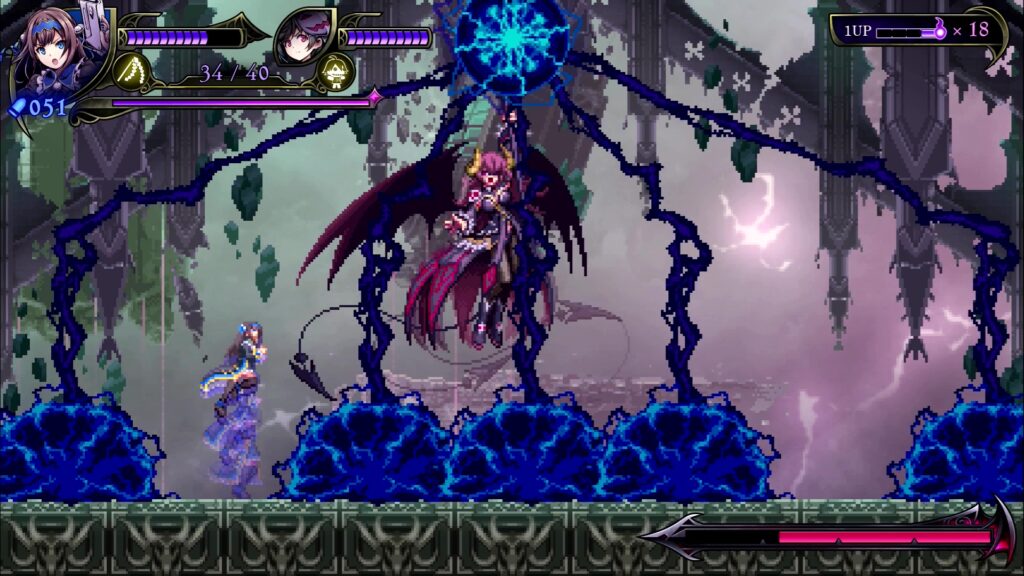
Giant Adult Kurona (Stage 8)
This is it! The final battle! And once again, this is a fight that looks daunting at first glance, but is heavily pattern-based and easily learnable once again. It’s also worth noting that the specifics of this fight vary according to whether you’re on the Normal or True ending path. For the Normal ending, choose “fight until the end!”, while for the True ending, choose “leave no-one behind!” having previously chosen “Find another way” in Stage 7.
Giant Adult Kurona’s weak point is her bust, and her crotch has a tendency to block attacks. Her left tit is generally the easiest to hit from underneath, but in the True ending variant of the fight, you’ll have numerous opportunities to raise yourself up and more easily slap her boobs around from a higher level, so take full advantage of the times Risu and Akira offer you extra platforms to stand on.
Note that Giant Adult Kurona has an absolute shitload of HP, so expect this fight to go on for a while and cycle around these moves multiple times. Also beware that the arena has gaps you can fall down at the side — be particularly careful about knockback on Veteran difficulty or higher.
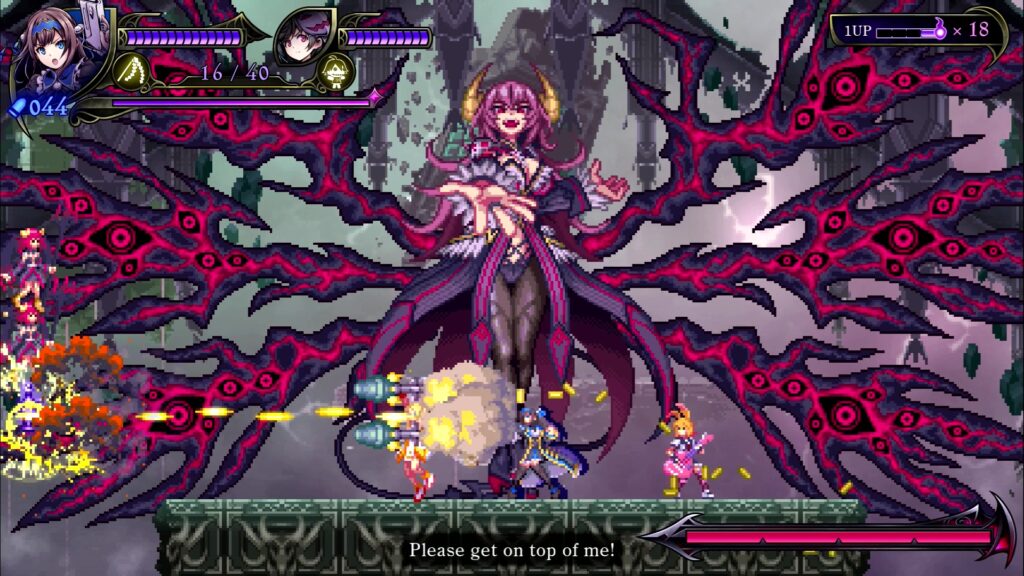
DEATH-troy Redux: Giant Adult Kurona will summon three Young Kuronas to one side of the arena. After a moment, they will charge across. Destroy the bottom one and the other two will harmlessly pass over you. If you’re on the True ending path, you can stand on Risu to more easily reach Giant Adult Kurona’s breasts, but watch out for the higher Young Kuronas. Aoi will blast them out of existence with her guitar shredding skills, but a little too late to be truly useful.
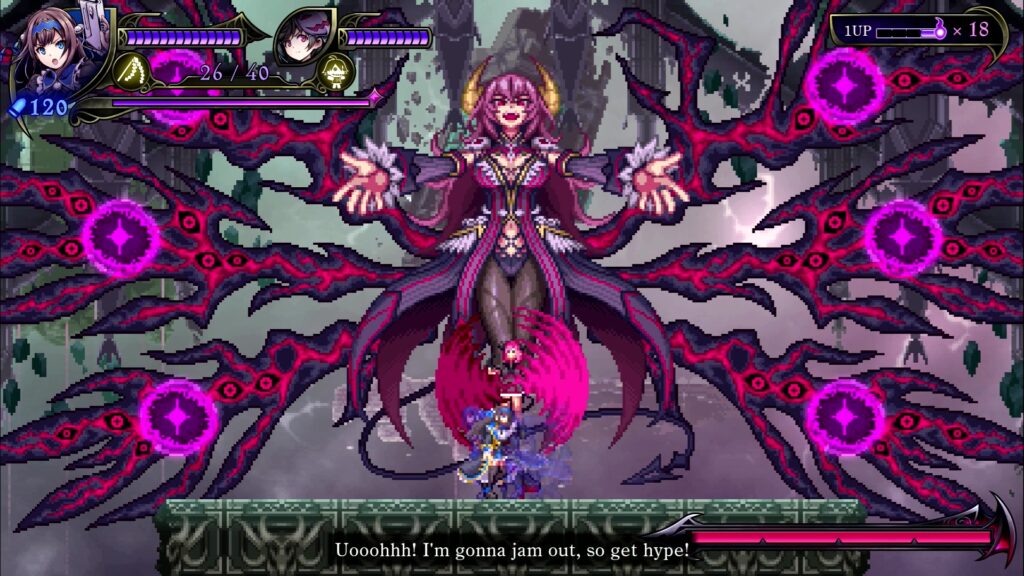
Purple Orbs: Giant Adult Kurona will summon six large purple orbs, three on either side of the arena. Destroy the bottom ones and jump over the others when they come for you. This will happen twice in succession. If you’re on the True ending path, Nanako will stand in the middle and create a spinning barrier that will protect you if you stand inside it, so take advantage of that and fire upwards as Shinobu to riddle Kurona’s boobies with a few more bullets.
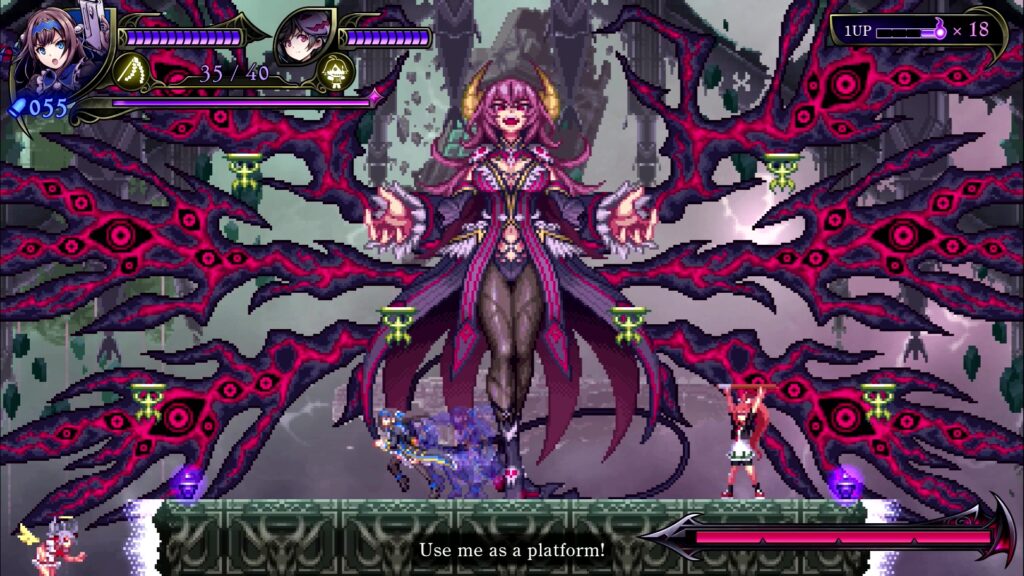
Spiky Platforms: Giant Adult Kurona will summon a series of tiny platforms and set the main arena floor ablaze. A moment later, the blue flames will turn into spikes, so be on one of the tiny platforms before that happens. After this, Kurona will slam a sword into the floor, sending energy waves out to either side and destroying the central tile of the arena floor. The tiny platforms will fall to the ground at the same time, so hop back onto the floor, taking care not to let the spikes underneath the platforms knock you off the arena.
On the True ending route, Chiru will blast the flames off the floor, making it safe until Kurona does her sword slam, and Akira will create another platform allowing you to more easily reach Kurona’s bustline, so quickly take advantage of this to deal some heavy damage.

Fire and Ice: Kurona will summon two magic circles at the side of the arena and fire projectiles out of both. Simply jump over the lower projectiles to easily avoid this, and ignore the raising blue platforms. If you’re on the True route, Kaname will show up and completely block the projectiles, providing you a good opportunity to deal some damage with subweapons or stand on the raising blue platforms for some direct hits.
Devil Slash: Kurona will summon a sword, pull her arm back and after a moment, slash horizontally across the middle of the arena. If you’re on the floor, this won’t affect you at all. If you were on one of the blue platforms on the True ending route, make sure you drop to the ground as she pulls her arm back.
DEATH Ball: Kurona will normally cycle around her moves after Devil Slash, but occasionally she will throw in this move just to mix things up a bit. She’ll summon a crimson ball by her head, which will drop down and then summon tentacles that spread out across the arena. You can avoid them with Maya’s high jump, but since this requires charging, timing is critical. If you have enough HP, it may just be best to tank this hit in the centre of the arena to avoid knockback, then heal with Shinobu’s Oonusa.
And that’s it — you’re done! Sit back and enjoy the ending you attained… and then think about tracking down all those hidden panties!
Join The Discussion
Rice Digital Discord
Rice Digital Twitter
Rice Digital Facebook
Or write us a letter for the Rice Digital Friday Letters Page by clicking here!
Disclosure: Some links in this article may be affiliate links, which means we may earn a small commission if you make a purchase after clicking on them. This is at no additional cost to you and helps support Rice Digital!


- Letter from the Editor: passing the torch - June 30, 2023
- Super Woden GP 2 is looking promising - June 30, 2023
- Inti Creates is making a 32 bit-style Love Live action platformer - June 26, 2023